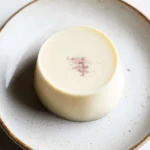
Vanilla Panna Cotta: A Beginner’s Guide to Creating This Classic Italian Dessert
Vanilla Panna Cotta is a simple yet elegant Italian dessert that’s both creamy and delicious. When I first made it, I was amazed at how such a quick and easy recipe could result in such a stunning treat. Perfect for beginners, this dessert requires minimal effort and ingredients but delivers big flavor. Whether you’re hosting a dinner or enjoying a quiet evening, Vanilla Panna Cotta is sure to impress!
- Prep Time: 10 minutes
- Cook Time: 5 minutes
- Total Time: 4 hours 10 minutes
- Yield: 6 servings 1x
- Category: Dessert
- Method: Stovetop, Refrigerated
- Cuisine: Italian
- Diet: Vegetarian
Ingredients
Scale
- 1 ½ cups plus 1 tablespoon heavy cream (375ml)
- 1 cup + 1 tablespoon whole milk (250ml)
- ½ cup caster sugar (95g) (you can also use granulated sugar)
- 4 teaspoons gelatin powder (12g sachet)
- 3 teaspoons vanilla paste or 1 vanilla bean (see note below)
Instructions
- Combine Milk, Cream, and Vanilla: In a medium saucepan, combine the heavy cream, whole milk, and vanilla paste or vanilla bean seeds. Turn the heat to medium and stir the mixture occasionally, making sure it heats evenly. Once it starts to steam and small bubbles form around the edges, bring it to a gentle boil. Be careful not to let the mixture boil over, as this could affect the texture and consistency.
- Dissolve the Sugar: When the mixture has come to a boil, remove it from the heat immediately. Stir in the sugar, making sure it dissolves completely. The sugar will sweeten the panna cotta, balancing the richness of the cream and milk while helping to create that perfect silky texture.
- Add the Gelatin: Sprinkle the gelatin powder into the hot milk-cream mixture while whisking gently. This is the key step to achieving a smooth panna cotta, as you’ll want to ensure the gelatin dissolves evenly. If you add the gelatin too quickly or without stirring, lumps can form. Whisk the mixture for about 30 seconds to make sure the gelatin is fully dissolved.
- Cool the Mixture: Pour the panna cotta mixture into individual ramekins or small bowls. You can also use silicone molds for an elegant presentation. Once filled, allow the mixture to cool at room temperature for about 30 minutes. While it cools, you might notice a skin forming on the surface of the panna cotta. This is a natural part of the process and can be easily removed with a spoon if you prefer a smoother top. However, this step is optional, and the skin won’t affect the final texture.
- Refrigerate: After the panna cotta has cooled for about 30 minutes, cover the ramekins with plastic wrap or a lid and refrigerate for at least 4-6 hours, or overnight if you prefer. The panna cotta will set as it chills, becoming firm with a delightful, wobbly texture. It’s important to give it ample time to fully set so that it holds its shape when served.
Notes
- Troubleshooting Gelatin: If the gelatin doesn’t dissolve properly or forms clumps, it’s often because the mixture wasn’t hot enough when you added the gelatin. Make sure the milk-cream mixture is just about to boil before adding the gelatin, and whisk constantly to avoid any lumps.
- Watch the Heat: Overheating the milk and cream mixture can cause it to separate or curdle. Keep an eye on the temperature to ensure it’s gently heating but not boiling too aggressively.
- No Mold? No Problem! If you don’t have traditional panna cotta moulds, use any small bowls or even drinking glasses. The beauty of this recipe is its flexibility—anything that can hold the mixture and allow it to set will work just fine.
- Test for Set: To check if the panna cotta is properly set, gently press the center of the surface with your finger. It should feel firm but still have a slight jiggle. If it’s too soft, let it chill for longer.