If you’re looking for a dessert that’s deceptively simple to make yet will leave a lasting impression on your guests, Vanilla Panna Cotta is the perfect choice. With its rich, creamy texture and delicate vanilla flavor, it’s no wonder this classic Italian dessert has become a beloved favorite worldwide. As someone who loves experimenting with easy yet elegant recipes, I can honestly say that Vanilla Panna Cotta has earned its spot as one of my go-to desserts. I vividly remember the first time I tried making it—nervous at first, I thought there was no way such a beautiful dessert could be so simple. To my surprise, not only was it easier than I expected, but it also turned out to be an absolute crowd-pleaser. Every bite of this velvety dessert feels like a special treat, and it’s incredibly versatile for any occasion.

Vanilla Panna Cotta: A Beginner’s Guide to Creating This Classic Italian Dessert
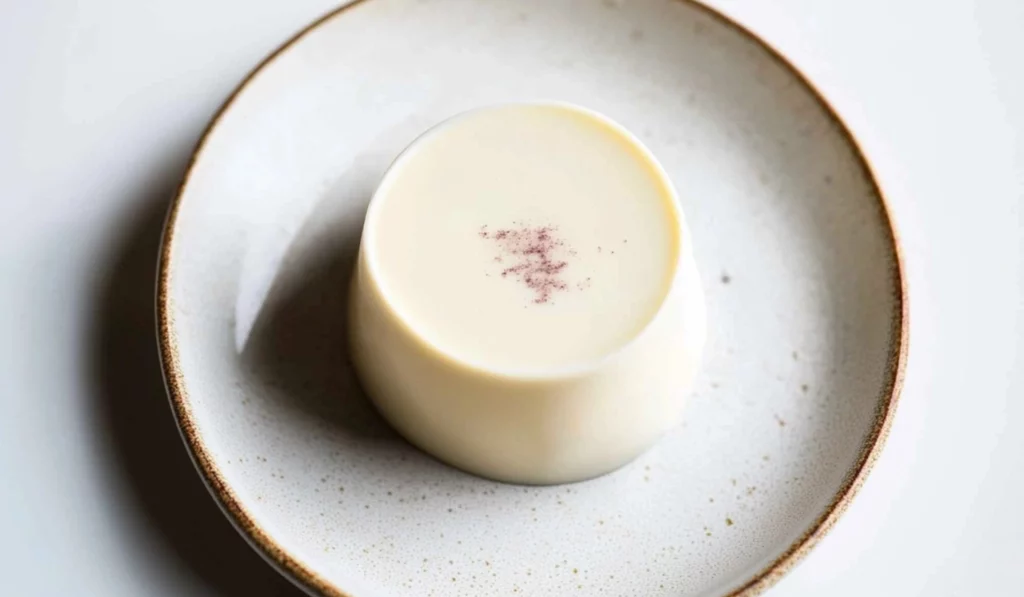
Vanilla Panna Cotta is a simple yet elegant Italian dessert that’s both creamy and delicious. When I first made it, I was amazed at how such a quick and easy recipe could result in such a stunning treat. Perfect for beginners, this dessert requires minimal effort and ingredients but delivers big flavor. Whether you’re hosting a dinner or enjoying a quiet evening, Vanilla Panna Cotta is sure to impress!
- Prep Time: 10 minutes
- Cook Time: 5 minutes
- Total Time: 4 hours 10 minutes
- Yield: 6 servings 1x
- Category: Dessert
- Method: Stovetop, Refrigerated
- Cuisine: Italian
- Diet: Vegetarian
Ingredients
- 1 ½ cups plus 1 tablespoon heavy cream (375ml)
- 1 cup + 1 tablespoon whole milk (250ml)
- ½ cup caster sugar (95g) (you can also use granulated sugar)
- 4 teaspoons gelatin powder (12g sachet)
- 3 teaspoons vanilla paste or 1 vanilla bean (see note below)
Instructions
- Combine Milk, Cream, and Vanilla: In a medium saucepan, combine the heavy cream, whole milk, and vanilla paste or vanilla bean seeds. Turn the heat to medium and stir the mixture occasionally, making sure it heats evenly. Once it starts to steam and small bubbles form around the edges, bring it to a gentle boil. Be careful not to let the mixture boil over, as this could affect the texture and consistency.
- Dissolve the Sugar: When the mixture has come to a boil, remove it from the heat immediately. Stir in the sugar, making sure it dissolves completely. The sugar will sweeten the panna cotta, balancing the richness of the cream and milk while helping to create that perfect silky texture.
- Add the Gelatin: Sprinkle the gelatin powder into the hot milk-cream mixture while whisking gently. This is the key step to achieving a smooth panna cotta, as you’ll want to ensure the gelatin dissolves evenly. If you add the gelatin too quickly or without stirring, lumps can form. Whisk the mixture for about 30 seconds to make sure the gelatin is fully dissolved.
- Cool the Mixture: Pour the panna cotta mixture into individual ramekins or small bowls. You can also use silicone molds for an elegant presentation. Once filled, allow the mixture to cool at room temperature for about 30 minutes. While it cools, you might notice a skin forming on the surface of the panna cotta. This is a natural part of the process and can be easily removed with a spoon if you prefer a smoother top. However, this step is optional, and the skin won’t affect the final texture.
- Refrigerate: After the panna cotta has cooled for about 30 minutes, cover the ramekins with plastic wrap or a lid and refrigerate for at least 4-6 hours, or overnight if you prefer. The panna cotta will set as it chills, becoming firm with a delightful, wobbly texture. It’s important to give it ample time to fully set so that it holds its shape when served.
Notes
- Troubleshooting Gelatin: If the gelatin doesn’t dissolve properly or forms clumps, it’s often because the mixture wasn’t hot enough when you added the gelatin. Make sure the milk-cream mixture is just about to boil before adding the gelatin, and whisk constantly to avoid any lumps.
- Watch the Heat: Overheating the milk and cream mixture can cause it to separate or curdle. Keep an eye on the temperature to ensure it’s gently heating but not boiling too aggressively.
- No Mold? No Problem! If you don’t have traditional panna cotta moulds, use any small bowls or even drinking glasses. The beauty of this recipe is its flexibility—anything that can hold the mixture and allow it to set will work just fine.
- Test for Set: To check if the panna cotta is properly set, gently press the center of the surface with your finger. It should feel firm but still have a slight jiggle. If it’s too soft, let it chill for longer.
The great thing about Vanilla Panna Cotta is that it looks and tastes far more complicated than it is. With just a handful of basic ingredients and minimal effort, you can create a dessert that’s as sophisticated as it is satisfying. Best of all, it’s ideal for beginners—whether you’re new to cooking or simply want to make something that doesn’t require a lot of time or special equipment. In this article, I’ll walk you through the entire process of making this creamy delight, offering tips, tricks, and variations to help you achieve perfect results every time.
Why Vanilla Panna Cotta is Perfect for Beginners
For anyone just starting out in the kitchen, Vanilla Panna Cotta is a dream come true. It’s a dessert that requires minimal active cooking time but delivers big results. All you need is patience while it sets in the fridge—there’s no baking, no complicated techniques, and no need for special tools. What could be better for someone who wants to make a statement without spending hours in the kitchen?
The recipe is also incredibly forgiving. If you’re nervous about getting the texture just right, fear not! Vanilla Panna Cotta is quite simple to perfect with a little practice. The gelatin sets the cream and milk mixture, giving it that signature smooth, wobbly texture, while the sugar adds just the right amount of sweetness. This dessert doesn’t require precision, just a few steps done carefully, and the result is always impressive.
Another advantage of this dessert is its versatility. While the base recipe is simple, you can easily customize it by adding different flavors, toppings, or even mixing it with other desserts like fruit compotes, chocolate sauces, or caramel drizzle. It’s an excellent choice for both intimate family meals and grand dinner parties because it looks beautiful and can be made in advance.
Ingredients and Preparation
To make Vanilla Panna Cotta, you’ll need the following ingredients:
Ingredients
- 1 ½ cups plus 1 tablespoon heavy cream (375ml)
- 1 cup + 1 tablespoon whole milk (250ml)
- ½ cup caster sugar (95g) (you can also use granulated sugar)
- 4 teaspoons gelatin powder (12g sachet)
- 3 teaspoons vanilla paste or 1 vanilla bean (see note below)
These ingredients are simple, but they come together to create a wonderfully creamy and flavorful dessert.
Ingredient Alternatives
- Gelatin: If you’re looking for a vegetarian or vegan alternative, you can replace gelatin with agar-agar, a plant-based ingredient derived from seaweed. While gelatin creates a smooth, creamy set, agar-agar provides a slightly firmer texture. You’ll need to adjust the quantity, so refer to the package instructions for the correct ratio when swapping gelatin for agar-agar. Agar-agar also sets at room temperature, so it’s important to allow it to cool at the right pace.
- Milk and Cream: Dairy-free and lactose-intolerant cooks can swap the heavy cream and whole milk for non-dairy options. Almond milk, coconut milk, or cashew cream are great substitutes. Keep in mind that different non-dairy milks can affect the flavor and texture of the panna cotta. Coconut milk will infuse the panna cotta with a rich, tropical flavor, while almond milk offers a lighter taste.
- Vanilla Paste: Vanilla paste is often preferred because it offers a more intense flavor and the attractive specks of vanilla seeds. However, if you don’t have it, don’t worry! You can use pure vanilla extract or scrape out the seeds from one vanilla bean pod. Both will work beautifully, with the vanilla bean providing the most authentic, aromatic flavor.
Step-by-Step Instructions
Now that you have your ingredients, it’s time to make the Vanilla Panna Cotta! The recipe is divided into clear, manageable steps to make sure even beginner cooks can achieve fantastic results.
- Combine Milk, Cream, and Vanilla: In a medium saucepan, combine the heavy cream, whole milk, and vanilla paste or vanilla bean seeds. Turn the heat to medium and stir the mixture occasionally, making sure it heats evenly. Once it starts to steam and small bubbles form around the edges, bring it to a gentle boil. Be careful not to let the mixture boil over, as this could affect the texture and consistency.
- Dissolve the Sugar: When the mixture has come to a boil, remove it from the heat immediately. Stir in the sugar, making sure it dissolves completely. The sugar will sweeten the panna cotta, balancing the richness of the cream and milk while helping to create that perfect silky texture.
- Add the Gelatin: Sprinkle the gelatin powder into the hot milk-cream mixture while whisking gently. This is the key step to achieving a smooth panna cotta, as you’ll want to ensure the gelatin dissolves evenly. If you add the gelatin too quickly or without stirring, lumps can form. Whisk the mixture for about 30 seconds to make sure the gelatin is fully dissolved.
- Cool the Mixture: Pour the panna cotta mixture into individual ramekins or small bowls. You can also use silicone molds for an elegant presentation. Once filled, allow the mixture to cool at room temperature for about 30 minutes. While it cools, you might notice a skin forming on the surface of the panna cotta. This is a natural part of the process and can be easily removed with a spoon if you prefer a smoother top. However, this step is optional, and the skin won’t affect the final texture.
- Refrigerate: After the panna cotta has cooled for about 30 minutes, cover the ramekins with plastic wrap or a lid and refrigerate for at least 4-6 hours, or overnight if you prefer. The panna cotta will set as it chills, becoming firm with a delightful, wobbly texture. It’s important to give it ample time to fully set so that it holds its shape when served.
Beginner Tips and Notes
- Troubleshooting Gelatin: If the gelatin doesn’t dissolve properly or forms clumps, it’s often because the mixture wasn’t hot enough when you added the gelatin. Make sure the milk-cream mixture is just about to boil before adding the gelatin, and whisk constantly to avoid any lumps.
- Watch the Heat: Overheating the milk and cream mixture can cause it to separate or curdle. Keep an eye on the temperature to ensure it’s gently heating but not boiling too aggressively.
- No Mold? No Problem! If you don’t have traditional panna cotta moulds, use any small bowls or even drinking glasses. The beauty of this recipe is its flexibility—anything that can hold the mixture and allow it to set will work just fine.
- Test for Set: To check if the panna cotta is properly set, gently press the center of the surface with your finger. It should feel firm but still have a slight jiggle. If it’s too soft, let it chill for longer.
How to Remove Panna Cotta from Moulds
Once your panna cotta has set and you’re ready to serve, the next step is to carefully remove it from the moulds. Here’s a simple method to do that:
- Prepare Hot Water: Fill a shallow bowl with hot water—just hot enough to touch but not boiling.
- Dip the Moulds: Gently dip the bottom of each panna cotta mould into the hot water for a few seconds. The warm water helps loosen the panna cotta from the sides of the mould without melting it.
- Invert onto a Plate: Once you’ve dipped the mould in hot water, place a serving plate over the top and carefully flip the mould. Gently tap the sides to help release the panna cotta.
- Serve and Enjoy: Once you’ve removed the mould, you can serve the panna cotta as-is or add toppings like fresh fruit, caramel sauce, or chocolate shavings.
Serving Suggestions
While Vanilla Panna Cotta is rich and flavorful on its own, you can take it to the next level by pairing it with complementary toppings:
- Fresh Berries: Add a handful of fresh berries, such as raspberries, strawberries, or blueberries. The tartness of the fruit provides a refreshing contrast to the creamy, sweet panna cotta.
- Citrus Compote: For a slightly tangy twist, try pairing your panna cotta with a citrus compote made from oranges or grapefruits. This will balance out the richness of the dessert and give it a bright, fresh flavor.
- Chocolate Sauce: If you’re a chocolate lover, a drizzle of dark chocolate sauce or chocolate ganache is a decadent addition.
- Nuts and Honey: For added texture, top the panna cotta with chopped pistachios, toasted almonds, or a drizzle of honey.
Leftover Storage Tips
Leftover panna cotta can be stored in the fridge for up to 2-3 days. Simply cover each ramekin with plastic wrap to keep the dessert fresh and protected. If you’ve topped the panna cotta with fresh fruit, it’s best to add the toppings just before serving to prevent them from getting soggy.

Conclusion
Vanilla Panna Cotta is the perfect dessert for beginners, offering an elegant, flavorful treat that requires minimal ingredients and effort. The process is straightforward and allows for customization, making it a versatile choice for any occasion. Whether you’re new to cooking or just looking for a dessert that will impress without stress, this recipe is sure to become a favorite. I encourage you to give it a try—don’t be intimidated by its reputation as a fancy dish. With a little patience, you can create a dessert that looks and tastes incredible. I can’t wait to hear how your Vanilla Panna Cotta turns out, so be sure to share your experiences in the comments below! Enjoy making this delightful dessert and impress your family and friends with your newfound panna cotta skills!


