
When it comes to desserts that are both simple and stunning, The Easiest Lemon Cheesecake is a true standout. With its creamy filling, buttery graham cracker crust, and zesty lemon flavor, this no-bake cheesecake is perfect for beginners looking to impress without the fuss. Whether you’re preparing for a holiday feast or a summer gathering, this dessert will surely be the star of the table.

The Easiest Lemon Cheesecake: A Refreshing Delight for Any Occasion
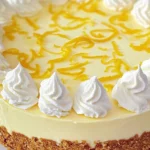
If you’ve ever wanted to make a dessert that wows without hours of effort, The Easiest Lemon Cheesecake is exactly what you need. This no-bake cheesecake combines a buttery graham cracker crust with a creamy, lemon-infused filling, making it a refreshing treat that’s perfect for any time of year. Whether you’re hosting a summer gathering, celebrating a holiday, or simply craving something sweet, this cheesecake delivers on flavor and ease.
- Prep Time: 30 minutes
- Cook Time: 0 minutes
- Total Time: 6 hours 30 minutes
- Yield: 12 slices 1x
- Category: Dessert
- Method: No-bake
- Cuisine: American
- Diet: Vegetarian
Ingredients
For the Graham Cracker Crust:
- 2 1/4 cups graham cracker crumbs
- 1/2 cup unsalted butter (melted)
For the Cheesecake Filling:
- 1 package (3 oz) lemon Jell-O
- 1 cup hot water
- 16 oz cream cheese (softened)
- 1/2 cup granulated sugar
- 1/2 tablespoon lemon zest
- 1/2 teaspoon vanilla extract
- 1 1/4 cups heavy whipping cream
To Decorate (Optional):
- Whipped cream
- Lemon zest
- Lemon slices
Instructions
1. Make the Graham Cracker Crust
Start by preparing your springform pan. Line both the sides and bottom of the pan with parchment paper to ensure easy removal later. This step is important for clean presentation, especially when serving the cheesecake on a platter. Next, combine the graham cracker crumbs and melted butter in a bowl. Stir the mixture until all crumbs are moistened. Using the back of a spoon or a measuring cup, press the crumb mixture firmly into the bottom and sides of the prepared pan to form a compact crust. This will provide a crunchy base that pairs perfectly with the creamy filling.
It’s crucial to press the crumbs down evenly to avoid any air pockets, which can result in an uneven texture when cutting the cheesecake. If you don’t have a springform pan, a regular round cake pan or pie dish works well—just be mindful that you may need to adjust the chilling time or use a different method to serve the cheesecake.
2. Prepare the Lemon Jell-O
In a heatproof bowl, combine the lemon Jell-O powder with hot water. Stir until the Jell-O dissolves completely. Allow the mixture to cool at room temperature for 20-30 minutes. You want it to be cool enough that it won’t melt the cream cheese when combined. A good test is to touch the side of the bowl—if it feels cool but still liquid, it’s ready to use.
3. Make the Cheesecake Filling
Using an electric mixer, beat the softened cream cheese and sugar in a large bowl until smooth and creamy. This process helps to break down the cream cheese, ensuring there are no lumps in your filling. Once the cream cheese is smooth, add the lemon zest and vanilla extract. Continue mixing until fully incorporated, ensuring a smooth consistency.
Next, slowly add the cooled lemon Jell-O in small batches (about 1/8 of a cup at a time), mixing on low speed between each addition. This method helps prevent the mixture from becoming too runny and ensures a smooth texture. Continue beating until everything is fully blended and smooth. If necessary, scrape down the sides of the bowl to ensure everything is mixed evenly.
4. Whip the Heavy Cream
In a separate bowl, beat the heavy whipping cream with an electric mixer until soft peaks form. This step will give the cheesecake its light, airy texture. You’ll know the cream is ready when it holds its shape but still looks smooth—too stiff, and it could affect the texture of the filling. Once the whipped cream is ready, gently fold it into the cream cheese and Jell-O mixture using a spatula. Be careful not to overmix, as you want to maintain the fluffiness of the whipped cream.
5. Assemble the Cheesecake
Spread the cheesecake filling evenly over the prepared graham cracker crust. Use a spatula to smooth the top, ensuring that the filling is evenly distributed. This helps create a uniform layer that looks professional when sliced. Once the cheesecake is assembled, cover it tightly with plastic wrap or foil and place it in the fridge to chill for at least 6 hours, preferably overnight. This will allow the cheesecake to set and hold its shape when sliced. The chilling process is crucial, as it helps the flavors meld together and creates a firm yet creamy texture.
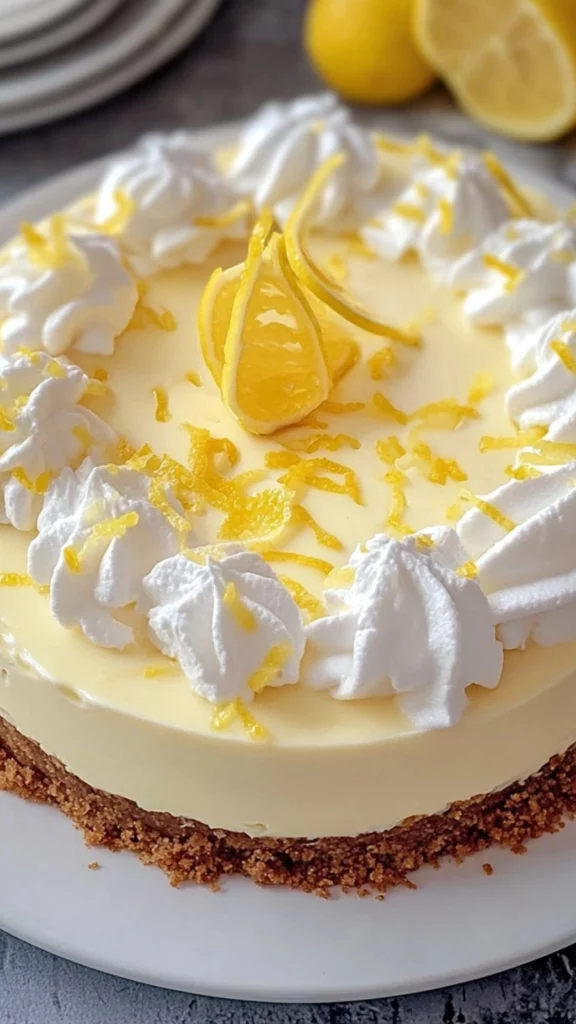
6. Decorate and Serve
Before serving, top your cheesecake with optional whipped cream, additional lemon zest, and lemon slices for a fresh, citrusy finish. These decorative touches not only enhance the appearance but also add an extra burst of lemon flavor. If you like, you can also garnish with fresh mint leaves or edible flowers for an elegant touch.
Notes
- Prevent Overcooking the Whipped Cream: When whipping the heavy cream, be cautious not to overwhip it. If the cream is overbeaten, it will turn into butter instead of soft peaks. Stop when the cream holds its shape but is still smooth.
- Ensuring Smooth Filling: Make sure the cream cheese is softened to room temperature before you start. Cold cream cheese will be difficult to mix, and it can result in a lumpy filling. If the filling appears too runny, chill it in the fridge for a little longer before serving.
- Chill Time: The cheesecake needs time to set, so be patient! The longer you let it chill, the firmer and more delicious it will become. If you’re short on time, aim for a minimum of 6 hours, but overnight is ideal.
- Serving Suggestions: For a fun variation, serve individual slices in small mason jars for a unique presentation. This works especially well if you’re hosting a party or a picnic.
Personally, I’ve always found the charm in no-bake desserts. They’re quick, easy, and full of flavor, and this lemon cheesecake is no exception. As a busy home cook, I love having recipes like this in my back pocket—especially ones that combine the classic appeal of cheesecake with the refreshing punch of lemon. It’s a dessert that’s simple enough to whip up, yet impressive enough to serve to guests. If you’re new to baking or just looking for a sweet treat that won’t take all day, this is the recipe for you.
Why This Recipe Is Perfect for Beginners
What makes The Easiest Lemon Cheesecake ideal for beginner cooks is its simplicity and quick preparation. With just a handful of ingredients, including graham cracker crumbs, cream cheese, lemon Jell-O, and heavy whipping cream, you can create a dessert that looks and tastes as though you spent hours in the kitchen. Plus, there’s no baking involved! Simply mix the ingredients, chill the cheesecake, and you’re done. The recipe takes less than 30 minutes of active prep time, and the rest is just letting it chill in the fridge. It’s an ideal dessert to make ahead of time, perfect for busy holidays or casual summer days.
The fact that this cheesecake requires no baking makes it especially convenient during hot weather, when the last thing you want to do is turn on the oven. On top of that, the lemon flavor provides a refreshing balance of sweetness and tartness, making it a crowd-pleaser for all ages. With its light and fluffy texture, this cheesecake is perfect for those warm days when you want a dessert that’s sweet without being too heavy.
The Versatility of This Recipe
One of the best aspects of this cheesecake is how versatile it is. While the classic lemon flavor is undoubtedly delicious, you can easily customize it to your liking. If you enjoy different fruit flavors, you can swap out the lemon Jell-O for raspberry, strawberry, or lime. The cream cheese filling is a blank canvas for your creativity! You can also adjust the sweetness level by adding more or less sugar, depending on your preference.
The no-bake nature of the cheesecake also gives you room to experiment with different crusts. While the graham cracker crust is traditional and easy, you can opt for a chocolate cookie crust or even a crushed almond crust for a gluten-free option. The possibilities are endless, allowing you to tailor the dessert to your specific tastes or dietary needs.
Ingredients and Preparation
For the Graham Cracker Crust:
- 2 1/4 cups graham cracker crumbs
- 1/2 cup unsalted butter (melted)
For the Cheesecake Filling:
- 1 package (3 oz) lemon Jell-O
- 1 cup hot water
- 16 oz cream cheese (softened)
- 1/2 cup granulated sugar
- 1/2 tablespoon lemon zest
- 1/2 teaspoon vanilla extract
- 1 1/4 cups heavy whipping cream
To Decorate (Optional):
- Whipped cream
- Lemon zest
- Lemon slices
Ingredient Substitutions
This recipe is incredibly flexible, and you can easily swap ingredients to suit your tastes or dietary needs:
- Graham Cracker Crust: If you prefer a gluten-free option, simply use gluten-free graham crackers or any other gluten-free cookie crumbs. Alternatively, you could opt for a cookie crust made from digestive biscuits or even shortbread cookies for a slightly different flavor. For a lower-carb option, try almond flour or coconut flour as a base.
- Lemon Jell-O: For a more natural approach, you can substitute lemon gelatin with homemade lemon curd (although this will require extra steps). If you can’t find lemon Jell-O, you could use any other flavored gelatin you like, though lemon is the most traditional and gives the cheesecake its signature taste.
- Cream Cheese: For a lighter version, you can use reduced-fat cream cheese or even mascarpone for a slightly different flavor. If you’re avoiding dairy, opt for plant-based cream cheese alternatives, such as cashew or almond-based cream cheese.
- Heavy Whipping Cream: If you prefer a dairy-free alternative, coconut cream or a plant-based whipping cream can work as a substitute. Just ensure the coconut cream is chilled before whipping, and the plant-based cream has a similar fat content to regular whipping cream to maintain the proper texture.
- Lemon Zest: If you’re not fond of zest, you can skip it, but it really helps bring out that fresh lemon flavor. Alternatively, you can substitute lime zest for a unique twist on the cheesecake.
The beauty of this recipe is that you can get creative while maintaining the same delicious outcome!
Step-by-Step Instructions
1. Make the Graham Cracker Crust
Start by preparing your springform pan. Line both the sides and bottom of the pan with parchment paper to ensure easy removal later. This step is important for clean presentation, especially when serving the cheesecake on a platter. Next, combine the graham cracker crumbs and melted butter in a bowl. Stir the mixture until all crumbs are moistened. Using the back of a spoon or a measuring cup, press the crumb mixture firmly into the bottom and sides of the prepared pan to form a compact crust. This will provide a crunchy base that pairs perfectly with the creamy filling.
It’s crucial to press the crumbs down evenly to avoid any air pockets, which can result in an uneven texture when cutting the cheesecake. If you don’t have a springform pan, a regular round cake pan or pie dish works well—just be mindful that you may need to adjust the chilling time or use a different method to serve the cheesecake.
2. Prepare the Lemon Jell-O
In a heatproof bowl, combine the lemon Jell-O powder with hot water. Stir until the Jell-O dissolves completely. Allow the mixture to cool at room temperature for 20-30 minutes. You want it to be cool enough that it won’t melt the cream cheese when combined. A good test is to touch the side of the bowl—if it feels cool but still liquid, it’s ready to use.
3. Make the Cheesecake Filling
Using an electric mixer, beat the softened cream cheese and sugar in a large bowl until smooth and creamy. This process helps to break down the cream cheese, ensuring there are no lumps in your filling. Once the cream cheese is smooth, add the lemon zest and vanilla extract. Continue mixing until fully incorporated, ensuring a smooth consistency.
Next, slowly add the cooled lemon Jell-O in small batches (about 1/8 of a cup at a time), mixing on low speed between each addition. This method helps prevent the mixture from becoming too runny and ensures a smooth texture. Continue beating until everything is fully blended and smooth. If necessary, scrape down the sides of the bowl to ensure everything is mixed evenly.
4. Whip the Heavy Cream
In a separate bowl, beat the heavy whipping cream with an electric mixer until soft peaks form. This step will give the cheesecake its light, airy texture. You’ll know the cream is ready when it holds its shape but still looks smooth—too stiff, and it could affect the texture of the filling. Once the whipped cream is ready, gently fold it into the cream cheese and Jell-O mixture using a spatula. Be careful not to overmix, as you want to maintain the fluffiness of the whipped cream.
5. Assemble the Cheesecake
Spread the cheesecake filling evenly over the prepared graham cracker crust. Use a spatula to smooth the top, ensuring that the filling is evenly distributed. This helps create a uniform layer that looks professional when sliced. Once the cheesecake is assembled, cover it tightly with plastic wrap or foil and place it in the fridge to chill for at least 6 hours, preferably overnight. This will allow the cheesecake to set and hold its shape when sliced. The chilling process is crucial, as it helps the flavors meld together and creates a firm yet creamy texture.
6. Decorate and Serve
Before serving, top your cheesecake with optional whipped cream, additional lemon zest, and lemon slices for a fresh, citrusy finish. These decorative touches not only enhance the appearance but also add an extra burst of lemon flavor. If you like, you can also garnish with fresh mint leaves or edible flowers for an elegant touch.
Beginner Tips and Notes
- Prevent Overcooking the Whipped Cream: When whipping the heavy cream, be cautious not to overwhip it. If the cream is overbeaten, it will turn into butter instead of soft peaks. Stop when the cream holds its shape but is still smooth.
- Ensuring Smooth Filling: Make sure the cream cheese is softened to room temperature before you start. Cold cream cheese will be difficult to mix, and it can result in a lumpy filling. If the filling appears too runny, chill it in the fridge for a little longer before serving.
- Chill Time: The cheesecake needs time to set, so be patient! The longer you let it chill, the firmer and more delicious it will become. If you’re short on time, aim for a minimum of 6 hours, but overnight is ideal.
- Serving Suggestions: For a fun variation, serve individual slices in small mason jars for a unique presentation. This works especially well if you’re hosting a party or a picnic.
Serving Suggestions
The Easiest Lemon Cheesecake is perfect on its own, but you can pair it with a variety of sides to elevate the experience:
- Fruit Compote: A mixed berry compote or fresh raspberries make a beautiful, tangy accompaniment to the cheesecake. The burst of fresh fruit adds both color and flavor.
- Graham Cracker Crumbs: If you want to add extra texture, sprinkle some crushed graham crackers on top of the cheesecake or on the side. It adds an extra crunch that complements the creamy filling.
- Coffee or Tea: A light, refreshing beverage like iced tea or coffee pairs perfectly with the citrusy cheesecake, balancing the richness of the dessert.
For leftovers, store the cheesecake in the fridge for up to 3 days. Be sure to cover it with plastic wrap or foil to keep it fresh. It’s also important to note that while the cheesecake tastes best within a couple of days, it can also be frozen for up to a month. Just make sure to wrap it tightly and thaw it in the fridge before serving.
Conclusion
This Easiest Lemon Cheesecake is the perfect recipe for beginner cooks who want to create something delicious with minimal effort. The refreshing lemon flavor, combined with the creamy texture and no-bake simplicity, makes it a go-to dessert for any occasion. It’s a dessert that can be made ahead of time, allowing you to enjoy your event stress-free. I encourage you to give it a try and share your experience in the comments below. Whether you’re a seasoned cook or a beginner, this cheesecake will soon become a favorite in your recipe rotation.
Don’t forget to share your version with us, and feel free to experiment with different toppings and variations. Happy baking!


