There’s something undeniably magical about a dessert that offers the perfect balance of textures and flavors—rich, creamy, and sweet with just the right amount of tartness. If you’re someone who enjoys indulging in decadent sweets but isn’t necessarily a seasoned baker, Strawberry Cheesecake Bars are your new best friend. This dessert combines a buttery, slightly sweet graham cracker crust with a smooth and creamy cheesecake filling, topped with fresh strawberries and a sweet, crumbly topping. It’s a bite-sized treat that packs in all the indulgence of a full cheesecake without the need for a springform pan or intricate techniques.

Strawberry Cheesecake Bars: The Ultimate Beginner-Friendly Dessert

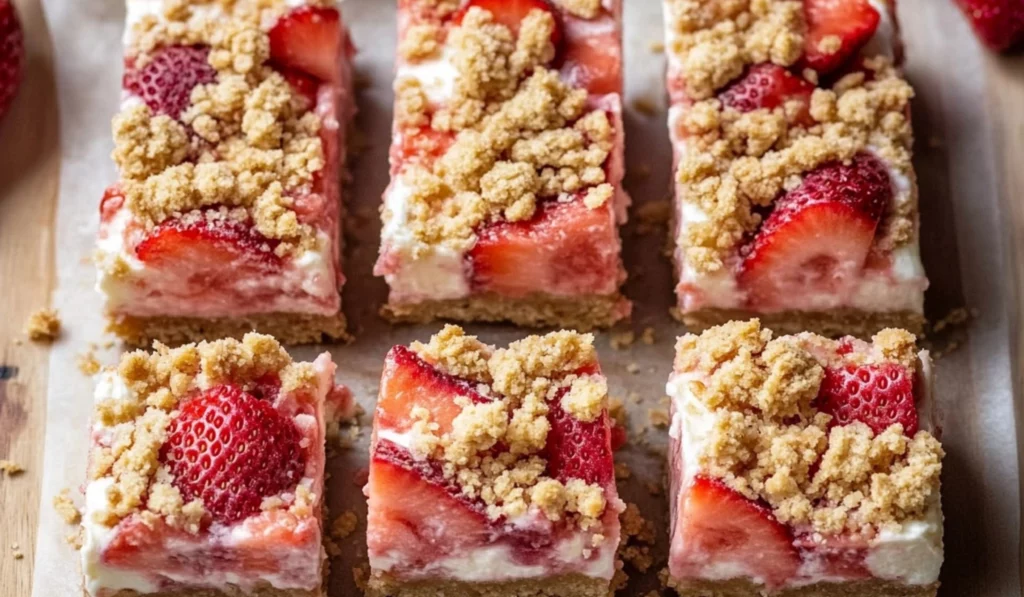
If you’re craving a dessert that’s both creamy and refreshing, Strawberry Cheesecake Bars are the perfect choice. With a buttery graham cracker crust, smooth cheesecake filling, fresh strawberries, and a sweet crumble topping, these bars deliver the best of both worlds. Best of all, they’re easy to make, making them ideal for beginner bakers looking to impress without spending hours in the kitchen. Whether for a special occasion or a simple treat, these bars are sure to delight!
- Prep Time: 15 minutes
- Cook Time: 35 minutes
- Total Time: 2 hours 50 minutes (includes chilling time)
- Yield: 12 servings 1x
- Category: Dessert
- Method: Baking
- Cuisine: American
- Diet: Vegetarian
Ingredients
For the Crust:
- 1 ½ cups (126 g) graham cracker crumbs (about 10–12 crushed graham cracker sheets)
- 6 tablespoons unsalted butter, melted
- ¼ cup (50 g) granulated sugar
For the Filling:
- 2 packages (8 ounces each) cream cheese, room temperature
- 2 large eggs, room temperature
- ⅓ cup (67 g) granulated sugar
- 1 teaspoon vanilla extract
- ¼ teaspoon kosher salt
- 2 cups (332 g) freshly diced strawberries
For the Crumble Topping:
- ¾ cup (94 g) all-purpose flour
- ¼ cup (50 g) light brown sugar, packed
- ¼ teaspoon kosher salt
- 5 tablespoons unsalted butter, melted
Instructions
- Preheat the oven to 350°F (175°C). Line a 9×9-inch baking dish with parchment paper, making sure to extend it up the sides of the dish for easy removal later. This will ensure your bars don’t stick and makes cleaning up afterward much easier. The parchment paper serves as your best friend in this recipe!
- Make the crust: In a medium bowl, combine the graham cracker crumbs, melted butter, and granulated sugar. Stir the mixture together until it resembles wet sand and the crumbs are fully coated with butter. This is the key to getting a crispy yet chewy crust. Press the mixture firmly into the bottom of the prepared baking dish, ensuring the layer is even and compact. A flat-bottomed cup works great to press it down evenly. The more firmly you press, the less likely the crust will fall apart when you cut it into bars.
- Prepare the cheesecake filling: In a large mixing bowl, use a hand mixer to beat together the cream cheese, eggs, sugar, vanilla extract, and kosher salt on medium speed. Beat until smooth, creamy, and completely lump-free. The consistency should be thick but spreadable—like frosting. If your cream cheese isn’t soft enough, you may get some lumps, so make sure it’s at room temperature before mixing.
- Assemble the filling: Once the filling is ready, spread it evenly over the graham cracker crust, making sure to cover the entire surface. You can use a spatula or spoon to gently smooth the filling into an even layer. The cheesecake filling should be thick enough that it doesn’t run off the crust.
- Add the strawberries: Now it’s time for the fruity layer! Sprinkle the freshly diced strawberries over the cheesecake filling. Don’t be afraid to load them up—the more strawberries, the better! These little red gems will add a fresh, sweet-tart bite that balances the richness of the cheesecake.
- Make the crumble topping: In a medium bowl, whisk together the flour, brown sugar, and kosher salt. Stir in the melted butter until the mixture forms a crumbly dough. You’ll want to make sure the butter is evenly mixed in so that the topping forms little crumbles when you sprinkle it over the bars.
- Top with crumble: Sprinkle the crumble mixture evenly over the strawberries, covering them as much as possible. Don’t worry about achieving perfection; the topping will melt and spread as it bakes. It’s perfectly fine if some strawberries peek through!
- Bake: Place the baking dish in the preheated oven and bake for 35-40 minutes. The filling should be set, and the crumble topping should turn golden brown. Keep an eye on the bars toward the end of the baking time. If the topping starts to brown too quickly, you can tent the dish with foil to prevent burning.
- Cool and chill: Once baked, remove the dish from the oven and let it cool on a wire rack for about 1 hour. After that, transfer it to the refrigerator and chill for at least another hour to allow the bars to firm up. Chilling is important as it helps the bars set properly, making them easier to slice.
- Serve: After they’ve chilled, lift the bars out of the pan using the parchment paper. Slice them into squares (or rectangles if you prefer). You’ll see the beautiful layers: a golden, buttery crust, creamy cheesecake filling, juicy strawberries, and a crumble topping that’s just the right amount of sweet and crunchy.
Notes
- Room temperature ingredients: To ensure a smooth, lump-free filling, make sure your cream cheese and eggs are at room temperature before you start mixing. This helps them blend together seamlessly and prevents a lumpy texture.
- Crust pressing: The key to a sturdy crust is pressing it firmly into the pan. Use the back of a spoon or your fingers to ensure it sticks together and doesn’t crumble when you slice the bars.
- Chilling time: Don’t skip the chilling step. If you cut the bars before they’ve chilled for at least 2 hours, they will be too soft and might fall apart.
- Flavor variations: Try experimenting with different fruits depending on the season! Blueberries, raspberries, or even a combination of berries would be perfect substitutes for strawberries. You could also add a dash of cinnamon or nutmeg to the crumble topping for extra warmth.
- Even baking: Every oven is different, so keep an eye on the bars as they bake. If they’re browning too quickly on top, cover them with aluminum foil to prevent over-baking.
My introduction to these bars happened during a family gathering. I had just started baking and was eager to impress everyone with something that was both delicious and easy to prepare. This recipe was a game-changer! Not only did it look stunning, but it also became an instant favorite. People loved how the tartness of the strawberries complemented the richness of the cream cheese filling, while the crumble topping added a delightful crunch. From that day forward, I’ve made these bars countless times, and they’ve become a staple at all of my gatherings.
The best part? This recipe is perfect for beginners who want to start exploring baking without being intimidated by complicated steps or ingredients. Whether you’re a novice or just someone who wants to whip up something sweet without too much fuss, Strawberry Cheesecake Bars are the answer. Let’s take a deeper look at the recipe, break it down step by step, and explore how easy it is to create this delicious treat.
Ingredients and Preparation
When it comes to making Strawberry Cheesecake Bars, you don’t need a long list of exotic ingredients. Instead, you’ll rely on simple, easy-to-find pantry staples that make this dessert beginner-friendly. Here’s what you’ll need for the three essential layers: the crust, the creamy cheesecake filling, and the crumble topping.
For the Crust:
- 1 ½ cups (126 g) graham cracker crumbs (about 10-12 crushed graham cracker sheets)
- 6 tablespoons unsalted butter, melted
- ¼ cup (50 g) granulated sugar
For the Filling:
- 2 packages (8 ounces each) cream cheese, room temperature
- 2 large eggs, room temperature
- ⅓ cup (67 g) granulated sugar
- 1 teaspoon vanilla extract
- ¼ teaspoon kosher salt
- 2 cups (332 g) freshly diced strawberries
For the Crumble Topping:
- ¾ cup (94 g) all-purpose flour
- ¼ cup (50 g) light brown sugar, packed
- ¼ teaspoon kosher salt
- 5 tablespoons unsalted butter, melted
Ingredient Alternatives:
- Graham cracker crumbs: If graham crackers aren’t available, you can easily substitute with any plain cookies (digestive biscuits work wonderfully), or even a combination of oats and sugar for a slightly healthier alternative.
- Butter: While unsalted butter is the ideal choice, you can use salted butter in a pinch. Just remember that the topping already has salt in it, so you may want to cut back slightly on the salt elsewhere in the recipe.
- Cream cheese: For a lighter option, you can opt for reduced-fat cream cheese or even use Greek yogurt for a tangy twist. Just note that using a non-fat version might affect the creaminess.
- Fresh strawberries: If you’re baking out of season or can’t find fresh strawberries, frozen strawberries will work too. Just make sure to thaw them first and drain excess liquid to avoid sogginess.
- Sugar: If you’re looking for a less sugary treat, you can replace granulated sugar with natural sweeteners like honey, maple syrup, or coconut sugar. Just be sure to adjust the quantity to taste, as these alternatives tend to be sweeter.
Step-by-Step Instructions
Now that we have everything prepped, it’s time to get our hands dirty (figuratively speaking)! Follow these simple steps, and you’ll soon have a batch of these irresistible strawberry cheesecake bars ready to chill.
- Preheat the oven to 350°F (175°C). Line a 9×9-inch baking dish with parchment paper, making sure to extend it up the sides of the dish for easy removal later. This will ensure your bars don’t stick and makes cleaning up afterward much easier. The parchment paper serves as your best friend in this recipe!
- Make the crust: In a medium bowl, combine the graham cracker crumbs, melted butter, and granulated sugar. Stir the mixture together until it resembles wet sand and the crumbs are fully coated with butter. This is the key to getting a crispy yet chewy crust. Press the mixture firmly into the bottom of the prepared baking dish, ensuring the layer is even and compact. A flat-bottomed cup works great to press it down evenly. The more firmly you press, the less likely the crust will fall apart when you cut it into bars.
- Prepare the cheesecake filling: In a large mixing bowl, use a hand mixer to beat together the cream cheese, eggs, sugar, vanilla extract, and kosher salt on medium speed. Beat until smooth, creamy, and completely lump-free. The consistency should be thick but spreadable—like frosting. If your cream cheese isn’t soft enough, you may get some lumps, so make sure it’s at room temperature before mixing.
- Assemble the filling: Once the filling is ready, spread it evenly over the graham cracker crust, making sure to cover the entire surface. You can use a spatula or spoon to gently smooth the filling into an even layer. The cheesecake filling should be thick enough that it doesn’t run off the crust.
- Add the strawberries: Now it’s time for the fruity layer! Sprinkle the freshly diced strawberries over the cheesecake filling. Don’t be afraid to load them up—the more strawberries, the better! These little red gems will add a fresh, sweet-tart bite that balances the richness of the cheesecake.
- Make the crumble topping: In a medium bowl, whisk together the flour, brown sugar, and kosher salt. Stir in the melted butter until the mixture forms a crumbly dough. You’ll want to make sure the butter is evenly mixed in so that the topping forms little crumbles when you sprinkle it over the bars.
- Top with crumble: Sprinkle the crumble mixture evenly over the strawberries, covering them as much as possible. Don’t worry about achieving perfection; the topping will melt and spread as it bakes. It’s perfectly fine if some strawberries peek through!
- Bake: Place the baking dish in the preheated oven and bake for 35-40 minutes. The filling should be set, and the crumble topping should turn golden brown. Keep an eye on the bars toward the end of the baking time. If the topping starts to brown too quickly, you can tent the dish with foil to prevent burning.
- Cool and chill: Once baked, remove the dish from the oven and let it cool on a wire rack for about 1 hour. After that, transfer it to the refrigerator and chill for at least another hour to allow the bars to firm up. Chilling is important as it helps the bars set properly, making them easier to slice.
- Serve: After they’ve chilled, lift the bars out of the pan using the parchment paper. Slice them into squares (or rectangles if you prefer). You’ll see the beautiful layers: a golden, buttery crust, creamy cheesecake filling, juicy strawberries, and a crumble topping that’s just the right amount of sweet and crunchy.
Beginner Tips and Notes
Here are some tips to make sure your Strawberry Cheesecake Bars turn out perfectly every time:
- Room temperature ingredients: To ensure a smooth, lump-free filling, make sure your cream cheese and eggs are at room temperature before you start mixing. This helps them blend together seamlessly and prevents a lumpy texture.
- Crust pressing: The key to a sturdy crust is pressing it firmly into the pan. Use the back of a spoon or your fingers to ensure it sticks together and doesn’t crumble when you slice the bars.
- Chilling time: Don’t skip the chilling step. If you cut the bars before they’ve chilled for at least 2 hours, they will be too soft and might fall apart.
- Flavor variations: Try experimenting with different fruits depending on the season! Blueberries, raspberries, or even a combination of berries would be perfect substitutes for strawberries. You could also add a dash of cinnamon or nutmeg to the crumble topping for extra warmth.
- Even baking: Every oven is different, so keep an eye on the bars as they bake. If they’re browning too quickly on top, cover them with aluminum foil to prevent over-baking.
Serving Suggestions
While these bars are amazing on their own, here are a few ways to elevate them even further:
- Whipped cream: A dollop of freshly whipped cream can add a light, airy texture to complement the richness of the cheesecake filling.
- Berry compote: For an extra burst of berry flavor, serve these bars with a homemade berry compote. You can easily make one by simmering fresh berries with a little sugar until they break down into a thick syrup.
- Mint leaves: Garnish the bars with a sprig of fresh mint to add a refreshing contrast to the sweetness and enhance the presentation.
For leftovers, store the bars in an airtight container in the refrigerator for up to 3 days. They also freeze well! Just make sure they’re fully chilled before you transfer them to the freezer to maintain their texture.

Conclusion
Making Strawberry Cheesecake Bars is a simple, fun, and incredibly rewarding experience—especially for beginner cooks. The combination of the buttery graham cracker crust, creamy cheesecake filling, fresh strawberries, and the sweet crumble topping makes for a dessert that’s as beautiful as it is delicious. Plus, with just a few basic ingredients and easy steps, you’ll have a dessert that looks like it came straight from a bakery without much effort at all.
I encourage you to try this recipe the next time you’re craving a sweet treat or need something quick to bring to a party. It’s foolproof, beginner-friendly, and guaranteed to impress your friends and family. Have fun with the process, and don’t forget to share your experience in the comments below—I’d love to hear how your version of these strawberry cheesecake bars turned out. Happy baking, and enjoy every bite!


