There’s something magical about the combination of rich chocolate, creamy mousse, and the sweet-salty allure of caramel. For me, these Salted Caramel Chocolate Mousse Cups hold a special place in my heart. The first time I made them, I was new to the world of desserts. I had always been intimidated by the idea of making mousse from scratch, thinking it was reserved for experienced bakers. But with this recipe, I learned that not only was it possible, but it was incredibly rewarding. These mousse cups are the perfect introduction to the world of fancy desserts, and what’s more, they are incredibly simple to make, especially for beginners.

Salted Caramel Chocolate Mousse Cups: A Heavenly Treat for Beginner Cooks

If you’re craving a decadent yet simple dessert, these Salted Caramel Chocolate Mousse Cups are the perfect choice. With rich chocolate mousse, crunchy chocolate cups, and a touch of homemade salted caramel, they offer a perfect balance of flavors. I remember making these for the first time as a beginner cook, and they turned out even better than I expected. This recipe is easy to follow and guarantees a show-stopping treat that anyone can make—whether you’re a seasoned baker or just starting out!
- Prep Time: 1 Hour
- Cook Time: 20 Minutes
- Total Time: 7 Hours 20 Minutes
- Yield: 6 Servings 1x
- Category: Dessert
- Method: No-bake, Stovetop, Chilled
- Cuisine: American
- Diet: Gluten Free
Ingredients
For the Chocolate Cups:
- 6 jumbo muffin liners (regular size works too, but jumbo allows for more space)
- 6 oz (about 1 cup) chocolate chips or chopped chocolate
For the Mousse:
- 4 egg yolks
- 1/4 cup granulated sugar
- 1 cup heavy cream (divided)
- 1 teaspoon vanilla extract
- 1/8 teaspoon salt
- 1 cup chocolate chips or chopped chocolate (dark chocolate is recommended, but you can use semi-sweet or milk chocolate as well)
For the Salted Caramel:
- 1/2 cup white sugar
- 2 tablespoons light corn syrup
- 3 tablespoons salted butter
- 1/3 cup heavy cream
- 1/4 teaspoon salt
- 1 teaspoon vanilla extract
For Toppings:
- Chocolate curls, shaved chocolate, or chopped chocolate
- Kosher salt or any coarse salt for sprinkling
Instructions
1. Preparing the Chocolate Cups
Start by melting the chocolate for the cups. I recommend using the microwave for ease. Place your chocolate chips or chopped chocolate in a microwave-safe bowl. Heat the chocolate at 50% power in 30-second intervals, stirring each time until completely melted and smooth.
It’s important to use medium heat when melting chocolate to avoid burning it. If you don’t have a microwave, you can melt the chocolate using the double boiler method: place the chocolate in a heatproof bowl over a pot of simmering water. Stir occasionally until the chocolate is smooth.
Once the chocolate is ready, take 6 jumbo muffin liners and place them into a muffin tin (a regular muffin tin works too). Using a small spoon or a paintbrush, scoop about 1 1/2 tablespoons of melted chocolate into each liner. Spread the chocolate about 3/4 of the way up the sides of each liner, ensuring it’s thick enough for a solid cup. You’ll want a nice, even coat to hold the mousse and caramel later.
Now, let the chocolate cups harden completely. To speed this up, you can place them in the fridge or freezer. Once they’ve set, gently peel away the muffin liner, revealing your sturdy chocolate cups!
2. Making the Mousse
Now comes the fun part—making the mousse! In a mixing bowl, whisk the egg yolks together and gradually add the granulated sugar. Keep whisking until the mixture is well combined. This process helps to dissolve the sugar and creates a smooth, creamy base for your mousse.
In a saucepan, heat 1 cup of heavy cream, vanilla, and salt over medium heat. Stir it occasionally until it becomes very hot, but not boiling. You’ll know it’s ready when the edges of the cream start to steam, but it shouldn’t bubble. Slowly pour at least half of the hot cream into the egg yolk mixture, stirring constantly to avoid cooking the eggs. After that, pour the egg mixture back into the saucepan.
Cook the mixture over low heat, stirring constantly, for about 5 minutes. The mixture should thicken slightly, but don’t let it boil. If you have a thermometer, it should reach 170°F (77°C). Once it’s ready, remove the pot from the heat and stir in your chocolate chips. Keep stirring until the chocolate is fully melted and smooth.
Now, cover the bowl and refrigerate the mousse for 1-2 hours until it’s cool. If you’re in a hurry, you can even pop it in the freezer for a quicker chill. This step is crucial because the mousse needs to be cool before you add the whipped cream. If the mousse is too warm, the whipped cream will melt into it, and you’ll lose that light and fluffy texture.
3. Making the Caramel
While the mousse chills, it’s time to make the salted caramel. Caramel can be tricky to get just right, but with a little practice, you’ll feel like a pro. In a saucepan, combine the white sugar and corn syrup, then cook over medium heat. Stir occasionally, and as the sugar begins to melt, you’ll notice it changing color. Keep a close eye on it, because once it starts to brown, it can go from perfect to burnt very quickly.
Once the caramel reaches a rich, dark color, add in the salted butter and heavy cream. Stir well, and be careful—it will bubble up! This is completely normal. Once the butter and cream have been incorporated, add the salt and vanilla extract. If there are any lumps, return the caramel to heat and stir until smooth. Set aside to cool completely.
4. Assembling the Mousse Cups
Once the mousse is cool and the caramel has set, you can start assembling your cups. Spoon about 1 tablespoon of salted caramel into the bottom of each chocolate cup. If the caramel has thickened too much, warm it slightly to make it more pourable. Just be careful not to overheat it, as this could cause the chocolate cups to melt.
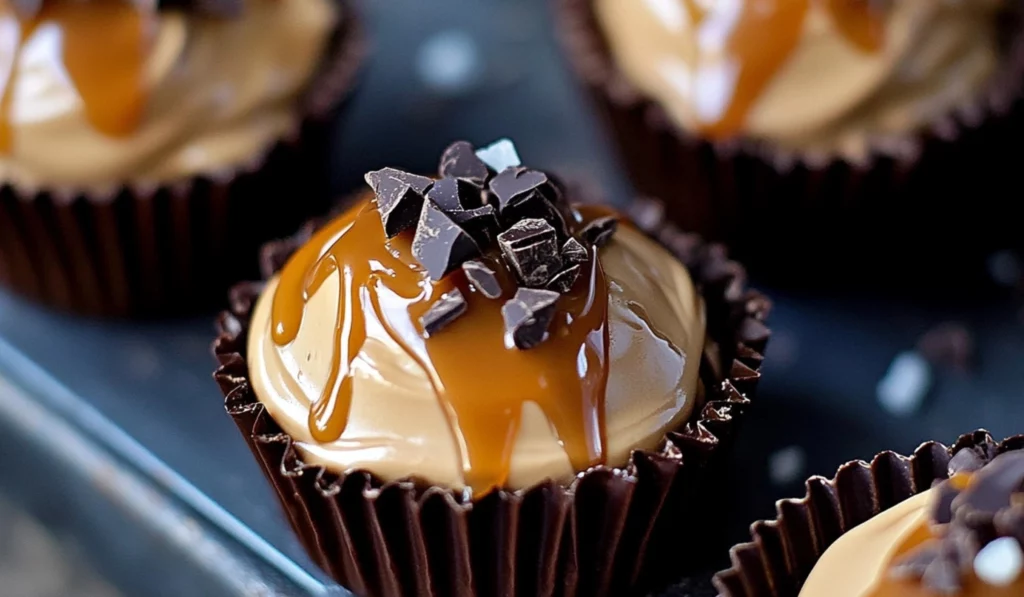
Next, spoon the mousse into each chocolate cup, filling it up to the top. Drizzle the remaining caramel over the mousse and top with a sprinkle of kosher salt and some chocolate curls or chopped chocolate. These little details will not only add flavor but will make your mousse cups look even more irresistible.
While you can enjoy these immediately, it’s best to refrigerate them for about 4 hours so the mousse sets and thickens up perfectly. This extra chilling time will ensure that the mousse has the right texture and that the caramel doesn’t mix with the mousse too much.
Notes
- Troubleshooting the Mousse: If your mousse is too runny after you fold in the whipped cream, you can chill it for a little longer to let it firm up. If it’s too thick, gently fold in a bit more whipped cream to lighten the texture. Make sure not to overmix, as you want to maintain the mousse’s light and airy consistency.
- Making the Caramel: Caramel can be tricky, but once you master it, you’ll feel like a pro! If your caramel hardens too quickly after adding the cream, simply return it to low heat and stir until it softens. Always be cautious when working with hot sugar—it can cause burns.
- Efficiency Tip: To save time, prep the chocolate cups and caramel ahead of time. You can even store the chocolate cups in the fridge for up to a week before filling them with mousse and caramel. This makes the process a lot smoother when it’s time to assemble.
- Whipping Cream: For the mousse, ensure your bowl and beaters are chilled before whipping the cream. This will help it whip faster and to stiff peaks. You can place the mixing bowl and beaters in the fridge for 10-15 minutes before using them.
I can still recall the joy of watching my friends’ faces light up as they took their first bite. The creamy chocolate mousse paired with the crunchy chocolate cup and the burst of salted caramel made for a flavor profile that was nothing short of divine. These mousse cups are a dessert that feels luxurious but can be made by anyone, no matter their skill level. The ease of preparation and the minimal ingredients involved make it a fantastic choice for beginner cooks eager to impress.
What makes this recipe stand out is its simplicity. Despite being made from scratch, this salted caramel chocolate mousse comes together with just a few basic ingredients and some straightforward techniques. As a beginner cook, you don’t need to worry about complicated techniques or obscure ingredients. This recipe is designed to be approachable and rewarding, giving you the confidence to make an elegant dessert that’s sure to wow.
The best part? This dessert is naturally gluten-free and can be easily customized based on your flavor preferences. Whether you’re looking for a rich, dark chocolate experience or prefer a sweeter milk chocolate base, this mousse will deliver. In this article, we will dive into everything you need to know about making these rich and creamy Salted Caramel Chocolate Mousse Cups, from ingredients to preparation, step-by-step instructions, and even some beginner-friendly tips. Whether you’re making them for a special occasion or simply to satisfy your sweet tooth, this dessert is sure to impress. Let’s get started!
Ingredients and Preparation
Before diving into the steps, it’s important to ensure you have all the ingredients for these delicious mousse cups. Here’s a breakdown of what you’ll need:
For the Chocolate Cups:
- 6 jumbo muffin liners (regular size works too, but jumbo allows for more space)
- 6 oz (about 1 cup) chocolate chips or chopped chocolate
For the Mousse:
- 4 egg yolks
- 1/4 cup granulated sugar
- 1 cup heavy cream (divided)
- 1 teaspoon vanilla extract
- 1/8 teaspoon salt
- 1 cup chocolate chips or chopped chocolate (dark chocolate is recommended, but you can use semi-sweet or milk chocolate as well)
For the Salted Caramel:
- 1/2 cup white sugar
- 2 tablespoons light corn syrup
- 3 tablespoons salted butter
- 1/3 cup heavy cream
- 1/4 teaspoon salt
- 1 teaspoon vanilla extract
For Toppings:
- Chocolate curls, shaved chocolate, or chopped chocolate
- Kosher salt or any coarse salt for sprinkling
When you first look at the list of ingredients, it might seem like a lot, but don’t be discouraged! Each component is straightforward, and nothing is too difficult to find. The chocolate cups, mousse, and caramel are all made with ingredients you probably already have in your kitchen. And if not, they’re easy to find at your local grocery store.
If you’re looking for substitutions, there are several ways to customize this recipe. If you don’t have jumbo muffin liners, regular ones will do—just make a few extra cups. You can also use different types of chocolate, depending on your preference. For the caramel, if you prefer a dairy-free version, substitute the butter and heavy cream with dairy-free alternatives like coconut oil and coconut cream. The beauty of this recipe lies in its versatility!
Step-by-Step Instructions
Now that we’ve got everything ready, let’s break down the steps for creating these decadent salted caramel chocolate mousse cups. We’ll go step by step to ensure it’s easy to follow for beginners!
1. Preparing the Chocolate Cups
Start by melting the chocolate for the cups. I recommend using the microwave for ease. Place your chocolate chips or chopped chocolate in a microwave-safe bowl. Heat the chocolate at 50% power in 30-second intervals, stirring each time until completely melted and smooth.
It’s important to use medium heat when melting chocolate to avoid burning it. If you don’t have a microwave, you can melt the chocolate using the double boiler method: place the chocolate in a heatproof bowl over a pot of simmering water. Stir occasionally until the chocolate is smooth.
Once the chocolate is ready, take 6 jumbo muffin liners and place them into a muffin tin (a regular muffin tin works too). Using a small spoon or a paintbrush, scoop about 1 1/2 tablespoons of melted chocolate into each liner. Spread the chocolate about 3/4 of the way up the sides of each liner, ensuring it’s thick enough for a solid cup. You’ll want a nice, even coat to hold the mousse and caramel later.
Now, let the chocolate cups harden completely. To speed this up, you can place them in the fridge or freezer. Once they’ve set, gently peel away the muffin liner, revealing your sturdy chocolate cups!
2. Making the Mousse
Now comes the fun part—making the mousse! In a mixing bowl, whisk the egg yolks together and gradually add the granulated sugar. Keep whisking until the mixture is well combined. This process helps to dissolve the sugar and creates a smooth, creamy base for your mousse.
In a saucepan, heat 1 cup of heavy cream, vanilla, and salt over medium heat. Stir it occasionally until it becomes very hot, but not boiling. You’ll know it’s ready when the edges of the cream start to steam, but it shouldn’t bubble. Slowly pour at least half of the hot cream into the egg yolk mixture, stirring constantly to avoid cooking the eggs. After that, pour the egg mixture back into the saucepan.
Cook the mixture over low heat, stirring constantly, for about 5 minutes. The mixture should thicken slightly, but don’t let it boil. If you have a thermometer, it should reach 170°F (77°C). Once it’s ready, remove the pot from the heat and stir in your chocolate chips. Keep stirring until the chocolate is fully melted and smooth.
Now, cover the bowl and refrigerate the mousse for 1-2 hours until it’s cool. If you’re in a hurry, you can even pop it in the freezer for a quicker chill. This step is crucial because the mousse needs to be cool before you add the whipped cream. If the mousse is too warm, the whipped cream will melt into it, and you’ll lose that light and fluffy texture.
3. Making the Caramel
While the mousse chills, it’s time to make the salted caramel. Caramel can be tricky to get just right, but with a little practice, you’ll feel like a pro. In a saucepan, combine the white sugar and corn syrup, then cook over medium heat. Stir occasionally, and as the sugar begins to melt, you’ll notice it changing color. Keep a close eye on it, because once it starts to brown, it can go from perfect to burnt very quickly.
Once the caramel reaches a rich, dark color, add in the salted butter and heavy cream. Stir well, and be careful—it will bubble up! This is completely normal. Once the butter and cream have been incorporated, add the salt and vanilla extract. If there are any lumps, return the caramel to heat and stir until smooth. Set aside to cool completely.
4. Assembling the Mousse Cups
Once the mousse is cool and the caramel has set, you can start assembling your cups. Spoon about 1 tablespoon of salted caramel into the bottom of each chocolate cup. If the caramel has thickened too much, warm it slightly to make it more pourable. Just be careful not to overheat it, as this could cause the chocolate cups to melt.
Next, spoon the mousse into each chocolate cup, filling it up to the top. Drizzle the remaining caramel over the mousse and top with a sprinkle of kosher salt and some chocolate curls or chopped chocolate. These little details will not only add flavor but will make your mousse cups look even more irresistible.
While you can enjoy these immediately, it’s best to refrigerate them for about 4 hours so the mousse sets and thickens up perfectly. This extra chilling time will ensure that the mousse has the right texture and that the caramel doesn’t mix with the mousse too much.
Beginner Tips and Notes
- Troubleshooting the Mousse: If your mousse is too runny after you fold in the whipped cream, you can chill it for a little longer to let it firm up. If it’s too thick, gently fold in a bit more whipped cream to lighten the texture. Make sure not to overmix, as you want to maintain the mousse’s light and airy consistency.
- Making the Caramel: Caramel can be tricky, but once you master it, you’ll feel like a pro! If your caramel hardens too quickly after adding the cream, simply return it to low heat and stir until it softens. Always be cautious when working with hot sugar—it can cause burns.
- Efficiency Tip: To save time, prep the chocolate cups and caramel ahead of time. You can even store the chocolate cups in the fridge for up to a week before filling them with mousse and caramel. This makes the process a lot smoother when it’s time to assemble.
- Whipping Cream: For the mousse, ensure your bowl and beaters are chilled before whipping the cream. This will help it whip faster and to stiff peaks. You can place the mixing bowl and beaters in the fridge for 10-15 minutes before using them.
Serving Suggestions
These Salted Caramel Chocolate Mousse Cups are rich and satisfying on their own, but if you want to elevate your dessert experience, serve them with some fresh berries, like raspberries or strawberries. The tartness of the fruit contrasts beautifully with the sweet and salty mousse. A dollop of fresh whipped cream or a scoop of vanilla ice cream would also be an excellent addition.
As for storing leftovers, these mousse cups will keep in the refrigerator for up to 3 days. Just be sure to cover them tightly to maintain their freshness. If you’re making them in advance, you can prepare the mousse and caramel up to a day ahead, and then assemble everything the day you plan to serve them.

Conclusion
There you have it! A decadent, yet beginner-friendly dessert that will have your guests thinking you’re a pastry chef. Whether you’re celebrating a special occasion or simply indulging in something sweet, these Salted Caramel Chocolate Mousse Cups are a guaranteed crowd-pleaser. Don’t forget to share your creations in the comments—I’d love to hear how they turned out for you!
Now go ahead, try your hand at this easy sheet pan dinner, and indulge in the rich, creamy, and utterly indulgent world of salted caramel and chocolate mousse. Remember, the beauty of this recipe is in its simplicity. You don’t need to be a professional baker to create something truly spectacular. Happy baking!


