There’s something truly magical about a glazed donut—that perfect combination of a golden, crisp exterior and a soft, airy interior. It’s a treat that not only satisfies your sweet tooth but brings comfort with every bite. The iconic Krispy Kreme donuts have long been a favorite for donut lovers around the world, with their light, chewy texture and sweet glaze. But what if you could make them right at home? This Krispy Kreme recipe copycat is just what you need. It’s perfect for beginners because it breaks down the process into manageable, easy-to-follow steps while still delivering a professional-level donut experience. Whether it’s for a special occasion, a weekend treat, or simply a reason to indulge, these donuts are a surefire way to impress anyone who takes a bite. I remember the first time I attempted to recreate Krispy Kreme’s signature glazed donuts at home. It was a Saturday morning, and I had just woken up with a craving for something sweet. With a little experimentation and a few tweaks, I finally nailed the recipe.
Perfect Homemade Glazed Donuts: A Krispy Kreme Copycat Recipe You’ll Love
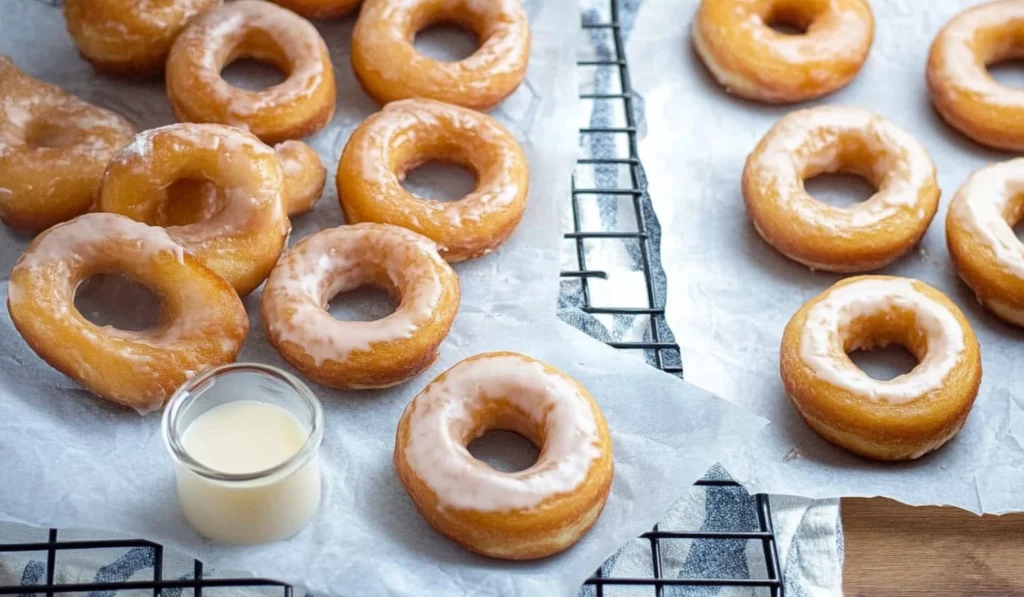
Homemade donuts are a treat like no other, and if you love Krispy Kreme’s glazed version, this easy recipe is for you! With simple ingredients and beginner-friendly steps, you can enjoy light, fluffy, and sweet donuts right at home. No need to wait in line—just follow this guide and enjoy warm, melt-in-your-mouth donuts fresh out of the fryer!
- Prep Time: 30 minutes
- Cook Time: 1 hour
- Total Time: 1 hour 30 minutes
- Yield: 18 donuts 1x
- Category: Breakfast, Dessert
- Method: Frying
- Cuisine: American
- Diet: Vegetarian
Ingredients
For the donuts:
- 1 ¼ cups whole milk (300 milliliters)
- 2 ¼ teaspoons instant (quick-rise) yeast (7 grams)
- 2 large eggs
- 8 tablespoons unsalted butter (113 grams), melted and cooled
- ¼ cup granulated sugar (50g)
- 1 teaspoon salt
- 4 ¼ cups bread flour (535 grams), plus more for rolling out the dough
- Oil for frying
For the glaze:
- 4 cups powdered sugar (500 grams)
- ½ cup milk (120 milliliters)
- 1 pinch salt
Instructions
1. Prepare the Yeast Mixture
Start by heating the whole milk in a microwave-safe bowl for about 45 seconds, until it’s warm to the touch but not too hot. You don’t want the milk to scald, as that could kill the yeast. Add the instant yeast to the warm milk and give it a gentle stir. Let the mixture sit for 5 minutes until you see foam forming on top. This indicates that the yeast is activated and ready to work its magic.
2. Mix the Wet Ingredients
In your stand mixer bowl or a large mixing bowl, combine the yeast mixture, eggs, melted butter, granulated sugar, and salt. Mix everything together until well combined. The mixture will be slightly runny, which is perfectly fine. This is the base for your dough, and it should be smooth and evenly blended.
3. Add the Flour
Gradually add the bread flour to the mixture, about half at a time. Mix until the flour is fully incorporated before adding the next batch. Once the dough begins to come together, you can add the remaining flour. Continue mixing until the dough forms a ball and pulls away from the sides of the bowl. If the dough is too sticky, add more flour, one tablespoon at a time, until it becomes manageable. The dough should be slightly tacky but not too sticky to handle.
4. Let the Dough Rise
Cover the bowl with a large kitchen towel or plastic wrap and place it in a warm spot. Allow the dough to rise for about 1 hour, or until it has doubled in size. This is an important step, as the yeast needs time to work and make the dough rise, which will give your donuts that airy, fluffy texture. Be patient, as this rise is key to getting the perfect donuts.
5. Roll and Cut the Donuts
Once the dough has doubled in size, it’s time to roll it out. Lightly flour your surface to prevent the dough from sticking. Roll the dough to about ½ inch thick. Using a donut cutter or two round cookie cutters (one large, about 3 inches in diameter, and one small for the hole), cut out the donuts. Don’t forget to save the donut holes—they fry up just as deliciously as the donuts themselves! Gather the dough scraps, knead them gently, and repeat the process until all the dough has been cut into donuts.
6. Let the Donuts Rise Again
Place each donut on a piece of parchment paper to prevent them from sticking. Cover the donuts with a towel and let them rise for another 45 minutes, or until they’ve puffed up. This secondary rise ensures that the donuts are light and airy, rather than dense.
7. Heat the Oil
While the donuts are rising, heat the oil in a deep fryer or large heavy-bottomed pot. The oil should reach a temperature of 375°F/190°C. If you don’t have a thermometer, you can test the oil by dropping a small piece of dough into it. If the dough sizzles and rises to the surface, the oil is ready for frying.
8. Fry the Donuts
Once the oil is hot, carefully lower the donuts (still on the parchment paper) into the oil, making sure not to overcrowd the pot. Fry the donuts for about 45 seconds on each side, or until they’re golden brown. Donut holes will cook faster, so keep an eye on them. When the donuts are done, remove them using a slotted spoon or tongs and transfer them to a cooling rack lined with paper towels to drain excess oil.
9. Make the Glaze
While the donuts are cooling, it’s time to make the glaze. In a large bowl, whisk together the powdered sugar, milk, and a pinch of salt. The glaze should be smooth and slightly thick. If you prefer a thinner glaze, add more milk, one teaspoon at a time, until it reaches the desired consistency. This glaze will coat the donuts beautifully, giving them that iconic, glossy finish.
10. Glaze the Donuts
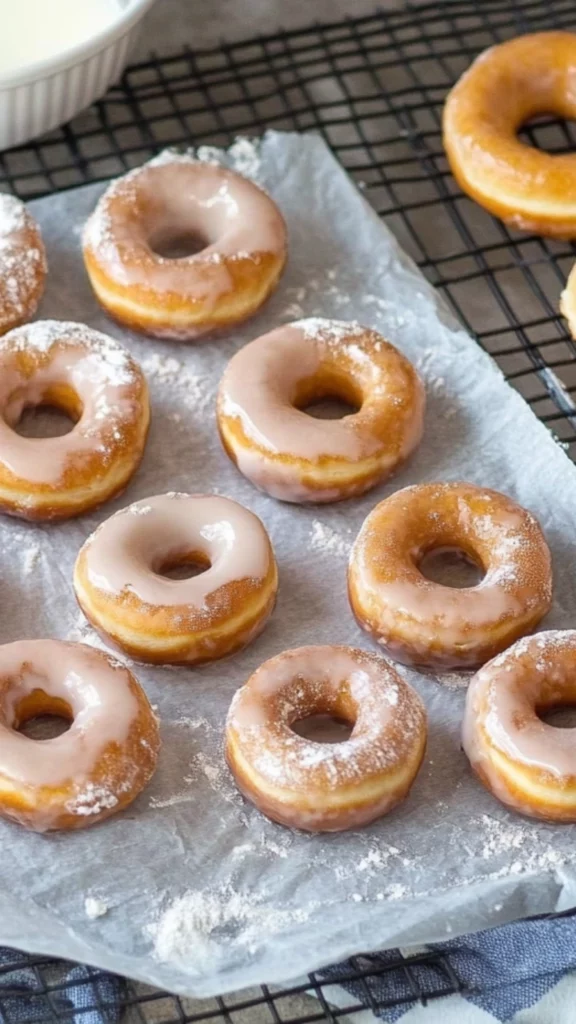
Once the donuts have cooled for a few minutes, it’s time to dip them in the glaze. Dip one side of each donut into the glaze, then flip it over using a fork. The glaze will slowly drip off as it sets, creating that shiny, sugary coating. Place the glazed donuts on a cooling rack to allow the glaze to set completely. Repeat the process with the remaining donuts.
Notes
- Yeast Troubleshooting: If your dough doesn’t rise properly, it could be because the yeast wasn’t activated. Ensure that your milk is warm but not hot. If the milk is too hot, it can kill the yeast, preventing the dough from rising. If you’re unsure, test the yeast by sprinkling it on a little bit of warm water before adding it to the milk. If it doesn’t foam after a few minutes, the yeast might be expired.
- Don’t Overcrowd the Fryer: Frying too many donuts at once can lower the oil temperature, which can cause them to cook unevenly. Fry in batches to ensure each donut gets the attention it needs for that perfect crispy exterior.
- Storage: These donuts are best eaten fresh, but you can store any leftovers in an airtight container for up to 2 days. For longer storage, you can freeze the donuts before glazing them. When you’re ready to enjoy them, simply thaw and glaze.
Now, whenever the craving strikes, I know exactly how to whip up these glazed donuts from scratch. Not only does this recipe bring back memories of those comforting Krispy Kreme donuts, but it also offers a hands-on approach that’s so much fun. You’ll feel like a professional baker as you make each donut and dip it in that silky-sweet glaze. What’s better than a warm, homemade donut straight out of the fryer? Absolutely nothing! This recipe is simple enough for beginners and provides clear, step-by-step instructions that will guide you through the entire process. So, let’s get started!
Ingredients and Preparation
The ingredients for these glazed donuts are simple and straightforward, but each one plays a crucial role in achieving that perfect texture and flavor. Understanding how each ingredient contributes to the final product will make the process smoother and give you a better grasp of what you’re doing. Let’s take a closer look at the essential ingredients you’ll need.
For the donuts:
- 1 ¼ cups whole milk (300 milliliters)
- 2 ¼ teaspoons instant (quick-rise) yeast (7 grams)
- 2 large eggs
- 8 tablespoons unsalted butter (113 grams), melted and cooled
- ¼ cup granulated sugar (50g)
- 1 teaspoon salt
- 4 ¼ cups bread flour (535 grams), plus more for rolling out the dough
- Oil for frying
For the glaze:
- 4 cups powdered sugar (500 grams)
- ½ cup milk (120 milliliters)
- 1 pinch salt
Step-by-Step Instructions
Making these glazed donuts at home might sound intimidating, but it’s actually an enjoyable and rewarding experience. The process can be broken down into simple steps, and by the end, you’ll have a batch of homemade donuts that rival any bakery. Let’s walk through the process together, step by step.
1. Prepare the Yeast Mixture
Start by heating the whole milk in a microwave-safe bowl for about 45 seconds, until it’s warm to the touch but not too hot. You don’t want the milk to scald, as that could kill the yeast. Add the instant yeast to the warm milk and give it a gentle stir. Let the mixture sit for 5 minutes until you see foam forming on top. This indicates that the yeast is activated and ready to work its magic.
2. Mix the Wet Ingredients
In your stand mixer bowl or a large mixing bowl, combine the yeast mixture, eggs, melted butter, granulated sugar, and salt. Mix everything together until well combined. The mixture will be slightly runny, which is perfectly fine. This is the base for your dough, and it should be smooth and evenly blended.
3. Add the Flour
Gradually add the bread flour to the mixture, about half at a time. Mix until the flour is fully incorporated before adding the next batch. Once the dough begins to come together, you can add the remaining flour. Continue mixing until the dough forms a ball and pulls away from the sides of the bowl. If the dough is too sticky, add more flour, one tablespoon at a time, until it becomes manageable. The dough should be slightly tacky but not too sticky to handle.
4. Let the Dough Rise
Cover the bowl with a large kitchen towel or plastic wrap and place it in a warm spot. Allow the dough to rise for about 1 hour, or until it has doubled in size. This is an important step, as the yeast needs time to work and make the dough rise, which will give your donuts that airy, fluffy texture. Be patient, as this rise is key to getting the perfect donuts.
5. Roll and Cut the Donuts
Once the dough has doubled in size, it’s time to roll it out. Lightly flour your surface to prevent the dough from sticking. Roll the dough to about ½ inch thick. Using a donut cutter or two round cookie cutters (one large, about 3 inches in diameter, and one small for the hole), cut out the donuts. Don’t forget to save the donut holes—they fry up just as deliciously as the donuts themselves! Gather the dough scraps, knead them gently, and repeat the process until all the dough has been cut into donuts.
6. Let the Donuts Rise Again
Place each donut on a piece of parchment paper to prevent them from sticking. Cover the donuts with a towel and let them rise for another 45 minutes, or until they’ve puffed up. This secondary rise ensures that the donuts are light and airy, rather than dense.
7. Heat the Oil
While the donuts are rising, heat the oil in a deep fryer or large heavy-bottomed pot. The oil should reach a temperature of 375°F/190°C. If you don’t have a thermometer, you can test the oil by dropping a small piece of dough into it. If the dough sizzles and rises to the surface, the oil is ready for frying.
8. Fry the Donuts
Once the oil is hot, carefully lower the donuts (still on the parchment paper) into the oil, making sure not to overcrowd the pot. Fry the donuts for about 45 seconds on each side, or until they’re golden brown. Donut holes will cook faster, so keep an eye on them. When the donuts are done, remove them using a slotted spoon or tongs and transfer them to a cooling rack lined with paper towels to drain excess oil.
9. Make the Glaze
While the donuts are cooling, it’s time to make the glaze. In a large bowl, whisk together the powdered sugar, milk, and a pinch of salt. The glaze should be smooth and slightly thick. If you prefer a thinner glaze, add more milk, one teaspoon at a time, until it reaches the desired consistency. This glaze will coat the donuts beautifully, giving them that iconic, glossy finish.
10. Glaze the Donuts
Once the donuts have cooled for a few minutes, it’s time to dip them in the glaze. Dip one side of each donut into the glaze, then flip it over using a fork. The glaze will slowly drip off as it sets, creating that shiny, sugary coating. Place the glazed donuts on a cooling rack to allow the glaze to set completely. Repeat the process with the remaining donuts.
Beginner Tips and Notes
As with any recipe, there are a few things to keep in mind to ensure your glazed donuts turn out perfectly every time. If you’re new to making donuts, these tips will be helpful along the way.
- Yeast Troubleshooting: If your dough doesn’t rise properly, it could be because the yeast wasn’t activated. Ensure that your milk is warm but not hot. If the milk is too hot, it can kill the yeast, preventing the dough from rising. If you’re unsure, test the yeast by sprinkling it on a little bit of warm water before adding it to the milk. If it doesn’t foam after a few minutes, the yeast might be expired.
- Don’t Overcrowd the Fryer: Frying too many donuts at once can lower the oil temperature, which can cause them to cook unevenly. Fry in batches to ensure each donut gets the attention it needs for that perfect crispy exterior.
- Storage: These donuts are best eaten fresh, but you can store any leftovers in an airtight container for up to 2 days. For longer storage, you can freeze the donuts before glazing them. When you’re ready to enjoy them, simply thaw and glaze.
Serving Suggestions
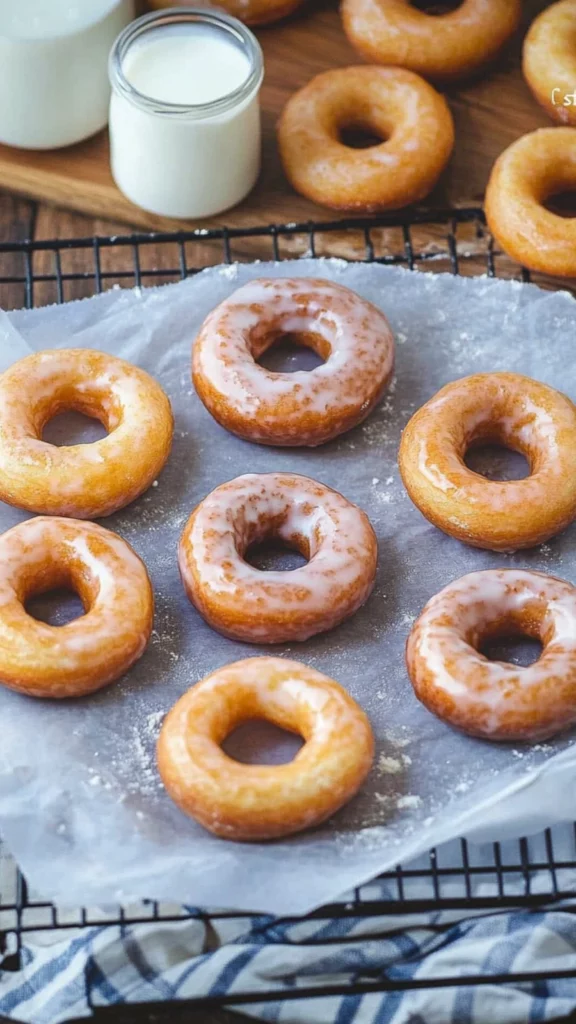
These glazed donuts are perfect on their own, but you can also try adding your own twist. Dust the donuts with cinnamon sugar for an extra layer of flavor, or fill them with your favorite jam or cream filling. If you’re feeling extra indulgent, drizzle some chocolate or caramel sauce over the top for a decadent treat. They’re also great paired with a hot cup of coffee or milk. Whether you enjoy them for breakfast, dessert, or as a snack, these donuts will quickly become a family favorite.
Conclusion
Making glazed donuts at home might seem like a challenge at first, but with the right recipe and a bit of patience, you’ll be able to create the same soft, melt-in-your-mouth donuts that are loved around the world. The key is to follow the steps carefully, give the dough enough time to rise, and fry at the right temperature. These homemade Krispy Kreme recipe copycat donuts are perfect for any occasion and are sure to be a hit with everyone who tries them. I hope you enjoy making and eating these delicious donuts as much as I do!


