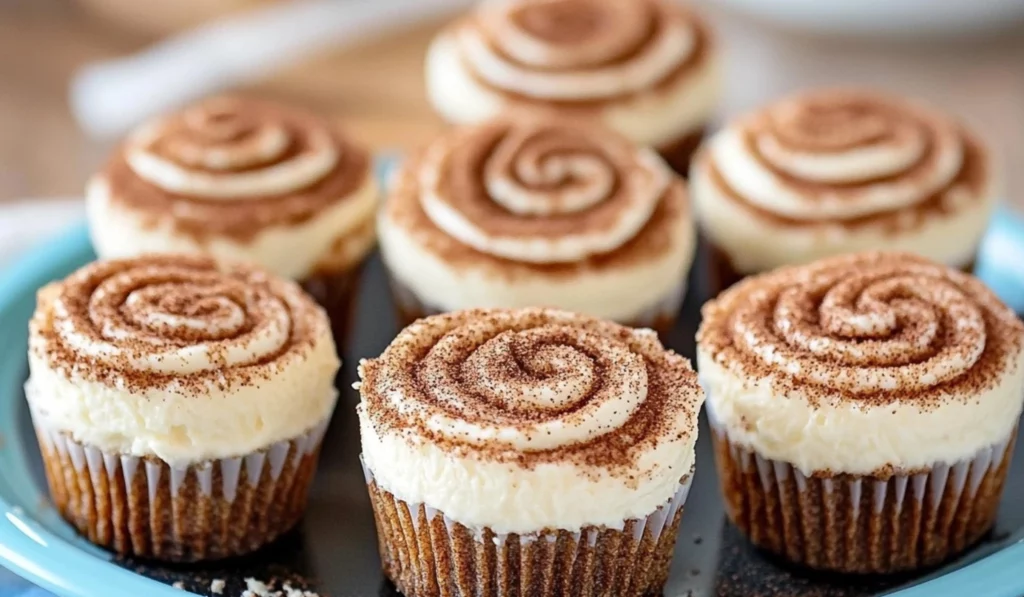
When I first discovered the magic of combining two of my all-time favorite desserts—cheesecake and cinnamon rolls—I knew I had stumbled upon something truly special. These Mini Cinnamon Roll Cheesecakes quickly became a hit in my home, offering a delightful balance of creamy richness and warm, spiced cinnamon sweetness. The crust, the cheesecake filling, the cinnamon sugar swirls, and the frosting come together to create an irresistible treat that’s perfect for any occasion, from a weekend breakfast to a celebratory dessert.

Mini Cinnamon Roll Cheesecakes: A Sweet Twist on a Classic Favorite

When it comes to baking, there’s something truly magical about creating a dish that’s both simple to make and bursting with flavor. That’s exactly what you’ll find with this recipe for Mini Cinnamon Roll Cheesecakes—a delightful blend of creamy cheesecake and the warm, comforting flavors of cinnamon rolls. It’s the perfect treat for anyone who loves indulgent desserts but doesn’t want to spend hours in the kitchen. Whether you’re a beginner or an experienced home baker, these mini cheesecakes offer a quick and easy way to enjoy a taste of cinnamon roll goodness in a fun, bite-sized form.
- Prep Time: 30 minutes
- Cook Time: 25 minutes
- Total Time: 55 minutes
- Yield: 12 Mini Cheesecakes 1x
- Category: Dessert
- Method: Baking, Oven-Baked, Easy
- Cuisine: American
- Diet: Vegetarian
Ingredients
For the Crust:
- 1 cup (134g) vanilla wafer cookie crumbs
- 2 tbsp sugar
- 1/2 tsp ground cinnamon
- 4 tbsp (56g) Challenge butter, melted
For the Cheesecake Filling:
- 12 ounces (339g) Challenge cream cheese, room temperature
- 1/2 cup (104g) sugar
- 3 tbsp (24g) flour
- 1/2 tsp ground cinnamon
- 1/2 cup (115g) sour cream
- 1 tsp vanilla extract
- 2 eggs
For the Cinnamon Sugar Filling:
- 1 1/2 tbsp ground cinnamon
- 1/4 cup (52g) sugar
For the Frosting:
- 3 tbsp Challenge butter
- 1/2 cup + 2 tbsp powdered sugar
- 1/4 tsp vanilla extract
- 1/2 tbsp milk
Instructions
Step 1: Prepare the Crust
Preheat your oven to 325°F (162°C) and line a cupcake pan with cupcake liners. This will prevent the cheesecakes from sticking to the pan and help with easy removal later on.
In a medium-sized bowl, combine the vanilla wafer cookie crumbs, sugar, cinnamon, and melted butter. Stir everything together until the mixture is well combined, and the crumbs are fully coated with butter. Divide the mixture evenly among the cupcake liners—about 2 tablespoons per cup—and press it down firmly to form a base. I like to use the back of a spoon to press the mixture down evenly.
Bake the crusts in the preheated oven for 5 minutes, just enough to set them. Once done, remove the pan from the oven and set it aside to cool while you prepare the filling. This short baking time ensures that the crust has a firm foundation for the cheesecake filling.
Step 2: Make the Cheesecake Filling
Reduce the oven temperature to 300°F (148°C), as cheesecakes bake better at a slightly lower temperature to avoid cracks.
In a large mixing bowl, beat together the cream cheese, sugar, flour, and ground cinnamon. Use a low-speed setting on your mixer to avoid incorporating too much air into the batter, which can cause cracks while baking. Scrape down the sides of the bowl to make sure everything is evenly combined.
Next, add the sour cream and vanilla extract, and continue mixing on low speed until everything is smooth and well incorporated. The sour cream gives the cheesecake its creamy texture, while the vanilla adds a subtle richness.
Add the eggs one at a time, beating slowly and scraping the sides of the bowl after each addition. This ensures your batter stays smooth and avoids overmixing. Once everything is combined, set the filling aside.
Step 3: Add the Cinnamon Sugar Swirls
In a small bowl, mix together the cinnamon and sugar for the cinnamon sugar filling. Now it’s time to assemble your mini cheesecakes!
Take each cupcake liner filled with crust and scoop about 1/2 to 3/4 of a tablespoon of cheesecake filling into each one. Next, sprinkle some cinnamon sugar over the filling, making sure to fully cover it. Repeat this process two more times, layering the filling and cinnamon sugar until each cup is almost full. You’ll end up with three layers of delicious cinnamon sugar filling.
Step 4: Bake the Mini Cheesecakes
Place the cheesecake-filled cupcake pan into the oven and bake for 15-17 minutes. Keep a close eye on them to ensure they don’t overbake. Once the cheesecakes are done, turn off the oven and leave the door closed for another 5 minutes. This helps the cheesecakes set while preventing any sudden temperature changes that could cause cracking.
After the 5 minutes are up, crack the oven door slightly and let the cheesecakes cool for about 15-20 minutes. This gradual cooling process will help them maintain their structure. Once they’ve cooled down a bit, transfer them to the fridge to finish cooling completely.
Step 5: Prepare the Frosting
While the cheesecakes are cooling, it’s time to make the frosting. In a small bowl, beat the butter until smooth and creamy. Add the powdered sugar, vanilla extract, and a touch of milk, and mix until everything is smooth and well combined. The frosting should have a slightly thick consistency, perfect for piping.
Transfer the frosting to a piping bag fitted with a small round tip, or use a ziplock bag with the corner cut off for a DIY option. Pipe a swirl of frosting on top of each cheesecake for a beautiful finish.
Step 6: Chill and Serve
Once the cheesecakes are fully frosted, place them back in the fridge to chill until you’re ready to serve. These Mini Cinnamon Roll Cheesecakes are best served chilled, and they make for a great dessert after dinner or a sweet treat to enjoy with coffee in the morning.
Notes
- Avoid Overmixing: When preparing the cheesecake filling, mix the ingredients on low speed to avoid incorporating too much air, which can lead to cracks in the cheesecake during baking.
- Eggs: When adding eggs, make sure to beat them in one at a time. This helps prevent the batter from becoming too runny or lumpy.
- Cinnamon Sugar Layers: Don’t skimp on the cinnamon sugar—each layer adds a delicious swirl of flavor that’s key to making these cheesecakes unique.
- Baking Time: Check the cheesecakes around 15 minutes, and remember that they’ll continue to cook as they cool. They should be just set in the center when they’re done.
What makes this recipe even better is its simplicity—ideal for beginner cooks who want to create something impressive without feeling overwhelmed. With just a few basic ingredients and simple steps, you’ll be able to whip up these Mini Cinnamon Roll Cheesecakes in no time, making them an excellent choice for anyone eager to step into the world of baking.
Whether you’re an experienced baker or a complete novice in the kitchen, this recipe offers something for everyone: a flavorful, fun, and foolproof way to enjoy a classic dessert with a twist. Let’s dive into how you can make these delicious mini cheesecakes, and I’ll share a few tips along the way to help ensure your baking adventure goes smoothly.
Why This Recipe is Perfect for Beginners
If you’re new to baking, the idea of making a cheesecake might seem daunting. After all, cheesecakes have a reputation for being temperamental when it comes to texture and baking time. But fear not! These Mini Cinnamon Roll Cheesecakes are the perfect introduction to cheesecake baking. Unlike traditional cheesecakes that require a water bath and meticulous temperature control, this recipe is much simpler and more forgiving. The mini size also makes them easier to manage and less likely to crack, making it a great starting point for beginners.
The best part is that you don’t have to worry about complicated techniques. The crust is easy to prepare by just mixing a few simple ingredients and pressing them into cupcake liners, and the filling comes together quickly with just a few mixing steps. Even the frosting is a breeze! All in all, these cheesecakes are a great way to build your baking confidence.
Ingredients and Preparation
Before you start, gather all the ingredients listed below. This simple recipe calls for accessible ingredients, many of which you likely already have in your pantry or fridge. Let’s break them down:
For the Crust:
- 1 cup (134g) vanilla wafer cookie crumbs
- 2 tbsp sugar
- 1/2 tsp ground cinnamon
- 4 tbsp (56g) Challenge butter, melted
The crust for these cheesecakes is simple, but it’s a vital element of the flavor. The vanilla wafer crumbs provide a buttery, slightly sweet base, while the addition of cinnamon enhances the warm flavors that pair so beautifully with the cheesecake filling. Melted butter binds it all together, ensuring the crust stays firmly in place.
For the Cheesecake Filling:
- 12 ounces (339g) Challenge cream cheese, room temperature
- 1/2 cup (104g) sugar
- 3 tbsp (24g) flour
- 1/2 tsp ground cinnamon
- 1/2 cup (115g) sour cream
- 1 tsp vanilla extract
- 2 eggs
The cheesecake filling is rich and smooth, thanks to the cream cheese and sour cream. The flour helps to give it structure, while the cinnamon adds warmth. The eggs bind everything together and help the cheesecake set. Make sure your cream cheese is at room temperature before mixing, as this will help you achieve a smooth, lump-free filling.
For the Cinnamon Sugar Filling:
- 1 1/2 tbsp ground cinnamon
- 1/4 cup (52g) sugar
This cinnamon sugar mixture is what gives the cheesecake its cinnamon roll twist. By layering this filling in between the cheesecake batter, you’ll create a beautiful swirl of flavor that will melt in your mouth with every bite.
For the Frosting:
- 3 tbsp Challenge butter
- 1/2 cup + 2 tbsp powdered sugar
- 1/4 tsp vanilla extract
- 1/2 tbsp milk
The frosting is a simple yet decadent addition that takes these cheesecakes from delicious to truly indulgent. It’s creamy, sweet, and perfectly complements the cinnamon and cream cheese filling. The vanilla extract enhances the flavor, and the touch of milk helps to give the frosting the ideal consistency for piping.
These ingredients are simple and straightforward, but I’ll also offer a few substitutions in case you want to tweak the recipe to your liking. For example, if you prefer a gluten-free version, you can swap out the vanilla wafer crumbs for a gluten-free cookie option. Similarly, if you don’t have sour cream on hand, you can use Greek yogurt as a substitute for a similar creamy texture and tang.
Preparing Your Kitchen
Before you begin, take a few minutes to get your kitchen ready for baking. Start by gathering all your ingredients and measuring them out. This will make the entire process smoother and more efficient. Preheat your oven to 325°F (162°C) to ensure it’s ready when you are. If you’re new to baking, one tip I recommend is to double-check that your oven is at the correct temperature by using an oven thermometer—oven temperatures can often vary.
Line your cupcake pan with cupcake liners to make the removal process easier. If you don’t have cupcake liners, you can also use parchment paper, but I recommend using liners for a clean, easy finish.
Step-by-Step Instructions
Now that we’ve gathered all the ingredients, it’s time to get baking! Let’s break the process into easy-to-follow steps to ensure a smooth and enjoyable experience.
Step 1: Prepare the Crust
Preheat your oven to 325°F (162°C) and line a cupcake pan with cupcake liners. This will prevent the cheesecakes from sticking to the pan and help with easy removal later on.
In a medium-sized bowl, combine the vanilla wafer cookie crumbs, sugar, cinnamon, and melted butter. Stir everything together until the mixture is well combined, and the crumbs are fully coated with butter. Divide the mixture evenly among the cupcake liners—about 2 tablespoons per cup—and press it down firmly to form a base. I like to use the back of a spoon to press the mixture down evenly.
Bake the crusts in the preheated oven for 5 minutes, just enough to set them. Once done, remove the pan from the oven and set it aside to cool while you prepare the filling. This short baking time ensures that the crust has a firm foundation for the cheesecake filling.
Step 2: Make the Cheesecake Filling
Reduce the oven temperature to 300°F (148°C), as cheesecakes bake better at a slightly lower temperature to avoid cracks.
In a large mixing bowl, beat together the cream cheese, sugar, flour, and ground cinnamon. Use a low-speed setting on your mixer to avoid incorporating too much air into the batter, which can cause cracks while baking. Scrape down the sides of the bowl to make sure everything is evenly combined.
Next, add the sour cream and vanilla extract, and continue mixing on low speed until everything is smooth and well incorporated. The sour cream gives the cheesecake its creamy texture, while the vanilla adds a subtle richness.
Add the eggs one at a time, beating slowly and scraping the sides of the bowl after each addition. This ensures your batter stays smooth and avoids overmixing. Once everything is combined, set the filling aside.
Step 3: Add the Cinnamon Sugar Swirls
In a small bowl, mix together the cinnamon and sugar for the cinnamon sugar filling. Now it’s time to assemble your mini cheesecakes!
Take each cupcake liner filled with crust and scoop about 1/2 to 3/4 of a tablespoon of cheesecake filling into each one. Next, sprinkle some cinnamon sugar over the filling, making sure to fully cover it. Repeat this process two more times, layering the filling and cinnamon sugar until each cup is almost full. You’ll end up with three layers of delicious cinnamon sugar filling.
Step 4: Bake the Mini Cheesecakes
Place the cheesecake-filled cupcake pan into the oven and bake for 15-17 minutes. Keep a close eye on them to ensure they don’t overbake. Once the cheesecakes are done, turn off the oven and leave the door closed for another 5 minutes. This helps the cheesecakes set while preventing any sudden temperature changes that could cause cracking.
After the 5 minutes are up, crack the oven door slightly and let the cheesecakes cool for about 15-20 minutes. This gradual cooling process will help them maintain their structure. Once they’ve cooled down a bit, transfer them to the fridge to finish cooling completely.
Step 5: Prepare the Frosting
While the cheesecakes are cooling, it’s time to make the frosting. In a small bowl, beat the butter until smooth and creamy. Add the powdered sugar, vanilla extract, and a touch of milk, and mix until everything is smooth and well combined. The frosting should have a slightly thick consistency, perfect for piping.
Transfer the frosting to a piping bag fitted with a small round tip, or use a ziplock bag with the corner cut off for a DIY option. Pipe a swirl of frosting on top of each cheesecake for a beautiful finish.
Step 6: Chill and Serve
Once the cheesecakes are fully frosted, place them back in the fridge to chill until you’re ready to serve. These Mini Cinnamon Roll Cheesecakes are best served chilled, and they make for a great dessert after dinner or a sweet treat to enjoy with coffee in the morning.
Beginner Tips and Notes
- Avoid Overmixing: When preparing the cheesecake filling, mix the ingredients on low speed to avoid incorporating too much air, which can lead to cracks in the cheesecake during baking.
- Eggs: When adding eggs, make sure to beat them in one at a time. This helps prevent the batter from becoming too runny or lumpy.
- Cinnamon Sugar Layers: Don’t skimp on the cinnamon sugar—each layer adds a delicious swirl of flavor that’s key to making these cheesecakes unique.
- Baking Time: Check the cheesecakes around 15 minutes, and remember that they’ll continue to cook as they cool. They should be just set in the center when they’re done.
Serving Suggestions
These Mini Cinnamon Roll Cheesecakes are rich and flavorful on their own, but you can elevate the experience with a few thoughtful sides or drinks. Pair them with a cup of freshly brewed coffee or a hot chocolate for a cozy dessert experience. If you want to serve them as part of a brunch spread, consider adding a fruit salad or a light, refreshing yogurt parfait to balance out the richness of the cheesecake.

Leftovers and Storage
If you have any leftovers (though I doubt you will!), store them in an airtight container in the fridge. They’ll stay fresh for up to 3 days, but they’re best enjoyed within the first day or two for optimal texture and flavor.
Conclusion
Now that you know how to make these Mini Cinnamon Roll Cheesecakes, it’s time to give them a try! I hope this recipe inspires you to step into the kitchen and get baking. Don’t forget to share your creations with me—I’d love to hear how your cheesecakes turned out! Leave a comment below or tag me on social media to let me know. Happy baking, and enjoy these delicious little treats that combine the best of two classic desserts!


