Baking is often seen as an intimidating task for beginner cooks, but once you get the hang of it, there’s nothing quite as satisfying as pulling a batch of freshly baked goods out of the oven. If you’re looking for a pastry that is both indulgent and easy to make, the cruffin is an excellent choice. This delectable treat combines the buttery flakiness of a croissant with the sweet, comforting flavors of a cinnamon roll, resulting in a pastry that’s simply irresistible.

Mastering the Art of Cruffins: A Beginner’s Guide to Perfect Pastries
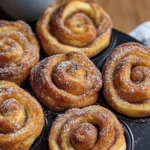
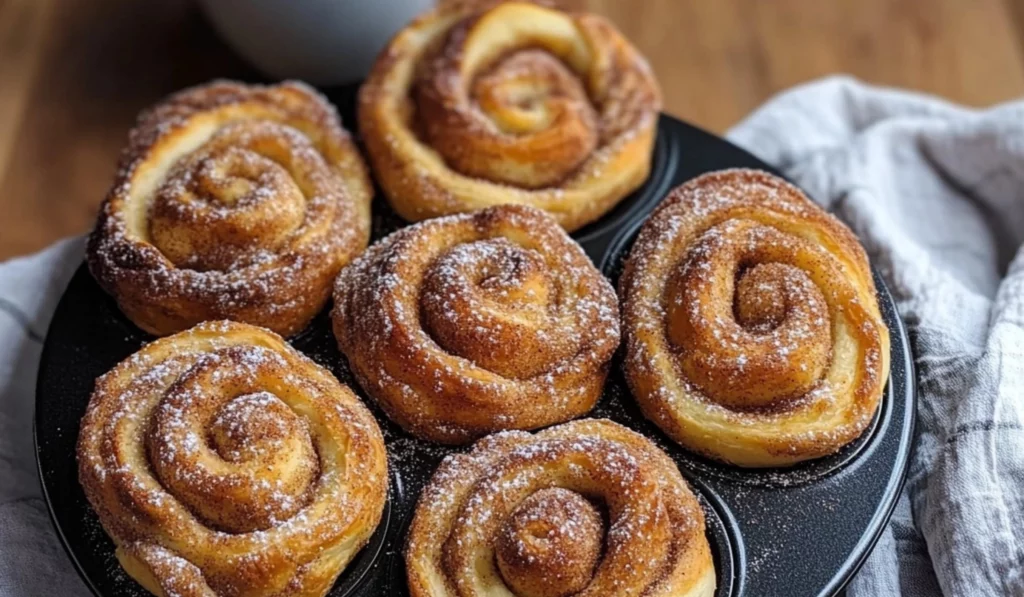
If you’re someone who enjoys a good pastry but doesn’t want to spend hours in the kitchen, then cruffins are about to become your new best friend. Imagine the buttery flakiness of a croissant, combined with the warm, comforting sweetness of cinnamon rolls, all packed into a muffin-shaped treat. Sounds delicious, right? Cruffins are the perfect answer to your baking cravings. These sweet pastries are easy to make, packed with flavor, and look impressive enough to wow your friends and family at any gathering.
- Prep Time: 20 minutes
- Cook Time: 20 minutes
- Total Time: 40 minutes
- Yield: 12 cruffins 1x
- Category: Breakfast, Dessert, Snack
- Method: Baking
- Cuisine: American
- Diet: Vegetarian
Ingredients
- 3 tubes (8 ounces each) of refrigerated crescent roll dough sheets
- 6 tablespoons unsalted butter, softened (divided)
- 1 cup (200 g) granulated sugar
- 1 tablespoon ground cinnamon
Instructions
1. Preheat the Oven and Prepare the Muffin Tin:
Begin by preheating your oven to 350°F (175°C). While the oven is heating up, prepare your muffin tin by spraying it with nonstick cooking spray. This ensures that your cruffins will come out easily after baking. You will need a standard 12-cup muffin tin for this recipe.
2. Roll Out the Crescent Roll Dough:
Place the crescent roll dough sheets on a lightly floured surface. Using a rolling pin, roll each dough sheet into a 12×16-inch rectangle. If you’re using perforated dough, make sure to pinch the seams to ensure the dough forms a continuous sheet without any holes. The goal here is to create a uniform, rectangular shape for even rolling.
3. Spread the Butter:
Once your dough is rolled out, spread 2 tablespoons of softened butter evenly over each dough sheet. The butter will give the cruffins their signature flakiness, so don’t skimp on this step. Make sure the butter is spread all the way to the edges of the dough.
4. Prepare the Cinnamon-Sugar Mixture:
In a small bowl, whisk together the granulated sugar and ground cinnamon. This mixture will provide the signature flavor of the cruffins. Sprinkle about ¼ cup of the cinnamon-sugar mixture evenly over each buttered dough sheet. Use your hands to gently press the cinnamon-sugar into the dough to ensure it sticks.
5. Roll the Dough:
Starting at one long edge of the dough, tightly roll the sheet into a log. This tight roll will help create the flaky layers that make cruffins so irresistible. After rolling up the dough, slice the log in half, creating two shorter logs. Then, slice each of those logs in half lengthwise. This will give you four shorter sections of dough per sheet. Repeat the process for the remaining two sheets of dough.
6. Form the Cruffins:
Now it’s time to shape the cruffins! Working one section of dough at a time, roll it tightly into a cinnamon roll shape, ensuring that the cut sides face outward. This will create the beautiful cinnamon swirls visible in the finished pastry. Once shaped, place the cruffin into the prepared muffin tin. Repeat this process with the remaining dough sections, arranging them neatly in the muffin tin.
7. Bake the Cruffins:
Place the muffin tin into the preheated oven and bake the cruffins for 18-20 minutes. Keep an eye on them during the last few minutes of baking, as they should be golden brown and slightly puffed up. The cruffins are done when they are crispy on the outside and cooked through on the inside.
8. Cool and Coat with Cinnamon-Sugar:
Once the cruffins are done baking, remove them from the oven and let them cool in the tin for a few minutes. While they’re still warm, roll each cruffin in the remaining cinnamon-sugar mixture. This final step ensures the cruffins are coated in a sweet, crunchy layer that adds to their irresistible flavor.
Notes
- Work Quickly with Butter: To avoid the butter melting into the dough before you’re finished, make sure it’s softened but not overly soft. It should be spreadable but still firm enough to stay in place as you work.
- Seal the Dough: If you’re using perforated crescent roll dough, be sure to pinch the seams shut so that the dough doesn’t unroll during baking.
- Don’t Overfill the Muffin Tin: Make sure the cruffins aren’t overcrowded in the muffin tin. They need a bit of space to puff up and bake evenly.
I first came across cruffins while browsing through a bakery one morning, lured in by the sweet smell of freshly baked pastries. I had never seen anything quite like it—golden, flaky layers with swirls of cinnamon and sugar, baked into muffin tins for a perfect handheld treat. Intrigued, I decided to try making them at home. To my delight, cruffins are much easier to make than they look, and they quickly became a favorite recipe in my baking rotation. They’re perfect for anyone, regardless of your skill level in the kitchen, and this guide will walk you through every step, from preparation to serving, to ensure you get perfect cruffins every time.
If you’re a beginner looking for a simple yet impressive recipe, the cruffin is an excellent choice. With just a handful of ingredients, you can create a pastry that looks and tastes like it came straight from a high-end bakery. The best part? The process is incredibly beginner-friendly, making it a great starting point for anyone wanting to explore the world of baking. Whether you’re preparing for a family breakfast, an afternoon tea, or a weekend brunch, these cruffins will wow your guests and elevate any occasion.
In this article, we’ll explore the entire process of making cruffins, from selecting ingredients to the final moments of enjoying these golden, flaky delights. Let’s dive in!
Ingredients and Preparation
When it comes to baking, the simplicity of the ingredients is often what makes a recipe both approachable and enjoyable. The beauty of cruffins lies in the fact that you only need a few basic items to make them, many of which you likely already have in your kitchen. Let’s break down the ingredients you’ll need:
Ingredients:
- 3 tubes (8 ounces each) of refrigerated crescent roll dough sheets
- 6 tablespoons unsalted butter, softened (divided)
- 1 cup (200 g) granulated sugar
- 1 tablespoon ground cinnamon
These simple ingredients come together to create the rich, buttery layers of the cruffin, paired with the warm, comforting flavor of cinnamon and sugar. If you want to add a little extra flair to your cruffins, you can try some alternative ingredients, allowing you to customize the recipe to your preferences.
Alternative Ingredients and Suggestions:
- Butter Substitutes: If you’re looking for a dairy-free version, you can swap the unsalted butter for a plant-based alternative like vegan butter or even coconut oil. Both will work well, though coconut oil might add a slight coconut flavor, which can be delightful with the cinnamon.
- Sugar Alternatives: For those who prefer a lower-sugar option, feel free to use coconut sugar or a sugar substitute like stevia or monk fruit. These alternatives may slightly alter the taste and texture, but they still provide a sweet, satisfying flavor.
- Cinnamon Variations: While cinnamon is the star of this recipe, you can add a pinch of nutmeg or cardamom to enhance the flavor. A dash of vanilla extract mixed into the cinnamon-sugar filling could also lend a delicious aroma and depth of flavor.
- Other Fillings: If you want to get more creative, you can add a layer of fruit preserves, chocolate chips, or even cream cheese filling between the layers for an extra indulgent treat.
With these alternative suggestions, you can experiment and make this recipe your own. But don’t worry—if you stick with the core ingredients, you’ll have a delicious result!
Step-by-Step Instructions
Now that you have all the ingredients, it’s time to get started on the fun part: assembling your cruffins! Don’t worry; even though these pastries may look fancy, they’re incredibly easy to make. Just follow these simple steps, and you’ll be enjoying freshly baked cruffins in no time.
1. Preheat the Oven and Prepare the Muffin Tin:
Begin by preheating your oven to 350°F (175°C). While the oven is heating up, prepare your muffin tin by spraying it with nonstick cooking spray. This ensures that your cruffins will come out easily after baking. You will need a standard 12-cup muffin tin for this recipe.
2. Roll Out the Crescent Roll Dough:
Place the crescent roll dough sheets on a lightly floured surface. Using a rolling pin, roll each dough sheet into a 12×16-inch rectangle. If you’re using perforated dough, make sure to pinch the seams to ensure the dough forms a continuous sheet without any holes. The goal here is to create a uniform, rectangular shape for even rolling.
3. Spread the Butter:
Once your dough is rolled out, spread 2 tablespoons of softened butter evenly over each dough sheet. The butter will give the cruffins their signature flakiness, so don’t skimp on this step. Make sure the butter is spread all the way to the edges of the dough.
4. Prepare the Cinnamon-Sugar Mixture:
In a small bowl, whisk together the granulated sugar and ground cinnamon. This mixture will provide the signature flavor of the cruffins. Sprinkle about ¼ cup of the cinnamon-sugar mixture evenly over each buttered dough sheet. Use your hands to gently press the cinnamon-sugar into the dough to ensure it sticks.
5. Roll the Dough:
Starting at one long edge of the dough, tightly roll the sheet into a log. This tight roll will help create the flaky layers that make cruffins so irresistible. After rolling up the dough, slice the log in half, creating two shorter logs. Then, slice each of those logs in half lengthwise. This will give you four shorter sections of dough per sheet. Repeat the process for the remaining two sheets of dough.
6. Form the Cruffins:
Now it’s time to shape the cruffins! Working one section of dough at a time, roll it tightly into a cinnamon roll shape, ensuring that the cut sides face outward. This will create the beautiful cinnamon swirls visible in the finished pastry. Once shaped, place the cruffin into the prepared muffin tin. Repeat this process with the remaining dough sections, arranging them neatly in the muffin tin.
7. Bake the Cruffins:
Place the muffin tin into the preheated oven and bake the cruffins for 18-20 minutes. Keep an eye on them during the last few minutes of baking, as they should be golden brown and slightly puffed up. The cruffins are done when they are crispy on the outside and cooked through on the inside.
8. Cool and Coat with Cinnamon-Sugar:
Once the cruffins are done baking, remove them from the oven and let them cool in the tin for a few minutes. While they’re still warm, roll each cruffin in the remaining cinnamon-sugar mixture. This final step ensures the cruffins are coated in a sweet, crunchy layer that adds to their irresistible flavor.
Beginner Tips and Notes
For beginners, baking can sometimes feel like a challenge, but with a few helpful tips, you can avoid common pitfalls and achieve the perfect cruffins.
Tips for Perfect Cruffins:
- Work Quickly with Butter: To avoid the butter melting into the dough before you’re finished, make sure it’s softened but not overly soft. It should be spreadable but still firm enough to stay in place as you work.
- Seal the Dough: If you’re using perforated crescent roll dough, be sure to pinch the seams shut so that the dough doesn’t unroll during baking.
- Don’t Overfill the Muffin Tin: Make sure the cruffins aren’t overcrowded in the muffin tin. They need a bit of space to puff up and bake evenly.
Troubleshooting:
- Dough Not Rolling Easily: If the dough feels sticky, dust it lightly with flour. If it’s too stiff, allow it to sit at room temperature for a few minutes before rolling.
- Overbaking: Keep a close eye on the cruffins towards the end of the baking time. If they’re getting too brown too quickly, you can tent the muffin tin with aluminum foil to prevent further browning.
Serving Suggestions
Cruffins are incredibly versatile and can be served in a variety of ways. Here are a few ideas for how to enjoy them:
- For Breakfast or Brunch: Serve your cruffins with a side of fresh fruit, such as sliced strawberries, raspberries, or a citrus salad. A cup of coffee or tea pairs perfectly with the sweet, buttery cruffins.
- For Dessert: To take your cruffins to the next level, drizzle them with icing or a simple glaze made from powdered sugar and milk. A scoop of vanilla ice cream on the side would be a perfect addition!
- For Afternoon Tea: Serve these alongside finger sandwiches, scones, or other small pastries for a lovely afternoon tea experience. Pair it with your favorite tea blend for a delightful treat.
Storage Tips
Cruffins are best enjoyed fresh, but if you happen to have leftovers, here are some storage tips to keep them fresh:
- Room Temperature: Store your cruffins in an airtight container at room temperature for up to two days. Reheat them in the oven at 350°F (175°C) for a few minutes to restore their flaky texture.
- Refrigeration: If you need to store them for longer, place them in an airtight container in the refrigerator for up to five days. Reheat before serving to avoid sogginess.
- Freezing: Cruffins can also be frozen for later use. After baking, allow them to cool completely before wrapping them in plastic wrap and placing them in a freezer bag. To enjoy, simply thaw at room temperature and reheat in the oven.

Conclusion
Baking cruffins is a fun and rewarding experience, and with just a few basic ingredients and steps, anyone can make these flaky, cinnamon-sugar-filled treats. Whether you’re new to baking or looking to try something different, cruffins are the perfect choice. They offer all the flavor of a classic cinnamon roll, with the delightful texture of a croissant, making them a pastry that everyone will love. Try this recipe today, and don’t be afraid to experiment with different fillings or flavors. Once you master cruffins, they’ll become a staple in your baking repertoire!


