When I first tried Magnolia Bakery’s banana pudding, it was like I had been transported to dessert heaven. The combination of creamy pudding, sweet bananas, and crunchy Nilla wafers was an absolute game-changer for me. I remember the first time I tasted it—I was at a family gathering, and everyone couldn’t stop talking about how delicious it was. I thought to myself, “I need to make this at home,” and so I did. And now, I’m excited to share this easy-to-make version of the famous Magnolia Bakery Banana Pudding with you!

Magnolia Bakery Banana Pudding Recipe: A Beginner-Friendly Guide to the Perfect Comfort Dessert

Magnolia Bakery’s banana pudding is the perfect dessert for beginners—simple, delicious, and loved by everyone. With creamy vanilla pudding, sweet bananas, and crunchy Nilla Wafers, this easy recipe requires no complicated techniques. It’s a quick, no-fuss treat that will impress your guests and satisfy your sweet tooth. Whether you’re new to baking or just looking for a simple dessert, this is your go-to recipe!
- Prep Time: 20 minutes
- Cook Time: 0 minutes
- Total Time: 8 hours 20 minutes
- Yield: 12 servings 1x
- Category: Dessert
- Method: Chilled, No-bake
- Cuisine: American
- Diet: Vegetarian
Ingredients
For the Pudding:
- 1 (14 oz) can sweetened condensed milk
- 1 ¼ cups (297 ml) ice-cold water
- 1 (3.4 oz) box instant vanilla pudding mix
- 3 cups (704 ml) heavy whipping cream
- 1 (12 oz) box Nilla Wafers
- 4 cups sliced bananas (about 5–6 bananas)
Instructions
Step 1: Make the Pudding Mixture
In a medium-sized bowl, start by combining the sweetened condensed milk, ice-cold water, and instant vanilla pudding mix. Whisk these ingredients together until fully combined and smooth. If you prefer, you can use a hand mixer for this step. The goal is to get the mixture to be thick and creamy, which should take about 2 minutes.
Once the pudding is mixed and smooth, cover the bowl with plastic wrap or a lid and place it in the fridge. Allow it to chill for at least 3-4 hours, or preferably overnight. This resting time will help the pudding set and thicken to the perfect consistency.
Step 2: Whip the Cream
While the pudding is chilling, it’s time to whip the cream. In a large mixing bowl, pour the heavy whipping cream. Using either a stand mixer or a hand mixer, beat the whipping cream on high speed until stiff peaks form. This will take about 3-5 minutes, depending on the speed of your mixer.
Tip: Be careful not to overwhip the cream. If you do, the cream can turn into butter, so stop beating as soon as the cream holds its shape when you lift the beaters.
Step 3: Combine the Pudding and Whipped Cream
Once the pudding has chilled and set, it’s time to combine the whipped cream with the pudding mixture. Gently fold the whipped cream into the pudding using a rubber spatula. You want to fold the two together carefully, as this will help keep the light and airy texture of the whipped cream intact.
Be sure to mix until everything is combined, but don’t overmix. The goal is to have a fluffy, creamy pudding mixture that’s not too dense.
Step 4: Assemble the Banana Pudding
Now comes the fun part—assembling the banana pudding! Start by placing a layer of Nilla Wafers in the bottom of a large, wide-bottomed bowl. Arrange them evenly to cover the base.
Next, add a layer of sliced bananas on top of the wafers. Be generous with the bananas, as they are the star of this dessert. Once the bananas are in place, spoon a generous amount of the pudding mixture on top, spreading it evenly with a spatula.
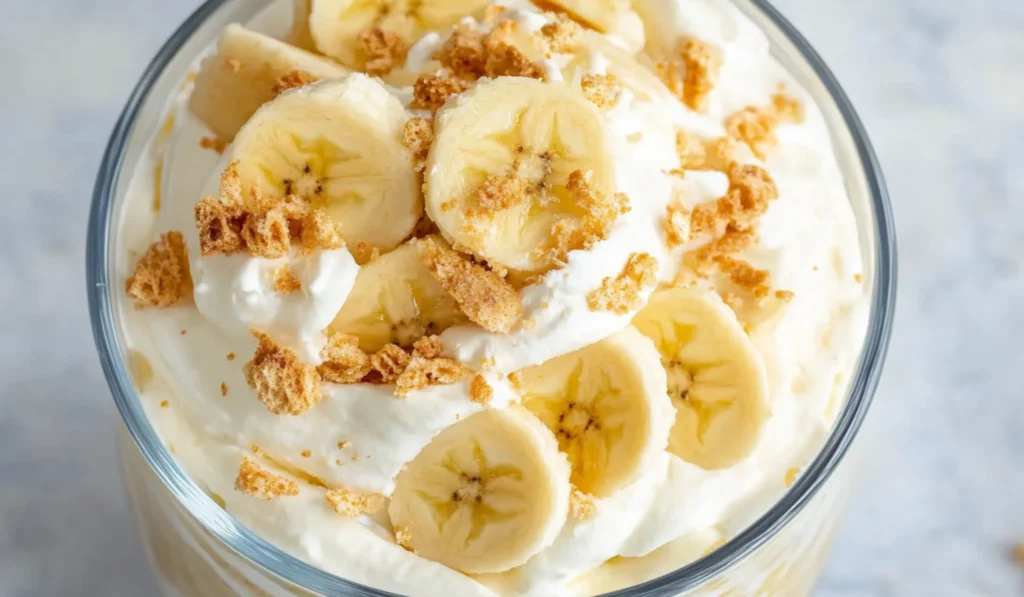
Repeat this layering process two more times, making sure to end with a layer of pudding on top. Garnish the top with some crushed Nilla Wafers for that classic touch.
Step 5: Chill the Pudding
Once your pudding is layered, cover the bowl tightly with plastic wrap and place it in the fridge. Let it chill for at least 4 hours, though you can chill it for up to 8 hours for the best results. The longer it sits, the better the flavors will meld together, and the texture will improve.
Step 6: Serve and Enjoy!
Once the banana pudding is chilled and ready to go, it’s time to serve! Spoon generous portions into bowls and enjoy the creamy, banana-filled goodness. If you like, you can top the pudding with a bit more whipped cream or extra crushed Nilla Wafers.
Notes
- Whipping the Cream: If you’re new to whipping cream, be sure to use a chilled bowl and beaters to help the cream whip faster and more easily.
- Make Ahead: This banana pudding actually gets better as it sits, so don’t be afraid to make it the day before your gathering. This will give the pudding time to thicken and develop more flavor.
- Banana Slices: To prevent the bananas from browning too quickly, you can sprinkle a small amount of lemon juice over them before layering. This will help preserve their color and freshness.
- Individual Servings: If you prefer to serve individual portions, you can layer the pudding into mason jars or small cups for a fun presentation. This makes it easy for guests to grab and go, and it looks cute too!
This banana pudding recipe is not only delicious but also perfect for beginners. If you’re someone who is just starting out in the kitchen or if you simply want a dessert that’s quick, simple, and satisfying, this recipe is for you. The beauty of banana pudding is that it’s incredibly easy to put together with a few simple ingredients, and it doesn’t require any advanced cooking skills. All you need to do is layer some ingredients, let it chill, and voila—you have a comforting and impressive dessert that everyone will love.
Whether you’re preparing for a casual family dinner or a special occasion, this Magnolia Bakery banana pudding recipe is guaranteed to make you look like a kitchen pro! So, let’s dive in and learn how to create this iconic dessert from scratch.
Why This Recipe is Perfect for Beginners
Banana pudding is a classic Southern dessert that has been passed down through generations, and it’s loved by so many for good reason. What makes this recipe ideal for beginners is that it’s easy to follow and doesn’t require any advanced cooking techniques or specialty tools. The pudding mixture is made with instant pudding mix, which means you don’t have to worry about cooking the pudding from scratch, and the whipped cream adds a light and airy texture without any complicated steps.
The other reason this recipe is beginner-friendly is that it requires very little prep time. You can have it ready in just 20 minutes, and all you need to do is assemble the layers and let it chill for a few hours. There’s no baking or cooking involved (besides the whipping of the cream), which makes it perfect for anyone new to cooking or anyone who simply wants to make something that’s easy but still impressive.
Ingredients and Preparation
Now that we know why this banana pudding is so great for beginners, let’s take a closer look at the ingredients you’ll need to make this delightful dessert. These ingredients are simple, straightforward, and easy to find at your local grocery store.
For the Pudding:
- 1 (14 oz) can sweetened condensed milk
- 1 ¼ cups (297 ml) ice-cold water
- 1 (3.4 oz) box instant vanilla pudding mix
- 3 cups (704 ml) heavy whipping cream
- 1 (12 oz) box Nilla Wafers
- 4 cups sliced bananas (about 5-6 bananas)
Alternative Ingredients and Substitutions:
If you want to make a few adjustments to the ingredients, here are some substitutions and alternatives you can try:
- Whipped Cream Substitute: If you prefer a lighter version of this dessert, you can use a lighter whipped cream option, such as light whipped cream or non-dairy whipped cream made from coconut cream. This will cut down on calories while still keeping the dessert delicious.
- Banana Substitute: For a fun twist, you can swap the bananas for other fruits like strawberries or peaches. These fruits will add a refreshing and slightly tangy flavor that complements the creamy pudding.
- Nilla Wafers Alternative: If you can’t find Nilla Wafers, you can use any other type of plain vanilla wafer cookie, or even graham crackers. The flavor might change slightly, but the texture will still hold up in the layers.
- Pudding Mix Swap: Instead of using vanilla pudding, you could try banana cream pudding mix for an extra boost of banana flavor. If you prefer a more decadent dessert, you could use coconut cream pudding mix to add a tropical flair to the banana pudding.
Step-by-Step Instructions
Now that we’ve gathered all of our ingredients and prepared any possible substitutions, let’s break down the steps for creating this mouthwatering banana pudding. I’ll walk you through it step by step, so even if you’re a beginner, you’ll feel confident as you go along.
Step 1: Make the Pudding Mixture
In a medium-sized bowl, start by combining the sweetened condensed milk, ice-cold water, and instant vanilla pudding mix. Whisk these ingredients together until fully combined and smooth. If you prefer, you can use a hand mixer for this step. The goal is to get the mixture to be thick and creamy, which should take about 2 minutes.
Once the pudding is mixed and smooth, cover the bowl with plastic wrap or a lid and place it in the fridge. Allow it to chill for at least 3-4 hours, or preferably overnight. This resting time will help the pudding set and thicken to the perfect consistency.
Step 2: Whip the Cream
While the pudding is chilling, it’s time to whip the cream. In a large mixing bowl, pour the heavy whipping cream. Using either a stand mixer or a hand mixer, beat the whipping cream on high speed until stiff peaks form. This will take about 3-5 minutes, depending on the speed of your mixer.
Tip: Be careful not to overwhip the cream. If you do, the cream can turn into butter, so stop beating as soon as the cream holds its shape when you lift the beaters.
Step 3: Combine the Pudding and Whipped Cream
Once the pudding has chilled and set, it’s time to combine the whipped cream with the pudding mixture. Gently fold the whipped cream into the pudding using a rubber spatula. You want to fold the two together carefully, as this will help keep the light and airy texture of the whipped cream intact.
Be sure to mix until everything is combined, but don’t overmix. The goal is to have a fluffy, creamy pudding mixture that’s not too dense.
Step 4: Assemble the Banana Pudding
Now comes the fun part—assembling the banana pudding! Start by placing a layer of Nilla Wafers in the bottom of a large, wide-bottomed bowl. Arrange them evenly to cover the base.
Next, add a layer of sliced bananas on top of the wafers. Be generous with the bananas, as they are the star of this dessert. Once the bananas are in place, spoon a generous amount of the pudding mixture on top, spreading it evenly with a spatula.
Repeat this layering process two more times, making sure to end with a layer of pudding on top. Garnish the top with some crushed Nilla Wafers for that classic touch.
Step 5: Chill the Pudding
Once your pudding is layered, cover the bowl tightly with plastic wrap and place it in the fridge. Let it chill for at least 4 hours, though you can chill it for up to 8 hours for the best results. The longer it sits, the better the flavors will meld together, and the texture will improve.
Step 6: Serve and Enjoy!
Once the banana pudding is chilled and ready to go, it’s time to serve! Spoon generous portions into bowls and enjoy the creamy, banana-filled goodness. If you like, you can top the pudding with a bit more whipped cream or extra crushed Nilla Wafers.
Beginner Tips and Notes
- Whipping the Cream: If you’re new to whipping cream, be sure to use a chilled bowl and beaters to help the cream whip faster and more easily.
- Make Ahead: This banana pudding actually gets better as it sits, so don’t be afraid to make it the day before your gathering. This will give the pudding time to thicken and develop more flavor.
- Banana Slices: To prevent the bananas from browning too quickly, you can sprinkle a small amount of lemon juice over them before layering. This will help preserve their color and freshness.
- Individual Servings: If you prefer to serve individual portions, you can layer the pudding into mason jars or small cups for a fun presentation. This makes it easy for guests to grab and go, and it looks cute too!
Serving Suggestions
While this banana pudding is absolutely perfect on its own, here are some ways to elevate the dessert even further:
- Toppings: Add a dollop of whipped cream, a drizzle of caramel sauce, or even a sprinkle of cinnamon or cocoa powder for extra flavor and visual appeal.
- Side Dishes: If you’re serving this banana pudding as part of a larger meal, consider pairing it with light side dishes like fresh fruit salad or roasted vegetables. The contrast of the refreshing fruit and the rich dessert will be a nice balance.
- Celebrations: Banana pudding is great for family gatherings, picnics, and barbecues. It’s an easy and delicious dessert that’s always a hit at parties or casual get-togethers.
Storage Tips for Leftovers
If you happen to have any leftover banana pudding (which is unlikely), you can store it in an airtight container in the refrigerator for up to 2 days. Keep in mind that the bananas may soften and brown slightly over time, but the flavor will still be just as delicious. For best results, try to enjoy the pudding within 24 hours of making it.

Conclusion
This Magnolia Bakery Banana Pudding recipe is the perfect beginner-friendly dessert that will impress your friends and family. It’s quick, easy, and so delicious! With just a few simple steps, you can create a comforting dessert that will bring smiles to everyone at the table. Whether you’re new to cooking or an experienced chef, this recipe is a great way to make something special without a lot of effort. Give it a try, and let me know how it turns out—I can’t wait to hear your thoughts!


