
There’s something magical about food that brings us closer to different cultures. For me, one of the most unforgettable culinary experiences was tasting a slice of Melopita, a traditional Greek honey and cheese pie, while on vacation in Sifnos. I remember sitting by the sea with my family, surrounded by the scent of fresh herbs and warm honey. When we tasted that pie, with its soft, creamy texture and golden honey drizzle, it felt like a secret recipe passed down through generations—a true taste of Greece. The best part about it? It was deceptively simple, requiring no crust, no complicated steps, and no need for expensive equipment. From that moment on, I was hooked on Melopita. Now, I’m excited to share this easy recipe with you, perfect for beginner bakers who want to bring a little bit of Greek magic to their kitchens.
Discover the Simplicity and Delight of Melopita: A Crustless Greek Honey & Cheese Pie

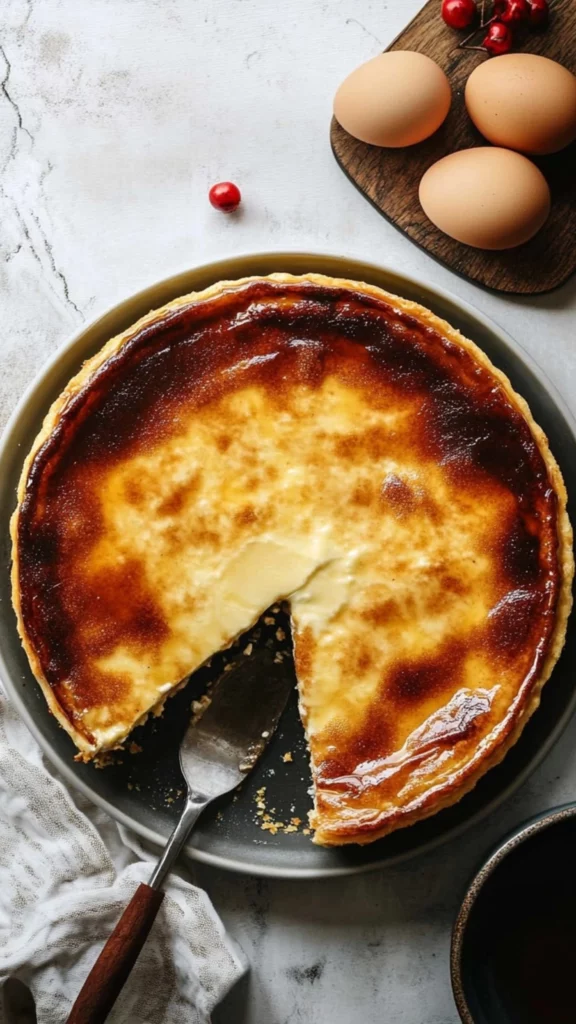
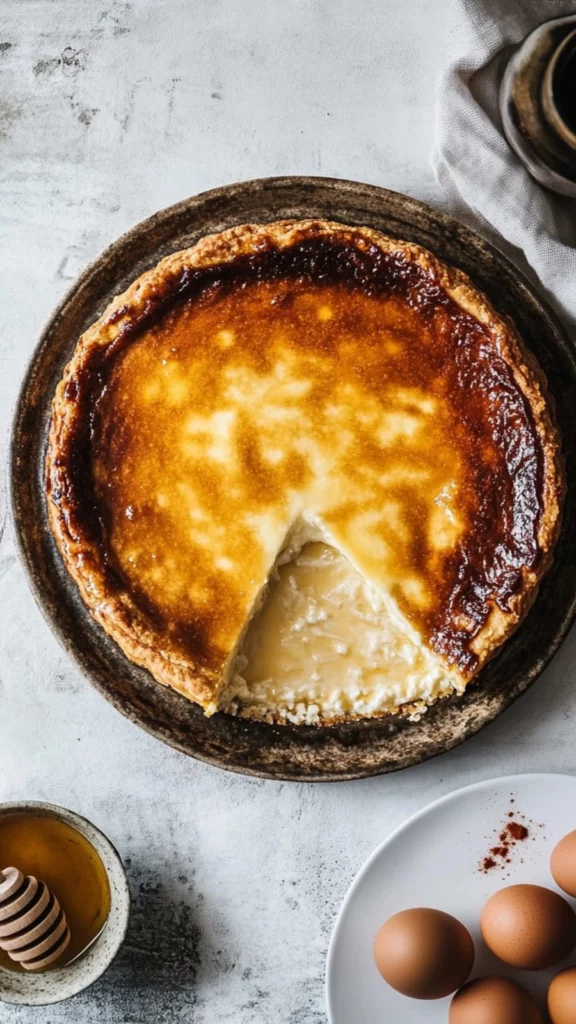
There’s something irresistibly special about a dessert that not only tastes amazing but also brings a touch of tradition and comfort into your kitchen. That’s exactly what Melopita, the classic Greek honey and cheese pie, does with every bite. Picture this: A soft, velvety pie filled with creamy ricotta, a subtle sweetness from honey, and just the right hint of cinnamon. It’s the kind of dessert that makes you pause and savor the moment, no complicated steps involved.
- Prep Time: 10 minutes
- Cook Time: 45 minutes
- Total Time: 55 minutes
- Yield: 8 servings 1x
- Category: Dessert
- Method: Baking
- Cuisine: Greek
- Diet: Vegetarian
Ingredients
Main Ingredients:
- 600 grams ricotta cheese (fresh): Ricotta is the heart of this pie. It provides that creamy, soft texture that makes Melopita so delicious. Fresh ricotta will give you the best results, but if you can’t find it, you can substitute it with cottage cheese or a similar soft cheese.
- 100 ml honey: Honey is the key to this pie’s sweet flavor and is used both in the filling and as a drizzle on top. Local honey can add a unique touch, giving the pie an extra layer of complexity.
- 3 eggs: Eggs are essential for binding the ingredients together and giving the pie its rich, custard-like consistency.
- 1 tablespoon cornstarch (corn flour): Cornstarch helps thicken the filling without the need for a crust, making the texture smooth and firm enough to hold together.
- 1 tablespoon vanilla extract: This enhances the flavor and adds a warm, aromatic touch to the pie’s sweetness.
For the Drizzle:
- 60 ml honey: For extra sweetness and a glossy finish, drizzle additional honey over the top once the pie has cooled.
- 1 tablespoon ground cinnamon: This is the final touch that adds a little spice and fragrance. Cinnamon pairs beautifully with the honey, rounding out the flavor profile.
Instructions
Step 1: Preheat the Oven and Prepare the Pan
Start by preheating your oven to 180°C (350°F). You want the oven to be nice and hot when your Melopita is ready to bake. Next, grease a 20cm (8-inch) springform pan. You can use butter or non-stick spray, or line the bottom of the pan with parchment paper for extra ease when removing the pie later.
Step 2: Whisk Together the Ingredients
In a large mixing bowl, add your ricotta cheese, honey, eggs, cornstarch, and vanilla extract. Use a whisk or a spoon to combine the ingredients, making sure the mixture is smooth and free of any lumps. Since you’re working with ricotta, it’s especially important to whisk thoroughly, as this ensures a velvety texture in the final pie. No need for a stand mixer here—your hands (and a simple whisk) are all you need!
Step 3: Pour the Mixture Into the Pan
Once the ingredients are well combined, pour the mixture into your prepared springform pan. Use a spatula to spread the mixture evenly across the bottom of the pan, making sure it fills the edges and sits level. This will ensure an even bake.
Step 4: Bake the Melopita
Place your pan in the preheated oven and bake for 45-50 minutes. The pie should begin to set, with the top turning golden brown. The key to knowing when your Melopita is done is checking the center. Gently shake the pan. If the center wobbles, it needs more time. If it feels firm, it’s ready! If you prefer, you can test it by inserting a toothpick into the center—if it comes out clean, you’re good to go.
Step 5: Cool and Remove the Pie
Once the Melopita is done baking, allow it to cool in the pan for about 5 minutes. This brief cooling period helps the pie set and makes it easier to remove from the pan. After this time, carefully release the sides of the springform pan and transfer the pie to a wire rack to cool completely.
Step 6: Drizzle with Honey and Cinnamon
After your Melopita has cooled, drizzle it with an additional ¼ cup of honey. The honey will soak into the surface, adding a lovely sweet layer. Finish by dusting the pie with cinnamon, which complements the honey and ricotta beautifully. This simple topping makes a world of difference, enhancing the flavors of the pie with an aromatic touch.
Notes
- Fresh Fruit: A handful of fresh berries or citrus fruits makes a refreshing and tart contrast to the creamy sweetness of the pie.
- Greek Yogurt: A dollop of Greek yogurt on the side can add a lovely creaminess and slight tang that complements the sweetness of the pie.
- Nuts: Chopped nuts like pistachios or almonds provide a crunchy texture that contrasts nicely with the soft pie.
Whether you’re new to baking or simply looking for a straightforward dessert that doesn’t compromise on flavor, Melopita is a fantastic option. It’s quick, uncomplicated, and doesn’t require any special skills. Plus, the combination of sweet honey and creamy cheese makes it a crowd-pleaser every time. It’s the kind of dessert that feels luxurious without being intimidating, and it’s a great way to start building your confidence in the kitchen. So, let’s dive into this Greek-inspired dessert that will surely win over your family and friends.
The Ingredients: A Simplicity That Delivers Flavor
Melopita’s beauty lies in its simplicity. You don’t need a long list of ingredients to achieve the perfect balance of flavors. Here’s a breakdown of what you’ll need, along with a few alternatives to suit your preferences or dietary needs.
Main Ingredients:
- 600 grams ricotta cheese (fresh): Ricotta is the heart of this pie. It provides that creamy, soft texture that makes Melopita so delicious. Fresh ricotta will give you the best results, but if you can’t find it, you can substitute it with cottage cheese or a similar soft cheese.
- 100 ml honey: Honey is the key to this pie’s sweet flavor and is used both in the filling and as a drizzle on top. Local honey can add a unique touch, giving the pie an extra layer of complexity.
- 3 eggs: Eggs are essential for binding the ingredients together and giving the pie its rich, custard-like consistency.
- 1 tablespoon cornstarch (corn flour): Cornstarch helps thicken the filling without the need for a crust, making the texture smooth and firm enough to hold together.
- 1 tablespoon vanilla extract: This enhances the flavor and adds a warm, aromatic touch to the pie’s sweetness.
For the Drizzle:
- 60 ml honey: For extra sweetness and a glossy finish, drizzle additional honey over the top once the pie has cooled.
- 1 tablespoon ground cinnamon: This is the final touch that adds a little spice and fragrance. Cinnamon pairs beautifully with the honey, rounding out the flavor profile.
Alternative Ingredients:
- Dairy-Free: If you’re looking to make a dairy-free version of this recipe, you can swap the ricotta for a vegan ricotta or cream cheese alternative. Many plant-based options are available, so you can easily find one that works for you.
- Gluten-Free: This recipe is naturally gluten-free since it doesn’t use any flour or a traditional crust. So, if you have gluten sensitivities, you’re good to go!
- Lower-Sugar Option: If you prefer a less sweet version, you can reduce the honey or use a sugar substitute like maple syrup. Keep in mind that this will change the flavor slightly, but it will still be delicious.
Step-by-Step Instructions: A Simple Process That Delivers Great Results
This recipe is all about simplicity. From mixing the ingredients to watching your pie rise in the oven, everything about this process is straightforward and beginner-friendly. Follow these steps for a delicious Melopita that’s sure to impress.
Step 1: Preheat the Oven and Prepare the Pan
Start by preheating your oven to 180°C (350°F). You want the oven to be nice and hot when your Melopita is ready to bake. Next, grease a 20cm (8-inch) springform pan. You can use butter or non-stick spray, or line the bottom of the pan with parchment paper for extra ease when removing the pie later.
Step 2: Whisk Together the Ingredients
In a large mixing bowl, add your ricotta cheese, honey, eggs, cornstarch, and vanilla extract. Use a whisk or a spoon to combine the ingredients, making sure the mixture is smooth and free of any lumps. Since you’re working with ricotta, it’s especially important to whisk thoroughly, as this ensures a velvety texture in the final pie. No need for a stand mixer here—your hands (and a simple whisk) are all you need!
Step 3: Pour the Mixture Into the Pan
Once the ingredients are well combined, pour the mixture into your prepared springform pan. Use a spatula to spread the mixture evenly across the bottom of the pan, making sure it fills the edges and sits level. This will ensure an even bake.
Step 4: Bake the Melopita
Place your pan in the preheated oven and bake for 45-50 minutes. The pie should begin to set, with the top turning golden brown. The key to knowing when your Melopita is done is checking the center. Gently shake the pan. If the center wobbles, it needs more time. If it feels firm, it’s ready! If you prefer, you can test it by inserting a toothpick into the center—if it comes out clean, you’re good to go.
Step 5: Cool and Remove the Pie
Once the Melopita is done baking, allow it to cool in the pan for about 5 minutes. This brief cooling period helps the pie set and makes it easier to remove from the pan. After this time, carefully release the sides of the springform pan and transfer the pie to a wire rack to cool completely.
Step 6: Drizzle with Honey and Cinnamon
After your Melopita has cooled, drizzle it with an additional ¼ cup of honey. The honey will soak into the surface, adding a lovely sweet layer. Finish by dusting the pie with cinnamon, which complements the honey and ricotta beautifully. This simple topping makes a world of difference, enhancing the flavors of the pie with an aromatic touch.
Beginner Tips and Notes: Navigating the Process with Confidence
Baking can sometimes feel intimidating, but Melopita is one of those recipes where you can’t really go wrong. However, as a beginner, there are a few tips and tricks that can help ensure the best results every time.
How to Tell If the Pie Is Done
One of the most common challenges when baking is determining when your dessert is done. For Melopita, you’ll know it’s ready when the top is golden brown and the center is firm. Gently shake the pan—if the center wobbles, it needs more time. You can also insert a toothpick into the center. If it comes out clean, the pie is fully cooked.
What If the Pie Is Too Runny?
If the Melopita isn’t setting properly and is too runny, don’t worry! Just pop it back in the oven for another 5-10 minutes. Make sure to check it every 5 minutes so it doesn’t overcook.
Overbaking?
If you accidentally leave the pie in for too long and it becomes over-baked or too browned, don’t stress! Melopita is meant to have a slightly rustic, golden top. It will still taste delicious.
Substituting Tools
If you don’t have a springform pan, don’t worry! You can use any round or square cake pan. Just make sure to line it with parchment paper so the pie doesn’t stick. Alternatively, silicone baking pans work well for this recipe as they’re non-stick and easy to remove.
Serving Suggestions: Pairing Melopita with Complementary Flavors
Melopita is a dessert that stands beautifully on its own, but pairing it with the right sides or drinks can elevate the experience. Here are a few ideas:
- Fresh Fruit: A handful of fresh berries or citrus fruits makes a refreshing and tart contrast to the creamy sweetness of the pie.
- Greek Yogurt: A dollop of Greek yogurt on the side can add a lovely creaminess and slight tang that complements the sweetness of the pie.
- Nuts: Chopped nuts like pistachios or almonds provide a crunchy texture that contrasts nicely with the soft pie.
Storage Tips:
Store leftover Melopita in an airtight container in the fridge for up to 3 days. It can be enjoyed cold, or you can bring it to room temperature before serving. The flavors deepen over time, making it just as enjoyable the next day!
Conclusion: Embrace the Simplicity of Melopita
Melopita is a delightful and simple dessert that will make you feel like a master baker in no time. It’s a wonderful choice for beginners, with easy-to-follow steps, minimal equipment, and ingredients you likely already have in your kitchen. Whether you’re baking for a special occasion or simply treating yourself to a homemade dessert, Melopita is a perfect way to enjoy a taste of Greece with minimal effort.
I encourage you to try this recipe and share your experiences! I’d love to hear how it turns out for you. What variations did you try? Did you add a personal twist? Let me know in the comments below. Happy baking, and enjoy your delicious Melopita!


