Filipino cuisine is filled with a rich history of flavorful dishes that highlight the diversity of the country’s culture. One dessert that stands out in Filipino homes, especially during celebrations and family gatherings, is Biko. This Filipino sticky rice cake dessert is made with glutinous rice, coconut milk, and brown sugar, creating a sweet, creamy, and sticky treat that’s both comforting and satisfying. If you’ve ever had the pleasure of tasting Biko, you know how irresistible it can be. It’s a dish that combines the perfect balance of sweetness and richness, making it a family favorite in many Filipino households.

Deliciously Easy Biko: A Step-by-Step Guide to Making Filipino Sticky Rice Cake
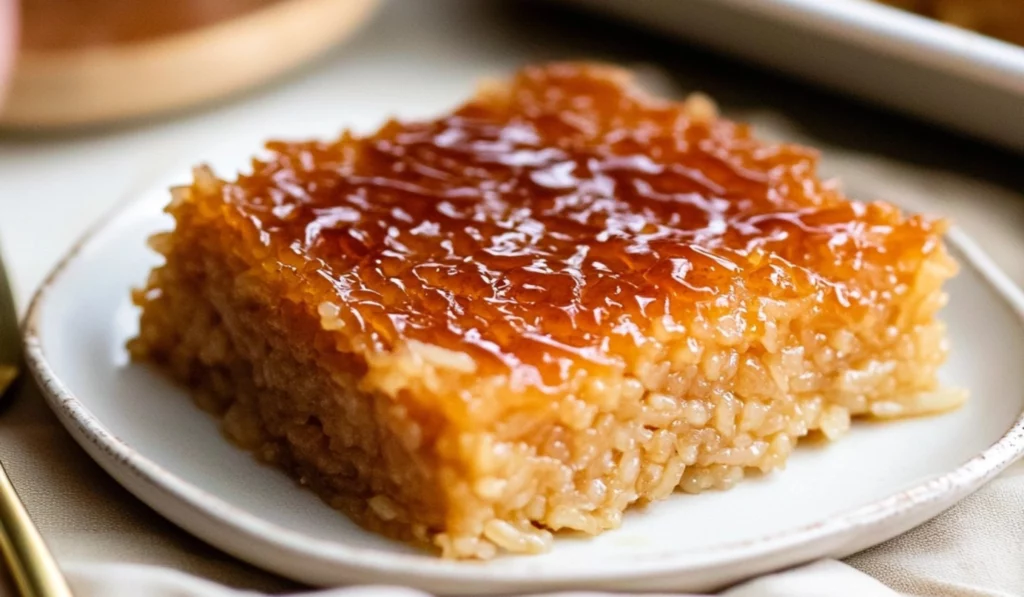
There’s something magical about the way a simple dessert can bring people together, and Biko is the perfect example of that. This Filipino sticky rice cake, with its rich coconut milk, sweet brown sugar, and chewy rice texture, is a beloved treat in Filipino households. Whether it’s served during festive celebrations or as an everyday indulgence, Biko never fails to impress.
- Prep Time: 20 minutes
- Cook Time: 1 hour
- Total Time: 9 hours 20 minutes (including soaking time)
- Yield: 12 servings 1x
- Category: Dessert
- Method: Baking, Stovetop
- Cuisine: Filipino
- Diet: Vegetarian
Ingredients
For the Rice:
- 4 cups glutinous rice
Glutinous rice, also known as sticky rice, is essential for this dessert because of its unique texture. It becomes sticky when cooked and holds together, making it perfect for creating the dense, chewy texture that Biko is known for. - 5 cups full-fat coconut milk
Coconut milk gives Biko its creamy, rich flavor. Full-fat coconut milk is preferred because it imparts a deeper, fuller taste and helps achieve the traditional richness of this Filipino dessert. - 1 1/2 cups water
Water helps to cook the glutinous rice, ensuring it absorbs enough moisture to become soft and sticky. - 2 1/2 cups dark brown sugar
Dark brown sugar provides the signature caramelized sweetness that Biko is known for. The molasses in the dark brown sugar adds a deeper, richer flavor compared to regular white sugar. - 1/2 tsp salt
A small amount of salt is added to balance out the sweetness and enhance the overall flavor.
For the Caramel Topping:
- 3/4 cup coconut milk (reserved from the 5 cups above)
This reserved coconut milk is used for the caramel topping, adding richness and helping to create the perfect glaze for the top of the rice cake. - 1 cup brown sugar
The caramel topping is made with the remaining brown sugar, creating a sweet, glossy layer that will crisp up beautifully when baked.
Instructions
1. Prepping the Rice:
Start by soaking the glutinous rice in water overnight. This step is crucial for getting the rice to the perfect sticky texture, which is the hallmark of Biko. Soaking allows the rice to absorb water, ensuring it cooks evenly and becomes soft and sticky. If you’re short on time, you can soak the rice for at least 6 hours, but overnight is best for optimal results.
Once the rice has finished soaking, drain it and rinse it under cold water to remove excess starch. This ensures that the rice doesn’t become too gummy when cooked.
2. Cooking the Rice:
In a large pot, combine the 4 cups of soaked rice, 5 cups of coconut milk (minus the reserved 3/4 cup), and 1 1/2 cups of water. Place the pot over medium heat and bring the mixture to a gentle boil. Once it starts to simmer, reduce the heat to medium-low and allow the rice to cook for about 6-8 minutes, or until most of the liquid has been absorbed. The rice should be fully cooked but still sticky. Stir occasionally to prevent it from sticking to the bottom of the pot.
You’ll know the rice is ready when it looks thick and sticky, and most of the liquid is absorbed. At this point, it should have a soft, yet firm texture that holds together well.
3. Adding Sweetness:
Once the rice is cooked, it’s time to sweeten it! Lower the heat to medium-low and stir in 1 1/2 cups of brown sugar and 1/2 teaspoon of salt. Stir constantly until the sugar has completely dissolved and the rice has absorbed all the sweetness. This process should take around 4-7 minutes.
The mixture will become thick and sticky, but keep stirring to ensure it doesn’t burn. Taste the rice and adjust the sweetness if necessary by adding more sugar to your liking.
4. Letting It Set:
Preheat your oven to 350°F (175°C). While the rice mixture is still hot, transfer it into a greased 9×13-inch baking dish or pan. Spread the rice mixture evenly to ensure the thickness is consistent across the pan. This is where the magic happens: the rice will firm up in the oven, holding its shape while the top becomes golden brown and slightly crispy.
5. Making the Caramel Topping:
In a small saucepan, combine the reserved 3/4 cup of coconut milk and 1 cup of brown sugar. Heat the mixture over medium heat until it begins to boil. Stir continuously until the sugar has dissolved and the mixture thickens slightly. This will only take a few minutes, so don’t walk away from the stove!
Once the mixture has thickened, remove it from the heat and allow it to cool for about 5 minutes. This helps the topping set when poured over the rice.
6. Assembling the Biko:
Pour the caramel topping evenly over the cooked rice mixture in the baking dish. Spread it out gently using a spatula to ensure the topping covers the rice completely. Then, transfer the dish to the preheated oven and bake for 60-65 minutes, or until the top turns golden brown and slightly crispy. The edges should be firm and caramelized, creating that signature texture we all love.
7. Serve and Enjoy:
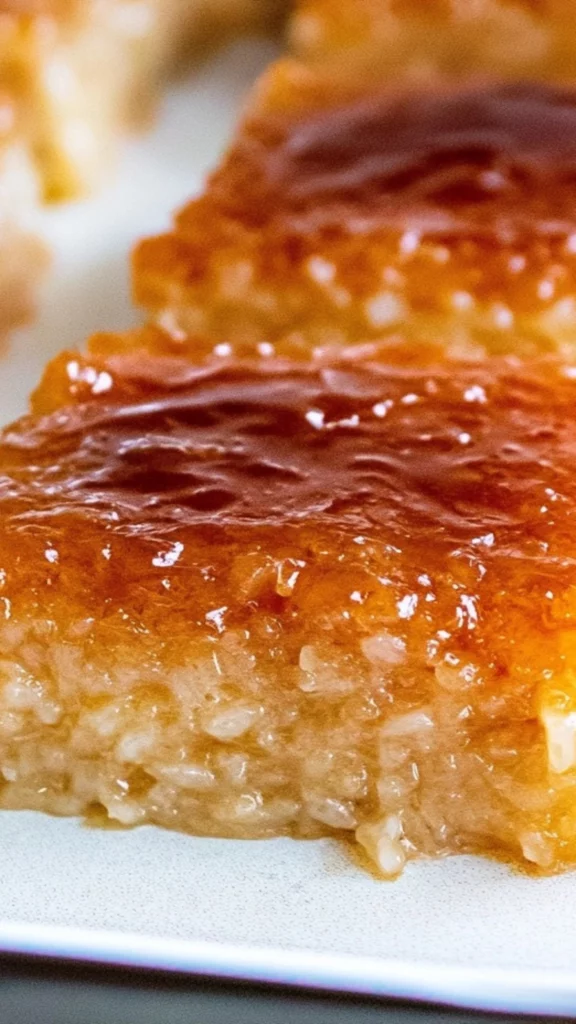
Once the Biko has finished baking, remove it from the oven and let it cool for about 15 minutes. Then, cut the rice cake into squares or diamond shapes, and serve it up to your eager guests. Biko is traditionally enjoyed during celebrations, but it’s also a great dessert for any time of the year.
Enjoy this Filipino sticky rice cake as a delightful treat, perfect for sharing with family and friends.
Notes
- Soak the Rice Overnight: The most important part of making Biko is soaking the rice. Make sure to soak it overnight, or for at least 6 hours, to achieve the desired sticky texture.
- Watch the Caramel: The caramel topping needs your full attention. When cooking the coconut milk and sugar, be sure to stir constantly to avoid burning the sugar. If the topping gets too thick, you can add a little more coconut milk to thin it out.
- Even Cooking: Stir the rice while it’s cooking to prevent it from sticking to the bottom of the pot. If the rice is cooking too quickly or starting to stick, lower the heat and continue stirring.
- Storage: If you have leftovers (which is unlikely!), store the Biko in an airtight container in the fridge for up to 3 days. You can also freeze Biko for up to 1 month. To reheat, simply warm it in the microwave or in the oven.
When I first learned how to make Biko, I was amazed at how such a simple combination of ingredients could create such a memorable dessert. I remember preparing it for a special family gathering, and the moment the caramelized top turned golden brown, the whole house was filled with a delicious coconut and brown sugar aroma. Everyone couldn’t wait to dig in, and it was a hit from the first bite. This easy Biko recipe is perfect for beginners, offering an uncomplicated way to recreate this Filipino classic at home. The process is simple, and with just a few ingredients, you can whip up this delicious treat in no time.
Whether you’re new to Filipino cooking or simply looking to try something new, this Biko recipe is an excellent place to start. It’s easy to make, incredibly delicious, and will quickly become a staple in your dessert repertoire.
Ingredients and Preparation
Before jumping into the step-by-step instructions, it’s important to familiarize yourself with the ingredients required for this recipe. Don’t worry, there’s no complex list of hard-to-find ingredients here. You’ll need just a few basic pantry staples and some glutinous rice, which is the star of the show. Let’s take a closer look at what you’ll need.
For the Rice:
- 4 cups glutinous rice
Glutinous rice, also known as sticky rice, is essential for this dessert because of its unique texture. It becomes sticky when cooked and holds together, making it perfect for creating the dense, chewy texture that Biko is known for. - 5 cups full-fat coconut milk
Coconut milk gives Biko its creamy, rich flavor. Full-fat coconut milk is preferred because it imparts a deeper, fuller taste and helps achieve the traditional richness of this Filipino dessert. - 1 1/2 cups water
Water helps to cook the glutinous rice, ensuring it absorbs enough moisture to become soft and sticky. - 2 1/2 cups dark brown sugar
Dark brown sugar provides the signature caramelized sweetness that Biko is known for. The molasses in the dark brown sugar adds a deeper, richer flavor compared to regular white sugar. - 1/2 tsp salt
A small amount of salt is added to balance out the sweetness and enhance the overall flavor.
For the Caramel Topping:
- 3/4 cup coconut milk (reserved from the 5 cups above)
This reserved coconut milk is used for the caramel topping, adding richness and helping to create the perfect glaze for the top of the rice cake. - 1 cup brown sugar
The caramel topping is made with the remaining brown sugar, creating a sweet, glossy layer that will crisp up beautifully when baked.
Now that you know what you’ll need, let’s dive into how to prepare this delicious treat!
Step-by-Step Instructions
This Biko recipe may look a bit lengthy, but don’t worry! It’s a simple process, and I’ll guide you through it with easy-to-follow steps. The key to making perfect Biko is patience and attention to detail, but don’t stress—it’s actually a lot easier than it seems.
1. Prepping the Rice:
Start by soaking the glutinous rice in water overnight. This step is crucial for getting the rice to the perfect sticky texture, which is the hallmark of Biko. Soaking allows the rice to absorb water, ensuring it cooks evenly and becomes soft and sticky. If you’re short on time, you can soak the rice for at least 6 hours, but overnight is best for optimal results.
Once the rice has finished soaking, drain it and rinse it under cold water to remove excess starch. This ensures that the rice doesn’t become too gummy when cooked.
2. Cooking the Rice:
In a large pot, combine the 4 cups of soaked rice, 5 cups of coconut milk (minus the reserved 3/4 cup), and 1 1/2 cups of water. Place the pot over medium heat and bring the mixture to a gentle boil. Once it starts to simmer, reduce the heat to medium-low and allow the rice to cook for about 6-8 minutes, or until most of the liquid has been absorbed. The rice should be fully cooked but still sticky. Stir occasionally to prevent it from sticking to the bottom of the pot.
You’ll know the rice is ready when it looks thick and sticky, and most of the liquid is absorbed. At this point, it should have a soft, yet firm texture that holds together well.
3. Adding Sweetness:
Once the rice is cooked, it’s time to sweeten it! Lower the heat to medium-low and stir in 1 1/2 cups of brown sugar and 1/2 teaspoon of salt. Stir constantly until the sugar has completely dissolved and the rice has absorbed all the sweetness. This process should take around 4-7 minutes.
The mixture will become thick and sticky, but keep stirring to ensure it doesn’t burn. Taste the rice and adjust the sweetness if necessary by adding more sugar to your liking.
4. Letting It Set:
Preheat your oven to 350°F (175°C). While the rice mixture is still hot, transfer it into a greased 9×13-inch baking dish or pan. Spread the rice mixture evenly to ensure the thickness is consistent across the pan. This is where the magic happens: the rice will firm up in the oven, holding its shape while the top becomes golden brown and slightly crispy.
5. Making the Caramel Topping:
In a small saucepan, combine the reserved 3/4 cup of coconut milk and 1 cup of brown sugar. Heat the mixture over medium heat until it begins to boil. Stir continuously until the sugar has dissolved and the mixture thickens slightly. This will only take a few minutes, so don’t walk away from the stove!
Once the mixture has thickened, remove it from the heat and allow it to cool for about 5 minutes. This helps the topping set when poured over the rice.
6. Assembling the Biko:
Pour the caramel topping evenly over the cooked rice mixture in the baking dish. Spread it out gently using a spatula to ensure the topping covers the rice completely. Then, transfer the dish to the preheated oven and bake for 60-65 minutes, or until the top turns golden brown and slightly crispy. The edges should be firm and caramelized, creating that signature texture we all love.
7. Serve and Enjoy:
Once the Biko has finished baking, remove it from the oven and let it cool for about 15 minutes. Then, cut the rice cake into squares or diamond shapes, and serve it up to your eager guests. Biko is traditionally enjoyed during celebrations, but it’s also a great dessert for any time of the year.
Enjoy this Filipino sticky rice cake as a delightful treat, perfect for sharing with family and friends.
Beginner Tips and Notes
Making Biko might seem intimidating, but I’ve got you covered with some beginner-friendly tips to ensure everything goes smoothly:
- Soak the Rice Overnight: The most important part of making Biko is soaking the rice. Make sure to soak it overnight, or for at least 6 hours, to achieve the desired sticky texture.
- Watch the Caramel: The caramel topping needs your full attention. When cooking the coconut milk and sugar, be sure to stir constantly to avoid burning the sugar. If the topping gets too thick, you can add a little more coconut milk to thin it out.
- Even Cooking: Stir the rice while it’s cooking to prevent it from sticking to the bottom of the pot. If the rice is cooking too quickly or starting to stick, lower the heat and continue stirring.
- Storage: If you have leftovers (which is unlikely!), store the Biko in an airtight container in the fridge for up to 3 days. You can also freeze Biko for up to 1 month. To reheat, simply warm it in the microwave or in the oven.
Serving Suggestions
Biko is often served as a standalone dessert, but it pairs beautifully with a variety of Filipino dishes. It’s great alongside savory dishes like sinigang (sour soup) or adobo (marinated meat stew). If you’re serving it as part of a Filipino feast, Biko is the perfect way to end the meal with a sweet, satisfying treat.
Conclusion
Now that you’ve got the lowdown on making Biko, it’s time to get in the kitchen and try it out! This easy Filipino sticky rice cake dessert is a great way to dive into Filipino cooking and impress your family and friends with a delicious, homemade treat. Don’t forget to share your experience in the comments—whether you’re a beginner or a seasoned pro, I’d love to hear how your Biko turned out. Happy cooking!


