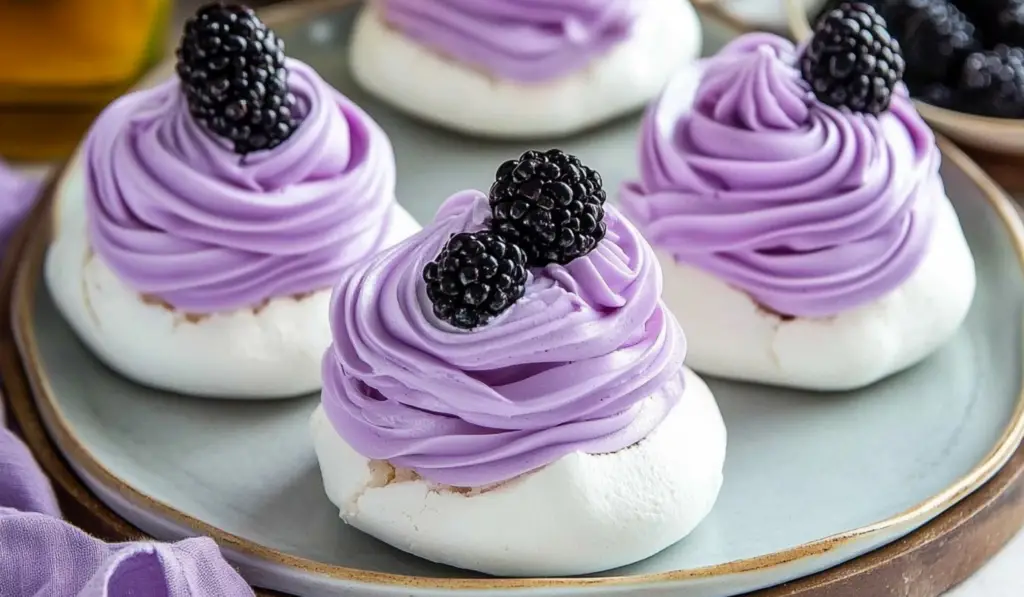
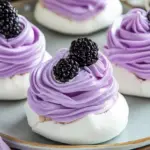
Pavlova, an iconic dessert named after the Russian ballerina Anna Pavlova, is a true show-stopper in the world of sweets. Its origins are hotly debated between Australia and New Zealand, but what’s universally agreed upon is that pavlova is a dessert worthy of admiration. It’s beloved not only for its dramatic appearance but also for its incredible textures and flavor combination. This blackberry pavlova, with its crisp meringue shell, sweet blackberry jam filling, and light, fluffy whipped cream topping, elevates the classic dessert into a new realm of deliciousness. It’s a treat that will undoubtedly impress your guests and make any occasion feel extraordinary.

Blackberry Pavlovas: A Decadent Dessert That Stands Out
Pavlova, an iconic dessert named after the Russian ballerina Anna Pavlova, is a true show-stopper in the world of sweets. Its origins are hotly debated between Australia and New Zealand, but what’s universally agreed upon is that pavlova is a dessert worthy of admiration. It’s beloved not only for its dramatic appearance but also for its incredible textures and flavor combination. This blackberry pavlova, with its crisp meringue shell, sweet blackberry jam filling, and light, fluffy whipped cream topping, elevates the classic dessert into a new realm of deliciousness. It’s a treat that will undoubtedly impress your guests and make any occasion feel extraordinary.
- Prep Time: 20 minutes
- Cook Time: 1 hour
- Total Time: 1 hour 20 minutes
- Yield: 6–8 servings 1x
- Category: Dessert, Brunch, Party Food
- Method: Baking, Whipping, Simmering
- Cuisine: Australian, New Zealand, Fusion
- Diet: Vegetarian
Ingredients
For the Pavlovas:
- 5 egg whites
- 1 1/4 cups granulated sugar (250 grams)
- A few drops of purple food coloring (optional)
- 2 tablespoons cornstarch
- 2 teaspoons lemon juice
For the Blackberry Jam:
- 2 cups blackberries (280 grams)
- 1/4 cup sugar (50 grams, or substitute with maple syrup or honey)
- 2 tablespoons lemon juice
- 1 tablespoon cornstarch
- 2 tablespoons water
For the Whipped Cream:
- 1 1/2 cups cold heavy cream (354 ml)
- 1/4 cup powdered sugar (31 grams)
- 1 teaspoon vanilla extract
Instructions
1. Preparing the Pavlovas:
The first step in making blackberry pavlova is to preheat your oven to 250°F (120°C). This low temperature is key for drying out the meringue without browning it, which helps maintain its delicate structure. Line two baking sheets with parchment paper to ensure the pavlovas bake evenly and do not stick to the surface.
Now it’s time to whip the egg whites. Place 5 egg whites into a large mixing bowl and begin beating them on medium speed with an electric mixer for about 1 minute. This initial step helps the egg whites start to foam, creating the foundation for the meringue. Gradually add the granulated sugar, one spoonful at a time. Be patient, allowing each spoonful to dissolve completely before adding more. This gradual addition of sugar helps the egg whites absorb the sweetness and ensures the meringue will be glossy and stable.
Once all the sugar is added, increase the mixer speed to high and continue beating for another 9-10 minutes. At this stage, the meringue should form stiff peaks, meaning that when you lift the beaters, the meringue should stand up straight without drooping. The texture should be smooth, glossy, and shiny, and the meringue should hold its shape perfectly. This is the critical moment in making pavlova—if the meringue isn’t whipped properly, the pavlova won’t keep its structure during baking.
If you’re using the optional food coloring, add a few drops of purple food coloring towards the last minute of whipping. This will give your meringue a subtle swirl of color, enhancing the visual appeal of the pavlova. You can skip this step if you prefer a more traditional look.
Next, fold in the cornstarch and lemon juice gently with a spatula. These ingredients serve two purposes: the cornstarch helps stabilize the meringue and prevent cracks, while the lemon juice adds a touch of acidity to balance the sweetness of the pavlova.
2. Piping the Meringue:
Now that your meringue is ready, it’s time to pipe it into the pavlova nests. If you’re creating the swirl effect, prepare your piping bag by brushing a few lines of food coloring inside. This will create a colorful swirl when you pipe the meringue. To make it easier, place the piping bag in a tall glass and fold the edges over the lip of the glass to hold the bag open.
Once the piping bag is ready, fill it with the whipped meringue and pipe 3 1/2-inch nests onto the parchment-lined baking sheets. Leave a small indentation in the center of each nest, which will be filled later with blackberry jam and whipped cream. The key to making perfectly shaped pavlovas is to pipe the meringue into a sturdy nest with a slight peak in the center, creating the space for the fillings to sit.
Bake the meringues for 1 hour at 250°F (120°C). After the baking time is complete, turn off the oven and leave the pavlovas inside for an additional 30 minutes. This step is essential to avoid a drastic change in temperature, which can cause the meringue to crack or deflate. Allow the pavlovas to cool completely before removing them from the oven. Once cooled, they will be light, crispy, and ready to fill. If you’re not ready to assemble them yet, the unfilled pavlovas can be stored in an airtight container for up to 5 days at room temperature.
3. Making the Blackberry Jam:
While the pavlovas are cooling, you can prepare the blackberry jam. Place 2 cups of blackberries, 1/4 cup of sugar (or your sweetener of choice), 2 tablespoons of lemon juice, and 2 tablespoons of water in a small saucepan. Bring the mixture to a boil over medium heat, stirring occasionally to prevent burning.
Once the blackberries start to release their juices, lower the heat to a simmer and cook for 5-10 minutes. The berries will begin to break down, and the mixture will become more concentrated. If the mixture becomes too dry, you can add a few tablespoons of water or extra lemon juice to maintain the desired consistency.
In a separate bowl, dissolve 1 tablespoon of cornstarch in 2 tablespoons of water. Add the cornstarch slurry to the saucepan and continue to cook for another minute, stirring constantly. This will thicken the jam and give it a more syrupy texture. Once thickened, remove the pan from the heat and transfer the jam to a small bowl. Let it cool completely before refrigerating, where it should be chilled before serving.
4. Whipping the Cream:
Just before assembling the pavlovas, it’s time to make the whipped cream. Place 1 1/2 cups of cold heavy cream, 1/4 cup of powdered sugar, and 1 teaspoon of vanilla extract in a mixing bowl. Whip the cream on medium-high speed for about 3 minutes, or until stiff peaks form. When whipped correctly, the cream should hold its shape and not collapse back into the bowl.
Once the cream is whipped, transfer it to a piping bag fitted with your preferred tip. A star-shaped tip, such as a 1M, is perfect for creating beautiful swirls of cream, but you can also use a round tip for a more simple presentation.
5. Assembling the Pavlovas:
Now comes the fun part—assembling the pavlovas. Take each meringue nest and spoon a generous amount of chilled blackberry jam into the center of each one. Be careful not to overfill the nests; you want to leave room for the whipped cream on top. After adding the jam, pipe a swirl of whipped cream over the top. For an extra touch of elegance, you can decorate the pavlovas with fresh blackberries. Not only does this add a burst of color, but it also complements the flavors of the jam and cream.
As a final touch, consider drizzling a little honey over the whipped cream or sprinkling a handful of crushed pistachios for a subtle crunch. These small additions elevate the pavlova and provide added texture and flavor contrasts.
While it’s tempting to assemble the pavlovas ahead of time, it’s best to do it the day you plan to serve them. The meringue can soften over time, especially if the jam is too wet, so assembling just before serving ensures that the pavlovas maintain their signature crispness.
Notes
- Whipping the Meringue: Make sure to whip the egg whites to stiff peaks. If the meringue isn’t stiff enough, the pavlovas will lose their shape after baking. You should be able to hold the mixing bowl upside down without the meringue falling out.
- Food Coloring: If you’re using food coloring, don’t overdo it. A subtle swirl is enough to create a visually appealing pavlova. Remember, the food coloring should be inside the piping bag, not mixed into the meringue directly.
- Storing the Pavlovas: Meringue shells can be made up to 5 days ahead of time and stored in an airtight container. If you live in a humid climate, be mindful that meringues can soften more quickly.
- Substitutions: If you prefer a different berry, such as raspberries, blueberries, or strawberries, feel free to substitute. You can also use maple syrup or honey as a sweetener in place of sugar for the jam, creating a more natural sweetness.
- Make-Ahead Tips: While the meringue and jam can be made in advance, it’s best to whip the cream on the day of serving. This will ensure the whipped cream is at its peak texture.
The beauty of this dessert lies in the harmony of flavors and textures. The meringue shell is the star, with its crisp exterior and soft, marshmallow-like interior that melts in your mouth. This contrast is complemented by the slightly tart and rich blackberry jam that infuses the pavlova with vibrant fruitiness. Topping it all off is the whipped cream, which adds a velvety smoothness that balances the sweetness of the meringue and the tang of the berries. The burst of fresh blackberries on top brings a pop of color and a refreshing note that rounds out the entire dessert.
Whether it’s a special occasion like a birthday, a holiday, or a simple weekend treat, blackberry pavlova has the power to turn any meal into a celebration. This recipe’s simplicity makes it approachable for bakers of all levels, yet its stunning visual appeal and complex flavors give it the finesse of a high-end dessert. By using a handful of ingredients, you can create a dessert that’s worthy of any festive table or casual get-together.
Ingredients for Blackberry Pavlovas
For the Pavlovas:
- 5 egg whites
- 1 1/4 cups granulated sugar (250 grams)
- A few drops of purple food coloring (optional)
- 2 tablespoons cornstarch
- 2 teaspoons lemon juice
For the Blackberry Jam:
- 2 cups blackberries (280 grams)
- 1/4 cup sugar (50 grams, or substitute with maple syrup or honey)
- 2 tablespoons lemon juice
- 1 tablespoon cornstarch
- 2 tablespoons water
For the Whipped Cream:
- 1 1/2 cups cold heavy cream (354 ml)
- 1/4 cup powdered sugar (31 grams)
- 1 teaspoon vanilla extract
Instructions for Blackberry Pavlova
1. Preparing the Pavlovas:
The first step in making blackberry pavlova is to preheat your oven to 250°F (120°C). This low temperature is key for drying out the meringue without browning it, which helps maintain its delicate structure. Line two baking sheets with parchment paper to ensure the pavlovas bake evenly and do not stick to the surface.
Now it’s time to whip the egg whites. Place 5 egg whites into a large mixing bowl and begin beating them on medium speed with an electric mixer for about 1 minute. This initial step helps the egg whites start to foam, creating the foundation for the meringue. Gradually add the granulated sugar, one spoonful at a time. Be patient, allowing each spoonful to dissolve completely before adding more. This gradual addition of sugar helps the egg whites absorb the sweetness and ensures the meringue will be glossy and stable.
Once all the sugar is added, increase the mixer speed to high and continue beating for another 9-10 minutes. At this stage, the meringue should form stiff peaks, meaning that when you lift the beaters, the meringue should stand up straight without drooping. The texture should be smooth, glossy, and shiny, and the meringue should hold its shape perfectly. This is the critical moment in making pavlova—if the meringue isn’t whipped properly, the pavlova won’t keep its structure during baking.
If you’re using the optional food coloring, add a few drops of purple food coloring towards the last minute of whipping. This will give your meringue a subtle swirl of color, enhancing the visual appeal of the pavlova. You can skip this step if you prefer a more traditional look.
Next, fold in the cornstarch and lemon juice gently with a spatula. These ingredients serve two purposes: the cornstarch helps stabilize the meringue and prevent cracks, while the lemon juice adds a touch of acidity to balance the sweetness of the pavlova.
2. Piping the Meringue:
Now that your meringue is ready, it’s time to pipe it into the pavlova nests. If you’re creating the swirl effect, prepare your piping bag by brushing a few lines of food coloring inside. This will create a colorful swirl when you pipe the meringue. To make it easier, place the piping bag in a tall glass and fold the edges over the lip of the glass to hold the bag open.
Once the piping bag is ready, fill it with the whipped meringue and pipe 3 1/2-inch nests onto the parchment-lined baking sheets. Leave a small indentation in the center of each nest, which will be filled later with blackberry jam and whipped cream. The key to making perfectly shaped pavlovas is to pipe the meringue into a sturdy nest with a slight peak in the center, creating the space for the fillings to sit.
Bake the meringues for 1 hour at 250°F (120°C). After the baking time is complete, turn off the oven and leave the pavlovas inside for an additional 30 minutes. This step is essential to avoid a drastic change in temperature, which can cause the meringue to crack or deflate. Allow the pavlovas to cool completely before removing them from the oven. Once cooled, they will be light, crispy, and ready to fill. If you’re not ready to assemble them yet, the unfilled pavlovas can be stored in an airtight container for up to 5 days at room temperature.
3. Making the Blackberry Jam:
While the pavlovas are cooling, you can prepare the blackberry jam. Place 2 cups of blackberries, 1/4 cup of sugar (or your sweetener of choice), 2 tablespoons of lemon juice, and 2 tablespoons of water in a small saucepan. Bring the mixture to a boil over medium heat, stirring occasionally to prevent burning.
Once the blackberries start to release their juices, lower the heat to a simmer and cook for 5-10 minutes. The berries will begin to break down, and the mixture will become more concentrated. If the mixture becomes too dry, you can add a few tablespoons of water or extra lemon juice to maintain the desired consistency.
In a separate bowl, dissolve 1 tablespoon of cornstarch in 2 tablespoons of water. Add the cornstarch slurry to the saucepan and continue to cook for another minute, stirring constantly. This will thicken the jam and give it a more syrupy texture. Once thickened, remove the pan from the heat and transfer the jam to a small bowl. Let it cool completely before refrigerating, where it should be chilled before serving.
4. Whipping the Cream:
Just before assembling the pavlovas, it’s time to make the whipped cream. Place 1 1/2 cups of cold heavy cream, 1/4 cup of powdered sugar, and 1 teaspoon of vanilla extract in a mixing bowl. Whip the cream on medium-high speed for about 3 minutes, or until stiff peaks form. When whipped correctly, the cream should hold its shape and not collapse back into the bowl.
Once the cream is whipped, transfer it to a piping bag fitted with your preferred tip. A star-shaped tip, such as a 1M, is perfect for creating beautiful swirls of cream, but you can also use a round tip for a more simple presentation.
5. Assembling the Pavlovas:
Now comes the fun part—assembling the pavlovas. Take each meringue nest and spoon a generous amount of chilled blackberry jam into the center of each one. Be careful not to overfill the nests; you want to leave room for the whipped cream on top. After adding the jam, pipe a swirl of whipped cream over the top. For an extra touch of elegance, you can decorate the pavlovas with fresh blackberries. Not only does this add a burst of color, but it also complements the flavors of the jam and cream.
As a final touch, consider drizzling a little honey over the whipped cream or sprinkling a handful of crushed pistachios for a subtle crunch. These small additions elevate the pavlova and provide added texture and flavor contrasts.
While it’s tempting to assemble the pavlovas ahead of time, it’s best to do it the day you plan to serve them. The meringue can soften over time, especially if the jam is too wet, so assembling just before serving ensures that the pavlovas maintain their signature crispness.
Tips for Making the Perfect Blackberry Pavlova
- Whipping the Meringue: Make sure to whip the egg whites to stiff peaks. If the meringue isn’t stiff enough, the pavlovas will lose their shape after baking. You should be able to hold the mixing bowl upside down without the meringue falling out.
- Food Coloring: If you’re using food coloring, don’t overdo it. A subtle swirl is enough to create a visually appealing pavlova. Remember, the food coloring should be inside the piping bag, not mixed into the meringue directly.
- Storing the Pavlovas: Meringue shells can be made up to 5 days ahead of time and stored in an airtight container. If you live in a humid climate, be mindful that meringues can soften more quickly.
- Substitutions: If you prefer a different berry, such as raspberries, blueberries, or strawberries, feel free to substitute. You can also use maple syrup or honey as a sweetener in place of sugar for the jam, creating a more natural sweetness.
- Make-Ahead Tips: While the meringue and jam can be made in advance, it’s best to whip the cream on the day of serving. This will ensure the whipped cream is at its peak texture.
Serving Suggestions for Blackberry Pavlovas
Blackberry pavlovas are perfect for any occasion. They make an impressive centerpiece at dinner parties, celebrations, and holiday meals. Pair them with a light, fruity wine such as a Moscato or a glass of sparkling rosé for a refreshing contrast to the dessert’s sweetness.
For a fun twist, consider topping the pavlovas with other fruits like kiwi, passion fruit, or citrus slices. These fruits bring brightness and acidity, enhancing the overall flavor profile. For added indulgence, serve each pavlova with a scoop of vanilla ice cream, creating a delicious contrast to the crispy meringue.

Conclusion
This blackberry pavlova recipe is a stunning, delicious dessert that combines the perfect balance of textures and flavors. The crisp meringue, tangy blackberry jam, and silky whipped cream create a treat that’s both visually striking and irresistibly delicious. Whether you’re an experienced baker or a novice, this recipe is straightforward and guarantees a crowd-pleasing result. The next time you’re looking for a dessert that will make a statement, this blackberry pavlova is sure to impress. Gather your ingredients, preheat the oven, and enjoy the experience of creating and indulging in this show-stopping dessert.


