I have a vivid memory of my first tiramisu experience. It was at a small Italian café, and the layers of coffee-soaked ladyfingers and creamy mascarpone were an absolute revelation. Then, imagine my delight when I discovered tiramisu cheesecake, a dessert that elegantly combines the best of both worlds. This recipe is perfect for beginner cooks who want to impress. It’s a no-bake wonder that requires minimal fuss, just a little patience for chilling. It’s a guaranteed hit at any gathering, and the rich flavors are sure to satisfy any sweet tooth. This Tiramisu Cheesecake is a delightful fusion of two beloved desserts, offering a sophisticated treat without the complexities of traditional baking.
Tiramisu Cheesecake: A Decadent Fusion of Italian Classics
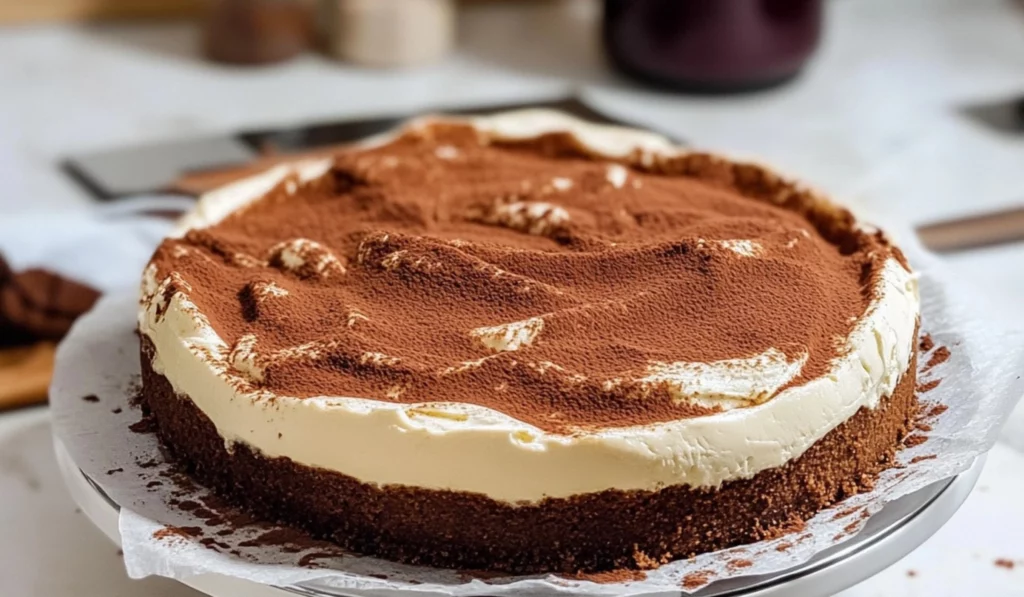
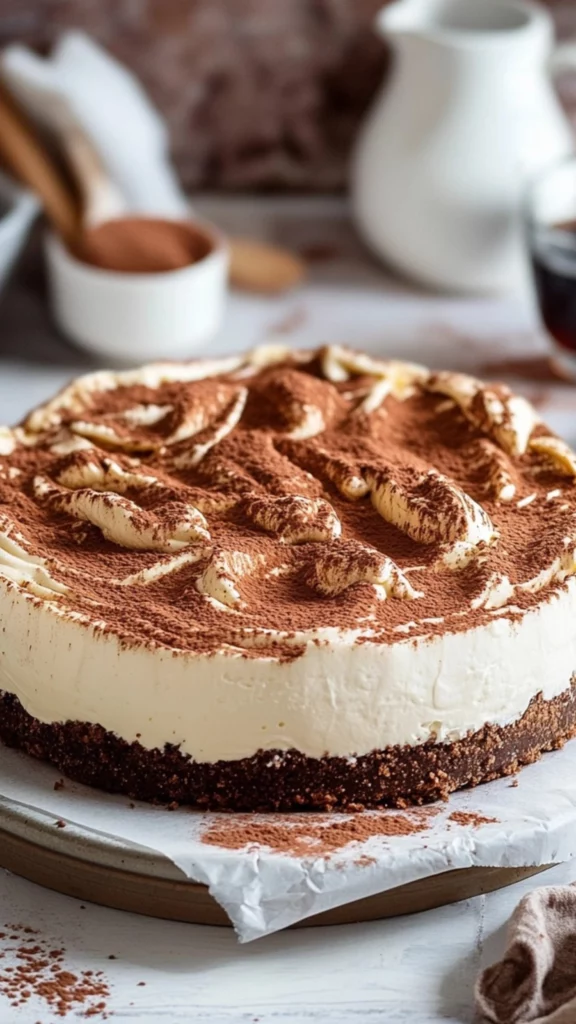
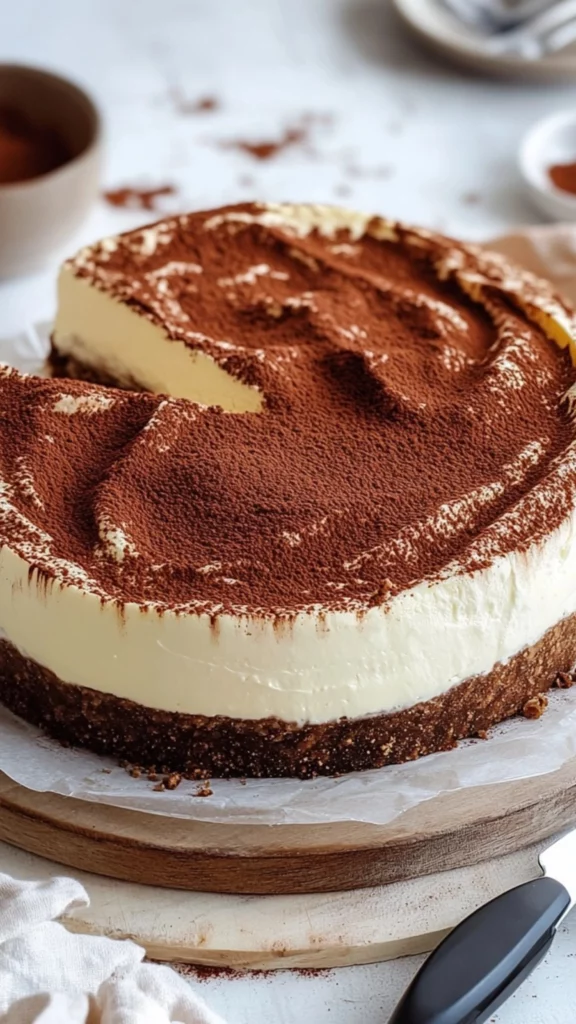
Tiramisu Cheesecake is a no-bake dessert that combines the flavors of tiramisu and cheesecake. It features a cocoa cookie crust, mascarpone filling, and coffee-soaked ladyfingers. It’s an impressive dessert perfect for beginner cooks.
- Prep Time: 30 minutes
- Cook Time: 0 minutes
- Total Time: 8 hours 30 minutes (including chilling time)
- Yield: 12 slices 1x
- Category: Dessert
- Method: Blending, Mixing, Assembling, Chilling
- Cuisine: Italian-American
Ingredients
- 250g graham crackers or digestive biscuits
- 2 tablespoons Dutch-processed unsweetened cocoa powder
- 75g butter, melted
- 250ml strong black coffee
- 1 tablespoon Amaretto (optional)
- 600g cream cheese
- 165g mascarpone cheese
- 150g powdered sugar
- 1 ½ teaspoons vanilla paste
- 360g heavy cream
- ½ pack ladyfingers
- 230g heavy cream (for topping)
- 2 tablespoons powdered sugar (for topping)
- ½ teaspoon vanilla paste (for topping)
- Dutch-processed unsweetened cocoa powder (for dusting)
Instructions
Cookie Crust:
- Prepare the Coffee: Brew strong black coffee and pour it into a shallow bowl. Optionally, mix in Amaretto. Let it cool. Preparing the coffee first allows it to cool while you work.
- Crush the Cookies: In a food processor, blend graham crackers/digestive biscuits and cocoa powder until a fine sand-like texture. This creates the base for the crust.
- Melt the Butter: Melt the butter. Add it to the food processor and blend with the cookie crumbs. This binds the crust together.
- Prepare the Springform Pan: Line a 23cm/9-inch springform pan with parchment paper. This prevents sticking and makes it easy to remove the cheesecake.
- Press the Crust: Add the cookie crumbs to the pan and press them down with the bottom of a glass until well-packed and flattened. This creates a firm base.
- Refrigerate: Place the crust in the refrigerator while preparing the cheesecake filling. Chilling the crust helps it set.
Cheesecake Filling:
- Cream the Cream Cheese: With a hand mixer or stand mixer (paddle attachment), cream the cream cheese on low speed for 1 minute. This ensures a smooth base.
- Add Mascarpone and Sugar: Add mascarpone cheese, powdered sugar, and vanilla paste. Mix on medium-high speed until smooth (about 1 minute). Scrape down the sides and mix on low speed until combined (about 30 seconds). Scraping ensures even mixing.
- Whip the Cream: In a separate bowl, whip the heavy cream until it holds stiff peaks. This adds lightness to the filling.
- Combine Fillings: Add half of the cheesecake filling to the springform pan and even it out with an offset spatula. This creates the first layer.
- Dip the Ladyfingers: Dip the ladyfingers in the coffee once on each side. Do not over-soak. This prevents the cheesecake from becoming soggy.
- Layer Ladyfingers: Lay the ladyfingers in straight lines over the filling, cutting them to fit. This adds the tiramisu element.
- Add Remaining Filling: Add the other half of the cheesecake filling and even it out. Cover with cling film. This creates the final layer.
- Chill: Refrigerate for a minimum of 8 hours, or preferably overnight. Chilling allows the cheesecake to set.
Decoration:
- Whip the Topping: Whip heavy cream, powdered sugar, and vanilla paste until stiff peaks. This creates the whipped cream topping.
- Assemble: Move the cheesecake to a serving dish. Add the whipped cream on top and return to the refrigerator.
- Dust with Cocoa: Before serving, dust with cocoa powder. This adds the final touch.
Tip: For clean slices, dip a sharp knife in hot water, dry it, and cut. Repeat after each slice. This ensures clean cuts.
Notes
- Use full-fat cream cheese and heavy cream.
- Don’t over-soak ladyfingers.
- Chill cheesecake for at least 8 hours.
- Use a hot knife for clean slices.
Ingredients and Preparation: Your Tiramisu Cheesecake Toolkit – The Essentials
This Tiramisu Cheesecake is a no-bake delight, but the quality of the ingredients matters. Remember, the key to a smooth process is having all your ingredients and tools prepared before you begin. This preparation will make your experience enjoyable and stress-free.
The Cookie Crust: The Foundation of Flavor – The Base Layer:
- 250g graham crackers or digestive biscuits – Provides the crunchy base. Alternatives: You can use Oreo cookies (without the cream filling) or biscotti for a different texture. Graham crackers create a classic crust.
- 2 tablespoons Dutch-processed unsweetened cocoa powder – Adds a rich chocolate flavor. Alternatives: You can use regular cocoa powder, but Dutch-processed has a smoother, less acidic flavor. Dutch-processed cocoa adds a deep flavor.
- 75g butter, melted – Binds the crust together. Alternatives: You can use coconut oil for a dairy-free option. Melted butter holds the crust together.
The Cheesecake Filling: The Creamy Heart – The Soul of the Dessert:
- 250ml strong black coffee – Soaks the ladyfingers and adds the tiramisu flavor. Alternatives: You can use decaffeinated coffee. Strong coffee adds the signature flavor.
- 1 tablespoon Amaretto (optional) – Enhances the coffee flavor. Alternatives: You can use coffee liqueur, marsala wine, or omit it for an alcohol-free version. Amaretto adds a nutty flavor.
- 600g cream cheese – Provides the creamy base. Alternatives: Use full-fat cream cheese for the best texture. Full-fat cream cheese creates a rich filling.
- 165g mascarpone cheese – Adds a rich, creamy texture. Alternatives: There’s no direct substitute, but you can use more cream cheese if necessary, though the flavor will be different. Mascarpone adds a unique creaminess.
- 150g powdered sugar – Sweetens the filling. Alternatives: There’s no direct substitute. Powdered sugar dissolves smoothly.
- 1 ½ teaspoons vanilla paste – Adds a warm, aromatic note. Alternatives: You can use vanilla extract. Vanilla paste adds a rich vanilla flavor.
- 360g heavy cream (380ml) – Creates a light, airy texture. Alternatives: Use full-fat heavy cream for the best results. Heavy cream creates a light texture.
- ½ a pack of ladyfingers – Adds the classic tiramisu element. Alternatives: There’s no direct substitute. Ladyfingers add the classic tiramisu texture.
The Topping: The Finishing Touch – The Decadent Crown:
- 230g heavy cream (250ml) – For the whipped cream topping. Alternatives: Use full-fat heavy cream. Heavy cream creates a stable whipped cream.
- 2 tablespoons powdered sugar – Sweetens the whipped cream. Alternatives: There’s no direct substitute. Powdered sugar sweetens the topping.
- ½ teaspoon vanilla paste – Adds flavor to the whipped cream. Alternatives: You can use vanilla extract. Vanilla paste adds a rich flavor.
- Dutch-processed unsweetened cocoa powder, for dusting – Adds a visual and flavor element. Alternatives: You can use chocolate shavings or coffee grounds. Cocoa powder adds a classic tiramisu finish.
Step-by-Step Instructions: Your Guide to Tiramisu Cheesecake Success – Easy and Clear
Cookie Crust:
- Prepare the Coffee: Brew strong black coffee and pour it into a shallow bowl. Optionally, mix in Amaretto. Let it cool. Preparing the coffee first allows it to cool while you work.
- Crush the Cookies: In a food processor, blend graham crackers/digestive biscuits and cocoa powder until a fine sand-like texture. This creates the base for the crust.
- Melt the Butter: Melt the butter. Add it to the food processor and blend with the cookie crumbs. This binds the crust together.
- Prepare the Springform Pan: Line a 23cm/9-inch springform pan with parchment paper. This prevents sticking and makes it easy to remove the cheesecake.
- Press the Crust: Add the cookie crumbs to the pan and press them down with the bottom of a glass until well-packed and flattened. This creates a firm base.
- Refrigerate: Place the crust in the refrigerator while preparing the cheesecake filling. Chilling the crust helps it set.
Cheesecake Filling:
- Cream the Cream Cheese: With a hand mixer or stand mixer (paddle attachment), cream the cream cheese on low speed for 1 minute. This ensures a smooth base.
- Add Mascarpone and Sugar: Add mascarpone cheese, powdered sugar, and vanilla paste. Mix on medium-high speed until smooth (about 1 minute). Scrape down the sides and mix on low speed until combined (about 30 seconds). Scraping ensures even mixing.
- Whip the Cream: In a separate bowl, whip the heavy cream until it holds stiff peaks. This adds lightness to the filling.
- Combine Fillings: Add half of the cheesecake filling to the springform pan and even it out with an offset spatula. This creates the first layer.
- Dip the Ladyfingers: Dip the ladyfingers in the coffee once on each side. Do not over-soak. This prevents the cheesecake from becoming soggy.
- Layer Ladyfingers: Lay the ladyfingers in straight lines over the filling, cutting them to fit. This adds the tiramisu element.
- Add Remaining Filling: Add the other half of the cheesecake filling and even it out. Cover with cling film. This creates the final layer.
- Chill: Refrigerate for a minimum of 8 hours, or preferably overnight. Chilling allows the cheesecake to set.
Decoration:
- Whip the Topping: Whip heavy cream, powdered sugar, and vanilla paste until stiff peaks. This creates the whipped cream topping.
- Assemble: Move the cheesecake to a serving dish. Add the whipped cream on top and return to the refrigerator.
- Dust with Cocoa: Before serving, dust with cocoa powder. This adds the final touch.
Tip: For clean slices, dip a sharp knife in hot water, dry it, and cut. Repeat after each slice. This ensures clean cuts.
Beginner Tips and Notes: Your Kitchen Ally – Helpful Advice and Hacks
- Troubleshooting:
- Crust Crumbles: Ensure the butter is evenly distributed throughout the crumb mixture.
- Lumpy Filling: Cream the cream cheese until smooth before adding other ingredients to the bowl.
- Soggy Ladyfingers: Dip the ladyfingers quickly and only once on each side.
- Whipped Cream Won’t Peak: Chill the bowl and beaters before whipping the cream.
- Prep Efficiency:
- Measure Ingredients: Measure all ingredients before starting to ensure a smooth workflow.
- Prepare Coffee: Brew the coffee ahead of time and allow it to cool completely.
- Use a Food Processor: Use a food processor for the crust to save time and effort.
- Chill Overnight: Allow ample chilling time for the cheesecake to set properly.
- Tool Substitutions:
- No Food Processor: Crush cookies in a zip-top bag with a rolling pin.
- No Stand Mixer: Use a hand mixer for the filling and topping.
- No Offset Spatula: Use a regular spatula to even out the filling.
- No Springform Pan: Use a regular cake pan with parchment paper for easy removal.
- Flavor Boosters:
- Add Chocolate Shavings: For extra chocolate flavor, add chocolate shavings to the topping.
- Use Coffee Liqueur: Instead of Amaretto, use coffee liqueur to enhance the coffee flavor.
- Add Espresso Powder: To the filling for a stronger coffee flavor in the cheesecake.
- Use Flavored Extracts: Like almond or hazelnut, to add unique flavor notes.
Serving Suggestions: Enhancing Your Tiramisu Cheesecake
This tiramisu cheesecake is delicious on its own but can be elevated with complementary sides and toppings.
- Sides:
- Fresh Berries: Serve with strawberries or raspberries for a fresh, fruity contrast.
- Chocolate Sauce: Drizzle with chocolate sauce for added richness.
- Coffee: Serve with a cup of espresso or coffee to complement the flavors.
A Sweet Conclusion: Sharing the Joy of Tiramisu Cheesecake
This Tiramisu Cheesecake is a perfect blend of Italian classics, offering a sophisticated dessert that’s surprisingly easy to make. It’s ideal for any occasion, and the no-bake aspect makes it accessible for beginner cooks. Don’t be afraid to experiment with variations and add your personal touch. The key to a successful tiramisu cheesecake is patience, especially during the chilling process. This allows the flavors to meld and the texture to set perfectly. Once you’ve mastered this recipe, you’ll have a go-to dessert that’s sure to impress your friends and family.
We encourage you to try this recipe and share your experiences in the comments below. Your feedback and personal touches can inspire other beginner cooks. If you have any questions or need further clarification, don’t hesitate to ask. We’re here to support you on your culinary journey. Remember, cooking is about experimenting and having fun. With a little practice, you can create delicious and impressive desserts that everyone will love.
This Tiramisu Cheesecake is a fantastic example of how you can create a restaurant-quality dessert at home without needing advanced baking skills. It’s a great way to showcase your creativity and bring a touch of elegance to your gatherings. Whether you’re celebrating a special occasion or simply want to treat yourself, this cheesecake is sure to delight. So, gather your ingredients, follow the steps, and get ready to enjoy a slice of pure decadence.


