There’s an undeniable charm to Linzer cookies. Those delicate, buttery circles, peeking through with a vibrant jam filling, dusted with powdered sugar – they’re like tiny, edible works of art. I remember the first time I saw a Linzer cookie. It was nestled amongst other tempting treats in a brightly lit bakery window, and I was instantly captivated. They seemed so elegant, so intricate, so… unattainable. I was convinced they were the domain of professional bakers, a feat beyond my culinary capabilities. But I was wrong! With a little patience, a good recipe (like this one!), and a dash of enthusiasm, you can create these beautiful cookies at home, even if you’re a complete beginner. These Raspberry Linzer Cookies are not only visually stunning and utterly delicious, but they’re also a fantastic introduction to the joys of cookie making. They’re simple enough for beginners, fun to make, and offer a great opportunity to practice your baking skills, from creaming butter and sugar to rolling dough and creating intricate cut-outs. Plus, the satisfaction of creating something so beautiful and tasty is truly rewarding! Imagine the look on someone’s face when you present them with a box of these homemade delights.
Raspberry Linzer Cookies: A Beginner’s Guide to Festive Baking

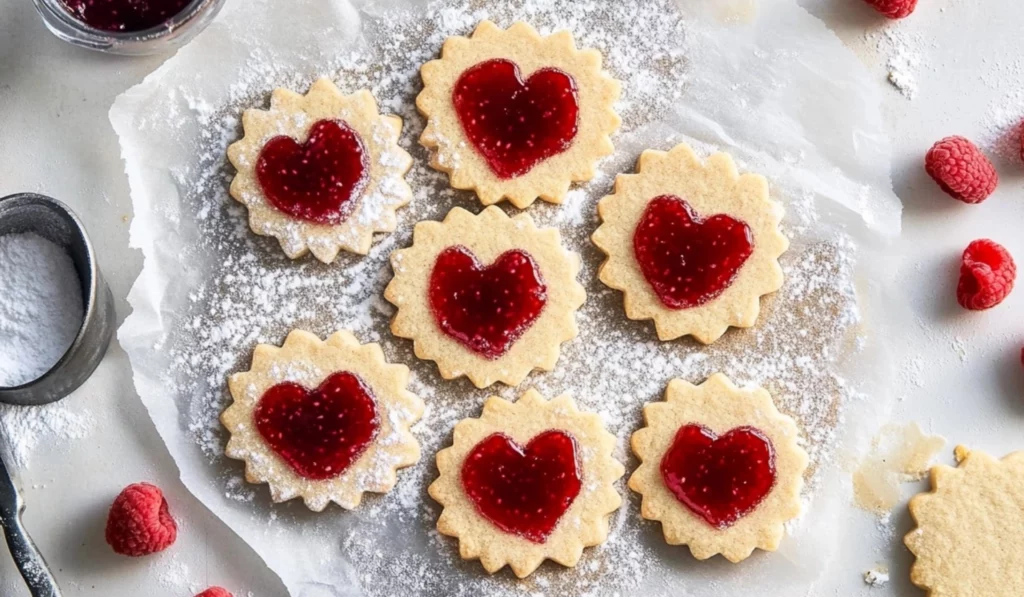
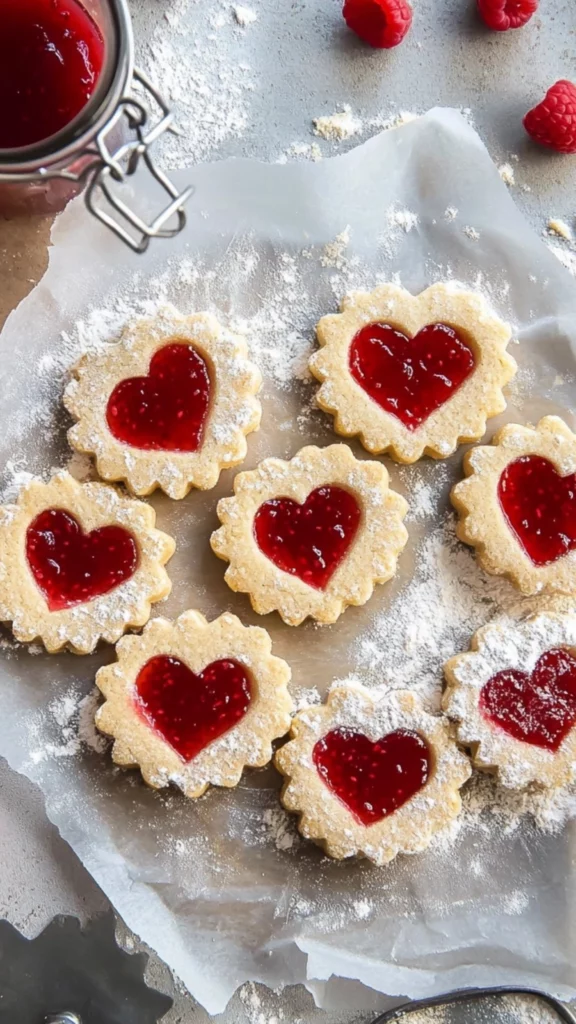
These adorable Raspberry Linzer Cookies are as beautiful as they are delicious! Buttery, perfectly sweet, and filled with the most delicious raspberry jam, they’re a treat for the eyes and the taste buds. Imagine delicate cookies with a heart-shaped cutout, revealing a vibrant red jam filling dusted with powdered sugar. They’re the perfect addition to any holiday cookie platter or a sweet gift for someone special. This easy recipe is ideal for beginner bakers, requiring minimal ingredients and delivering maximum impact.
- Prep Time: 10 minutes
- Cook Time: 10 minutes
- Total Time: 50 minutes
- Yield: 24 cookies (12 filled) 1x
- Category: Dessert
- Method: Baking
- Cuisine: European, German, Austrian
- Diet: Vegetarian
Ingredients
- 1 cup (2 sticks) unsalted butter, room temperature
- 2/3 cup granulated sugar
- 1 large egg yolk
- 2 tsp almond extract (optional)
- 1 tsp vanilla extract
- 2 cups all-purpose flour
- 2/3 cup superfine almond meal or almond flour
- 1 Tbsp cornstarch
- 1/4 tsp fine salt
- 2 cups raspberry jam
- 1/4 cup powdered sugar
Instructions
1. Roll to the Correct Thickness (The Even Layer): Roll the chilled dough out on the plastic wrap to be 1/8 inch thick. Using rolling pin bands can help you achieve an even thickness throughout the dough. If the dough cracks or splits a bit as you roll it out, don’t worry! It will come back together as you continue to roll it. You can also cut the cookies out around any large splits. If the dough becomes too soft to handle while rolling, simply lift the entire sheet of plastic wrap with the dough and place it back in the refrigerator for 5-10 minutes to let it firm up.
2. Cream Butter and Sugar (The Foundation): In a large bowl or the bowl of a stand mixer fitted with the paddle attachment, beat the room temperature butter and granulated sugar on medium-high speed for a couple of minutes, until the mixture becomes lighter in color, fluffy, and almost doubled in volume. This process incorporates air into the butter and sugar, which is essential for creating a light and tender cookie.
3. Add Egg Yolk and Extracts (The Flavor Boosters): Add the egg yolk, almond extract (if using), and vanilla extract to the creamed butter and sugar. Mix on medium speed until well combined. The mixture should be smooth and creamy.
4. Combine Dry Ingredients (The Building Blocks): In a separate bowl, whisk together the all-purpose flour, almond flour, cornstarch, and salt. Whisking ensures that the dry ingredients are evenly distributed, preventing lumps and ensuring consistent flavor throughout the dough.
5. Incorporate Dry Ingredients (The Gentle Touch): Gradually mix the flour mixture into the butter mixture on low speed until it is just incorporated. Be very careful not to overmix the dough. Overmixing can develop the gluten in the flour, resulting in tough cookies. Stop mixing as soon as the dry ingredients are combined and no streaks of flour remain. Scrape the sides of the bowl with a rubber spatula as needed to ensure that all of the ingredients are evenly incorporated.
6. Chill the Dough (The Essential Step): Divide the dough in half and wrap each portion tightly in plastic wrap. Flatten each portion into a rectangle (about 1/4 inch thick). This will make it easier to roll out the dough later. Chill the dough in the refrigerator for at least 45 minutes, or up to overnight. Chilling the dough is absolutely crucial! It allows the butter to solidify, which prevents the cookies from spreading too much during baking. It also makes the dough easier to handle and less sticky.
7. Preheat Oven and Prepare Baking Sheets (The Prep Work): Preheat your oven to 350°F (175°C) about 30 minutes before you plan to roll out the dough. This ensures that your oven is at the correct temperature when you bake the cookies. Line two large baking sheets with parchment paper or silicone baking mats. Parchment paper or silicone mats prevent the cookies from sticking to the baking sheet and make cleanup a breeze.
8. Roll Out the Dough (The Art of Precision): Take one piece of chilled dough out of the fridge (keep the other portion chilled until you’re ready to use it). Unwrap the dough and place it on a sheet of plastic wrap. Dust both sides of the dough and your rolling pin generously with flour. This will prevent the dough from sticking to the plastic wrap and rolling pin.
9. Cut Out Cookies (The Shapes of Delight): Cut out 1 1/2-inch scalloped circles using a floured cookie cutter. If you don’t have a circle cutter that size, you can use a round glass that’s similar in size. Dip your cookie cutter in flour each time before cutting out a cookie to prevent the dough from sticking. Use a 3/4-inch heart-shaped cutter (or another shape of your choice) to remove the centers from half of the circles. These cut-outs will become the tops of your Linzer cookies. Save the dough scraps from the centers to be rolled out again with the next piece of dough.
10. Bake (The Transformation): Place the cookies about 2 inches apart on the prepared baking sheets. This allows enough space for the cookies to spread slightly during baking. Bake one sheet of cookies at a time on the middle rack of your oven for 9-10 minutes, or until the edges are just starting to turn a light golden brown. Keep a very close eye on the cookies as they bake, as they can brown quickly. It’s better to slightly underbake them than to overbake them, as overbaked Linzer cookies can be dry and crumbly.
11. Cool (The Settling Down): Let the baked cookies cool on the baking sheet for about 15 minutes before transferring them to a wire rack to finish cooling completely. This allows the cookies to firm up slightly, making them easier to handle. Trying to move them while they’re still hot can cause them to break.
12. Repeat with Remaining Dough (The Second Act): While the first batch of cookies is baking and cooling, knead together the cookie dough scraps from the cut-outs. Rewrap them in plastic wrap and pop them back in the refrigerator to chill for a few minutes. Then, pull out the second chilled portion of dough from the refrigerator and repeat steps 7-12. Continue this process with the chilled dough scraps until all of the dough has been used.
13. Dust with Powdered Sugar (The Snowy Topping): Once all of the cookies have fully cooled, it’s time to add the finishing touches. Use a powdered sugar sifter or a fine-mesh sieve to generously dust the tops of the cookies with the center cut-outs. This creates a beautiful, snowy effect and adds a touch of sweetness.
14. Fill with Jam (The Heart of the Matter): Spread about 2 teaspoons of your favorite raspberry jam on the flat side of each uncut cookie. Make sure the jam is spread evenly, but don’t spread it all the way to the edges, as it will spread further when you top the cookies.
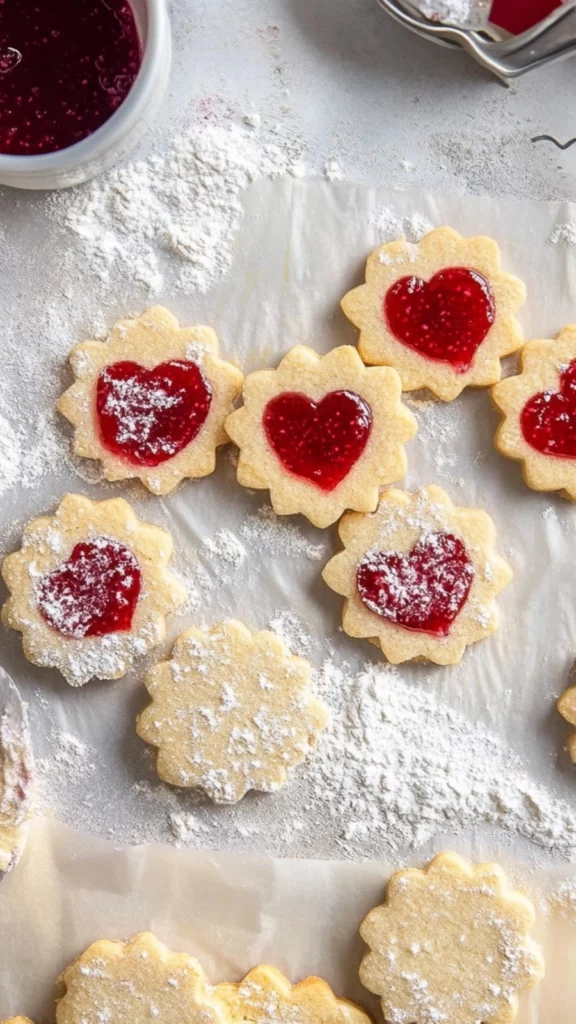
15. Assemble (The Grand Finale): Carefully top each jam-covered cookie with a cut-out cookie (powdered sugar side up), gently pressing down to spread the jam to the edges of the cut-out. The jam should peek through the heart-shaped cut-out, creating a beautiful and appetizing effect.
Notes
- Room Temperature Butter (The Key to Creaming): Using room temperature butter is absolutely essential for achieving a light and fluffy cookie dough. If your butter is too cold, it will be difficult to cream with the sugar, resulting in a dense and heavy dough. If it’s too warm, it will be greasy and the cookies will spread too much.
- Don’t Overmix (The Gentle Touch): Overmixing the dough can develop the gluten in the flour, which will make the cookies tough and chewy. Mix just until the ingredients are combined and no streaks of flour remain.
- Chill the Dough (The Essential Step): Don’t skip the chilling step! Chilling the dough is crucial for preventing the cookies from spreading too much during baking and for making the dough easier to handle.
- Rolling Dough (The Art of Evenness): If the dough becomes too soft to handle while rolling, place it back in the refrigerator for a few minutes to firm up. Dusting the dough and your rolling pin with flour will also help to prevent sticking.
- Baking Time (Watchful Eyes): Keep a close eye on the cookies while they’re baking, as they can brown quickly. It’s better to slightly underbake them than to overbake them.
- Cooling Completely (The Final Firming): Let the cookies cool completely before filling them with jam. This will prevent the jam from melting and will ensure that the cookies hold their shape.
This recipe is tailor-made for beginner cooks because it breaks down the seemingly complex process into manageable, bite-sized steps. We’ll demystify the art of working with a delicate dough and guide you through each stage, from mixing the initial ingredients to filling and decorating your finished cookies. We’ll explain the importance of chilling the dough, the proper way to roll it out, and how to prevent those pesky cracks. The recipe is also relatively time-efficient. While there’s a chilling period for the dough (which is crucial for achieving the right texture), the actual baking and assembly are surprisingly quick and easy. And while cookies aren’t exactly a health food, these Linzer cookies are a treat you can feel good about making at home. You control the ingredients, so you know exactly what’s going into them, and you can even make healthier swaps if you’re feeling adventurous (more on that later!). Plus, baking is a wonderful way to de-stress and unleash your creativity. The aroma of warm cookies filling your kitchen is an experience in itself!
Ingredients and Preparation (A Deeper Dive)
This recipe makes approximately 24 Linzer cookies (12 filled cookies), perfect for sharing or gifting.
Linzer Cookie Dough (The Foundation of Flavor):
- 1 cup (2 sticks) unsalted butter, room temperature – Room temperature butter is absolutely essential for easy creaming. If your butter is cold, it will be difficult to incorporate with the sugar, resulting in a lumpy dough. Let it sit at room temperature for at least an hour before you begin.
- 2/3 cup granulated sugar– Granulated sugar provides sweetness and helps to aerate the butter, creating a light and fluffy texture.
- 1 large egg yolk – Using just the yolk, rather than the whole egg, adds richness and tenderness to the dough. It also helps to prevent the cookies from spreading too much during baking.
- 2 tsp almond extract – Optional, but highly recommended! Almond extract adds a lovely, delicate flavor that complements the raspberry jam perfectly. You can also use vanilla extract, or a combination of both.
- 1 tsp vanilla extract – Vanilla extract enhances the overall flavor profile of the cookies, adding a touch of warmth and sweetness.
- 2 cups all-purpose flour – All-purpose flour forms the base of the dough. Measure it accurately, preferably using a kitchen scale, to ensure the correct ratio of ingredients.
- 2/3 cup superfine almond meal or almond flour – Almond meal or almond flour adds a delicate, nutty texture to the cookies and contributes to their melt-in-your-mouth quality. Don’t substitute regular ground almonds, as they will make the cookies too dense.
- 1 Tbsp cornstarch – Cornstarch helps to create a tender, crumbly texture. It also prevents the cookies from becoming too chewy.
- 1/4 tsp fine salt– Salt enhances the flavors of the other ingredients and helps to balance the sweetness.
Filling & Decorations (The Finishing Touches):
- 2 cups of your favorite raspberry jam – Seedless raspberry jam is highly recommended for a smooth, elegant filling. However, if you prefer a more rustic texture, you can use jam with seeds. You can also use other flavors of jam, such as apricot, strawberry, or black currant.
- 1/4 cup powdered sugar– Powdered sugar adds a touch of sweetness and creates a beautiful, snowy dusting on top of the cookies. Use a fine-mesh sieve or a powdered sugar shaker for even distribution.
Alternatives and Flexibility (Making it Your Own):
- Jam: Feel free to get creative with your jam selection! Apricot, strawberry, blackberry, or even a homemade jam would be absolutely delicious. Consider using a variety of jams for a colorful assortment of Linzer cookies.
- Extracts: You can experiment with different extracts to create unique flavor combinations. Lemon extract, orange extract, or even rosewater would be lovely additions to the dough.
- Cookie Cutters: Don’t be afraid to get creative with your cookie cutters! Use different shapes for the cut-outs in the center of the cookies, or even use different shapes for the overall cookie shape. Heart shapes are classic for Valentine’s Day, but you can also use stars, circles, or even custom cookie cutters.
Step-by-Step Instructions (With Extra Tips and Tricks for Success)
1. Roll to the Correct Thickness (The Even Layer): Roll the chilled dough out on the plastic wrap to be 1/8 inch thick. Using rolling pin bands can help you achieve an even thickness throughout the dough. If the dough cracks or splits a bit as you roll it out, don’t worry! It will come back together as you continue to roll it. You can also cut the cookies out around any large splits. If the dough becomes too soft to handle while rolling, simply lift the entire sheet of plastic wrap with the dough and place it back in the refrigerator for 5-10 minutes to let it firm up.
2. Cream Butter and Sugar (The Foundation): In a large bowl or the bowl of a stand mixer fitted with the paddle attachment, beat the room temperature butter and granulated sugar on medium-high speed for a couple of minutes, until the mixture becomes lighter in color, fluffy, and almost doubled in volume. This process incorporates air into the butter and sugar, which is essential for creating a light and tender cookie.
3. Add Egg Yolk and Extracts (The Flavor Boosters): Add the egg yolk, almond extract (if using), and vanilla extract to the creamed butter and sugar. Mix on medium speed until well combined. The mixture should be smooth and creamy.
4. Combine Dry Ingredients (The Building Blocks): In a separate bowl, whisk together the all-purpose flour, almond flour, cornstarch, and salt. Whisking ensures that the dry ingredients are evenly distributed, preventing lumps and ensuring consistent flavor throughout the dough.
5. Incorporate Dry Ingredients (The Gentle Touch): Gradually mix the flour mixture into the butter mixture on low speed until it is just incorporated. Be very careful not to overmix the dough. Overmixing can develop the gluten in the flour, resulting in tough cookies. Stop mixing as soon as the dry ingredients are combined and no streaks of flour remain. Scrape the sides of the bowl with a rubber spatula as needed to ensure that all of the ingredients are evenly incorporated.
6. Chill the Dough (The Essential Step): Divide the dough in half and wrap each portion tightly in plastic wrap. Flatten each portion into a rectangle (about 1/4 inch thick). This will make it easier to roll out the dough later. Chill the dough in the refrigerator for at least 45 minutes, or up to overnight. Chilling the dough is absolutely crucial! It allows the butter to solidify, which prevents the cookies from spreading too much during baking. It also makes the dough easier to handle and less sticky.
7. Preheat Oven and Prepare Baking Sheets (The Prep Work): Preheat your oven to 350°F (175°C) about 30 minutes before you plan to roll out the dough. This ensures that your oven is at the correct temperature when you bake the cookies. Line two large baking sheets with parchment paper or silicone baking mats. Parchment paper or silicone mats prevent the cookies from sticking to the baking sheet and make cleanup a breeze.
8. Roll Out the Dough (The Art of Precision): Take one piece of chilled dough out of the fridge (keep the other portion chilled until you’re ready to use it). Unwrap the dough and place it on a sheet of plastic wrap. Dust both sides of the dough and your rolling pin generously with flour. This will prevent the dough from sticking to the plastic wrap and rolling pin.
9. Cut Out Cookies (The Shapes of Delight): Cut out 1 1/2-inch scalloped circles using a floured cookie cutter. If you don’t have a circle cutter that size, you can use a round glass that’s similar in size. Dip your cookie cutter in flour each time before cutting out a cookie to prevent the dough from sticking. Use a 3/4-inch heart-shaped cutter (or another shape of your choice) to remove the centers from half of the circles. These cut-outs will become the tops of your Linzer cookies. Save the dough scraps from the centers to be rolled out again with the next piece of dough.
10. Bake (The Transformation): Place the cookies about 2 inches apart on the prepared baking sheets. This allows enough space for the cookies to spread slightly during baking. Bake one sheet of cookies at a time on the middle rack of your oven for 9-10 minutes, or until the edges are just starting to turn a light golden brown. Keep a very close eye on the cookies as they bake, as they can brown quickly. It’s better to slightly underbake them than to overbake them, as overbaked Linzer cookies can be dry and crumbly.
11. Cool (The Settling Down): Let the baked cookies cool on the baking sheet for about 15 minutes before transferring them to a wire rack to finish cooling completely. This allows the cookies to firm up slightly, making them easier to handle. Trying to move them while they’re still hot can cause them to break.
12. Repeat with Remaining Dough (The Second Act): While the first batch of cookies is baking and cooling, knead together the cookie dough scraps from the cut-outs. Rewrap them in plastic wrap and pop them back in the refrigerator to chill for a few minutes. Then, pull out the second chilled portion of dough from the refrigerator and repeat steps 7-12. Continue this process with the chilled dough scraps until all of the dough has been used.
13. Dust with Powdered Sugar (The Snowy Topping): Once all of the cookies have fully cooled, it’s time to add the finishing touches. Use a powdered sugar sifter or a fine-mesh sieve to generously dust the tops of the cookies with the center cut-outs. This creates a beautiful, snowy effect and adds a touch of sweetness.
14. Fill with Jam (The Heart of the Matter): Spread about 2 teaspoons of your favorite raspberry jam on the flat side of each uncut cookie. Make sure the jam is spread evenly, but don’t spread it all the way to the edges, as it will spread further when you top the cookies.
15. Assemble (The Grand Finale): Carefully top each jam-covered cookie with a cut-out cookie (powdered sugar side up), gently pressing down to spread the jam to the edges of the cut-out. The jam should peek through the heart-shaped cut-out, creating a beautiful and appetizing effect.
Beginner Tips and Notes (Words of Wisdom)
- Room Temperature Butter (The Key to Creaming): Using room temperature butter is absolutely essential for achieving a light and fluffy cookie dough. If your butter is too cold, it will be difficult to cream with the sugar, resulting in a dense and heavy dough. If it’s too warm, it will be greasy and the cookies will spread too much.
- Don’t Overmix (The Gentle Touch): Overmixing the dough can develop the gluten in the flour, which will make the cookies tough and chewy. Mix just until the ingredients are combined and no streaks of flour remain.
- Chill the Dough (The Essential Step): Don’t skip the chilling step! Chilling the dough is crucial for preventing the cookies from spreading too much during baking and for making the dough easier to handle.
- Rolling Dough (The Art of Evenness): If the dough becomes too soft to handle while rolling, place it back in the refrigerator for a few minutes to firm up. Dusting the dough and your rolling pin with flour will also help to prevent sticking.
- Baking Time (Watchful Eyes): Keep a close eye on the cookies while they’re baking, as they can brown quickly. It’s better to slightly underbake them than to overbake them.
- Cooling Completely (The Final Firming): Let the cookies cool completely before filling them with jam. This will prevent the jam from melting and will ensure that the cookies hold their shape.
Serving Suggestions (Sharing the Delight)
These Raspberry Linzer Cookies are perfect for any occasion! They make a beautiful addition to a holiday cookie platter, a delightful afternoon treat with a cup of tea or coffee, or a special gift for someone you love. They’re also a wonderful homemade treat for Valentine’s Day, Christmas, or any other festive occasion.
Storage Tips (Keeping them Fresh):
Store the finished cookies in an airtight container at room temperature for up to 4 days. To maintain their crispness, you can also store them in a single layer in a cookie tin lined with parchment paper.
Conclusion (A Sweet Ending)
Creating these Raspberry Linzer Cookies is a truly rewarding baking experience. Don’t be discouraged if your first attempt isn’t perfect. Like any baking project, it takes a little practice and patience. But with a little love and this easy-to-follow recipe, you’ll be whipping up beautiful and delicious Linzer cookies in no time. So, gather your ingredients, put on some music, and get ready to bake some sweet memories. Share your Linzer cookie creations with us in the comments below – we can’t wait to see what you make! Happy baking, and may your kitchen be filled with the sweet aroma of freshly baked cookies! And remember, the most important ingredient in any recipe is love. So, bake with love, share with love, and enjoy every delicious bite!


