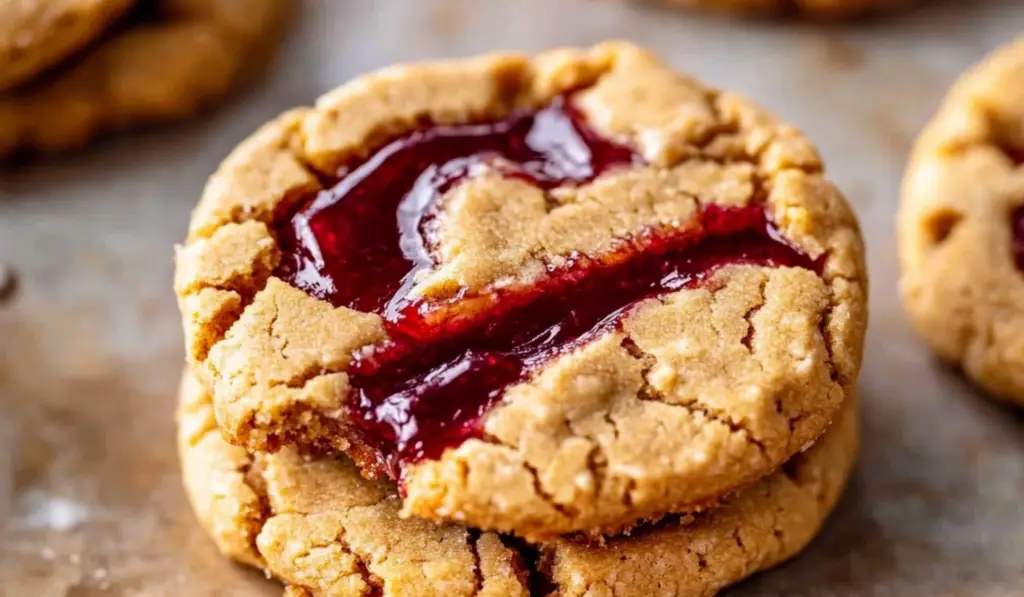
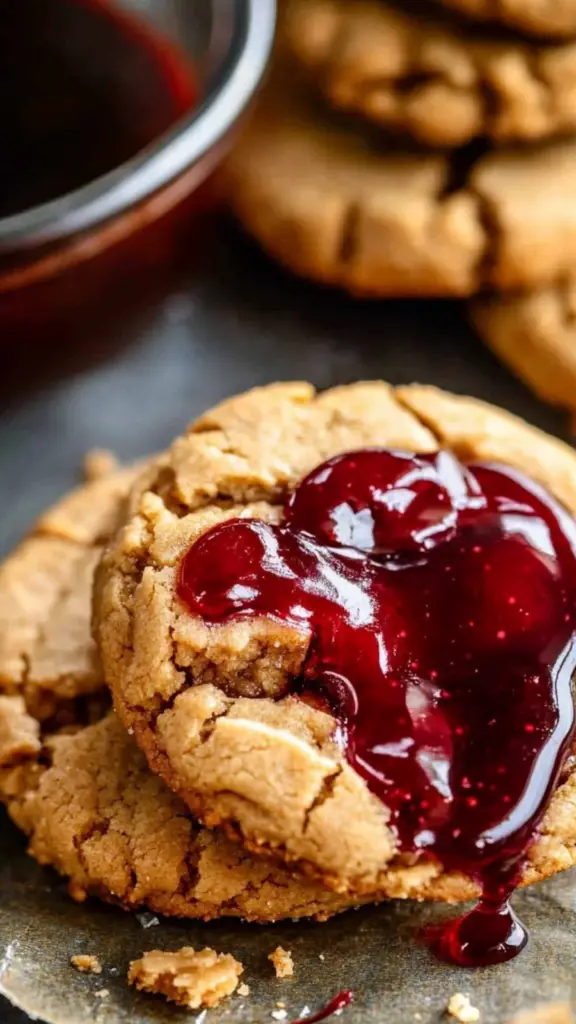
Peanut butter and jelly is a classic American combination that many of us associate with childhood memories—whether it was packed in our school lunchboxes or enjoyed as a comforting snack. But what if you could combine this timeless duo into a delicious, melt-in-your-mouth cookie? Enter Peanut Butter and Jelly Cookies, a soft, chewy treat that perfectly captures the essence of this beloved pairing, all in a cookie form!
PrintPeanut Butter and Jelly Cookies: A Nostalgic, Flavor-Packed Delight
Peanut butter and jelly is a classic American combination that many of us associate with childhood memories—whether it was packed in our school lunchboxes or enjoyed as a comforting snack. But what if you could combine this timeless duo into a delicious, melt-in-your-mouth cookie? Enter Peanut Butter and Jelly Cookies, a soft, chewy treat that perfectly captures the essence of this beloved pairing, all in a cookie form!
- Prep Time: 10 minutes
- Cook Time: 13 minutes
- Total Time: 23 minutes
- Yield: 28 cookies
- Category: Dessert, Cookies
- Method: Baking
- Cuisine: American
- Diet: Vegetarian
Ingredients
For the Cookie Dough:
- Butter (1/2 cup): The base of any good cookie dough is butter, and here, it provides a rich, smooth texture that will give your cookies that perfect melt-in-your-mouth quality.
- Granulated Sugar (3/4 cup) and Brown Sugar (1/4 cup): The combination of these two sugars gives the cookies the right amount of sweetness and a soft, chewy texture. Brown sugar also adds a hint of caramel-like richness.
- Peanut Butter (1 cup): This is the star of the show. Choose creamy peanut butter for a smooth, melt-in-your-mouth finish, or opt for crunchy peanut butter if you like a little extra texture in your cookies.
- Egg (1 large): The egg binds the ingredients together and helps with the cookie’s rise.
- Vanilla Extract (1 teaspoon): Adds depth to the flavor and complements the peanut butter beautifully.
- Flour (1 and 1/2 cups): All-purpose flour gives the cookies structure and helps hold everything together.
- Baking Soda (1 teaspoon): This leavening agent helps the cookies rise and become soft and tender.
- Kosher Salt (1/4 teaspoon): A pinch of salt enhances the sweet and savory flavors of the peanut butter.
For the Jam Topping:
- Seedless Jam (1/2 cup): You’ll need a smooth, seedless jam for the topping. Strawberry, grape, raspberry, or even apricot jam all work well here. Choose your favorite or switch it up based on your mood.
- More Jam (for topping): After baking, you can add a little more jam on top to make the cookies look extra appealing.
- Melted Peanut Butter (for garnish): A drizzle of melted peanut butter adds a rich finishing touch that pairs beautifully with the jam and peanut butter cookie base.
- Chopped Peanuts (for garnish): For a bit of crunch and extra peanut flavor, sprinkle some chopped peanuts on top of the cookies.
Instructions
Step 1: Preheat and Prepare Your Baking Sheets
Preheat your oven to 350°F (175°C) and line two baking sheets with parchment paper or a silicone baking mat. This ensures that the cookies don’t stick and makes for easy cleanup.
Step 2: Mix the Wet Ingredients
In a large mixing bowl or stand mixer, beat the butter until it’s smooth and creamy. Scrape down the sides of the bowl to ensure all of the butter is incorporated. Add the granulated sugar and brown sugar, and beat the mixture until fluffy and light. Scrape the sides of the bowl again to remove any sugar clumps.
Next, add the peanut butter and beat until fully combined. Peanut butter will be thick and sticky, so make sure to mix well until the dough is smooth. Add the egg and vanilla extract and beat until fully incorporated.
Step 3: Add the Dry Ingredients
In a separate bowl, combine the flour, baking soda, and kosher salt. Stir the dry ingredients to evenly distribute the baking soda and salt. Gradually add the dry mixture to the wet ingredients, mixing just until everything is combined. Be careful not to overmix; overmixing can result in tough cookies.
Step 4: Shape the Cookie Dough
Once your dough is ready, use a cookie scoop or your hands to shape the dough into 1 to 1.5-inch balls. Place them on the prepared baking sheets, spacing the cookies a couple of inches apart to allow for spreading during baking.
Step 5: Press the Cookies with a Fork
To give your cookies that classic peanut butter cookie look, dip a fork into a bit of sugar or flour (to prevent sticking) and press it gently into the top of each cookie. Turn the fork perpendicular and press again, creating a crisscross pattern. This step will flatten the cookies to about half their thickness.
Step 6: Add the Jam
Now for the best part—adding the jam! Take a teaspoon of your chosen seedless jam (stirred to smooth out any lumps) and carefully place a small dollop on the center of each cookie. Be sure not to let the jam spill over the edges, as it can cause the cookies to become gummy. If the jam touches the pan, it might spread, but it will still be delicious!
Step 7: Bake the Cookies
Place the baking sheets in the preheated oven and bake the cookies for 13-15 minutes, or until the edges are set and lightly browned. These cookies are a bit delicate, so be careful not to underbake them. A slight browning around the edges is the perfect indicator that they’re ready.
Once baked, let the cookies rest on the baking sheets for 5-10 minutes before transferring them to a wire rack to cool completely. The jam on top will be hot, so be cautious.
Step 8: Garnish and Serve
If you want your cookies to look extra beautiful, drizzle some melted peanut butter over the top and sprinkle with chopped peanuts for a little crunch. You can also add a touch more jam to make the cookies look even more appealing.
Serve them up with a glass of milk, or just enjoy them straight from the cooling rack. These cookies are a crowd-pleaser and will have everyone reaching for more.
Notes
- Don’t Overmix the Dough: Overmixing cookie dough can make the cookies tough. Once the dry ingredients are incorporated, stop mixing.
- Jam Choice: While classic strawberry jam is always a favorite, don’t be afraid to experiment with other flavors. Raspberry, grape, or even blueberry jam work beautifully in these cookies.
- Freezing the Dough: If you want to make these cookies ahead of time, the dough freezes well. Shape the dough into balls, press with a fork, and freeze on a baking sheet. Once frozen, transfer the dough balls to a ziplock bag. When you’re ready to bake, add the jam and bake the cookies directly from the freezer. Just add an extra minute or two to the baking time.
These cookies are a delightful twist on the traditional peanut butter cookie, with a dollop of sweet and fruity jam on top to create the perfect balance of creamy peanut butter and tart jam. If you’re someone who can never get enough of peanut butter and jelly sandwiches, then these cookies will become your new favorite treat. They’re simple to make, incredibly satisfying, and ready to be devoured in no time.
In this article, we’ll explore how to make these irresistible cookies, provide tips for success, and share fun ideas for variations and serving suggestions. Whether you’re baking for a special occasion or simply craving a nostalgic snack, these Peanut Butter and Jelly Cookies are sure to please everyone at the table.
Ingredients Breakdown
To make these cookies, you’ll need just a few pantry staples, most of which you likely already have on hand. Here’s what you’ll need for the cookie dough and topping:
For the Cookie Dough:
- Butter (1/2 cup): The base of any good cookie dough is butter, and here, it provides a rich, smooth texture that will give your cookies that perfect melt-in-your-mouth quality.
- Granulated Sugar (3/4 cup) and Brown Sugar (1/4 cup): The combination of these two sugars gives the cookies the right amount of sweetness and a soft, chewy texture. Brown sugar also adds a hint of caramel-like richness.
- Peanut Butter (1 cup): This is the star of the show. Choose creamy peanut butter for a smooth, melt-in-your-mouth finish, or opt for crunchy peanut butter if you like a little extra texture in your cookies.
- Egg (1 large): The egg binds the ingredients together and helps with the cookie’s rise.
- Vanilla Extract (1 teaspoon): Adds depth to the flavor and complements the peanut butter beautifully.
- Flour (1 and 1/2 cups): All-purpose flour gives the cookies structure and helps hold everything together.
- Baking Soda (1 teaspoon): This leavening agent helps the cookies rise and become soft and tender.
- Kosher Salt (1/4 teaspoon): A pinch of salt enhances the sweet and savory flavors of the peanut butter.
For the Jam Topping:
- Seedless Jam (1/2 cup): You’ll need a smooth, seedless jam for the topping. Strawberry, grape, raspberry, or even apricot jam all work well here. Choose your favorite or switch it up based on your mood.
- More Jam (for topping): After baking, you can add a little more jam on top to make the cookies look extra appealing.
- Melted Peanut Butter (for garnish): A drizzle of melted peanut butter adds a rich finishing touch that pairs beautifully with the jam and peanut butter cookie base.
- Chopped Peanuts (for garnish): For a bit of crunch and extra peanut flavor, sprinkle some chopped peanuts on top of the cookies.
Step-by-Step Instructions
Now that you know what you’ll need, it’s time to get baking! These Peanut Butter and Jelly Cookies are quick and easy to make, and the process is simple. Here’s a step-by-step guide to achieving cookie perfection.
Step 1: Preheat and Prepare Your Baking Sheets
Preheat your oven to 350°F (175°C) and line two baking sheets with parchment paper or a silicone baking mat. This ensures that the cookies don’t stick and makes for easy cleanup.
Step 2: Mix the Wet Ingredients
In a large mixing bowl or stand mixer, beat the butter until it’s smooth and creamy. Scrape down the sides of the bowl to ensure all of the butter is incorporated. Add the granulated sugar and brown sugar, and beat the mixture until fluffy and light. Scrape the sides of the bowl again to remove any sugar clumps.
Next, add the peanut butter and beat until fully combined. Peanut butter will be thick and sticky, so make sure to mix well until the dough is smooth. Add the egg and vanilla extract and beat until fully incorporated.
Step 3: Add the Dry Ingredients
In a separate bowl, combine the flour, baking soda, and kosher salt. Stir the dry ingredients to evenly distribute the baking soda and salt. Gradually add the dry mixture to the wet ingredients, mixing just until everything is combined. Be careful not to overmix; overmixing can result in tough cookies.
Step 4: Shape the Cookie Dough
Once your dough is ready, use a cookie scoop or your hands to shape the dough into 1 to 1.5-inch balls. Place them on the prepared baking sheets, spacing the cookies a couple of inches apart to allow for spreading during baking.
Step 5: Press the Cookies with a Fork
To give your cookies that classic peanut butter cookie look, dip a fork into a bit of sugar or flour (to prevent sticking) and press it gently into the top of each cookie. Turn the fork perpendicular and press again, creating a crisscross pattern. This step will flatten the cookies to about half their thickness.
Step 6: Add the Jam
Now for the best part—adding the jam! Take a teaspoon of your chosen seedless jam (stirred to smooth out any lumps) and carefully place a small dollop on the center of each cookie. Be sure not to let the jam spill over the edges, as it can cause the cookies to become gummy. If the jam touches the pan, it might spread, but it will still be delicious!
Step 7: Bake the Cookies
Place the baking sheets in the preheated oven and bake the cookies for 13-15 minutes, or until the edges are set and lightly browned. These cookies are a bit delicate, so be careful not to underbake them. A slight browning around the edges is the perfect indicator that they’re ready.
Once baked, let the cookies rest on the baking sheets for 5-10 minutes before transferring them to a wire rack to cool completely. The jam on top will be hot, so be cautious.
Step 8: Garnish and Serve
If you want your cookies to look extra beautiful, drizzle some melted peanut butter over the top and sprinkle with chopped peanuts for a little crunch. You can also add a touch more jam to make the cookies look even more appealing.
Serve them up with a glass of milk, or just enjoy them straight from the cooling rack. These cookies are a crowd-pleaser and will have everyone reaching for more.
Tips for Success
- Don’t Overmix the Dough: Overmixing cookie dough can make the cookies tough. Once the dry ingredients are incorporated, stop mixing.
- Jam Choice: While classic strawberry jam is always a favorite, don’t be afraid to experiment with other flavors. Raspberry, grape, or even blueberry jam work beautifully in these cookies.
- Freezing the Dough: If you want to make these cookies ahead of time, the dough freezes well. Shape the dough into balls, press with a fork, and freeze on a baking sheet. Once frozen, transfer the dough balls to a ziplock bag. When you’re ready to bake, add the jam and bake the cookies directly from the freezer. Just add an extra minute or two to the baking time.
Variations to Try
- Nut Butters: If you’re allergic to peanuts or simply want to switch things up, almond butter or cashew butter can be substituted for peanut butter. These options will give your cookies a slightly different flavor but still provide that creamy texture.
- Add Chocolate: For a decadent twist, sprinkle mini chocolate chips on top of the jam before baking. The chocolate melts and adds another layer of richness to the cookie.
- Nut-Free Version: If you need to make a nut-free version of these cookies, try using sunflower seed butter in place of the peanut butter. It provides a similar consistency and flavor without the nuts.
Storage and Freezing
These Peanut Butter and Jelly Cookies stay fresh for up to 3 days when stored in an airtight container at room temperature. If you want to keep them longer, you can refrigerate them for up to a week, or freeze them for up to 3 months. To freeze, place the cooled cookies in a single layer on a baking sheet, freeze until solid, and then transfer to a freezer bag. This way, you’ll have homemade cookies ready to go whenever you crave them!
Conclusion: A Sweet, Nostalgic Treat
Peanut Butter and Jelly Cookies are the perfect way to enjoy a beloved childhood combination in a fun and delicious new form. With their soft, chewy texture and the sweet, fruity jam topping, these cookies are a surefire hit for anyone who loves peanut butter or is looking for a nostalgic snack. Whether you make them for a special occasion or just as a treat for yourself, these cookies are bound to bring joy to your taste buds and warm memories to your heart.
So, grab your ingredients, preheat your oven, and get ready to indulge in the ultimate peanut butter and jelly-inspired cookie!
