I distinctly remember the moment I first experienced the unique, warm, and spiced flavor of Biscoff spread. It was a culinary epiphany! The rich, caramel-like notes were unlike anything I had tasted before, and I was immediately inspired to incorporate it into my dessert repertoire. I was preparing for an impromptu gathering and needed a dessert that was not only quick and easy but also undeniably delicious. These No-Bake Biscoff Cheesecake Cups proved to be the perfect solution. The creamy, rich cheesecake filling, infused with the irresistible flavor of Biscoff spread, paired harmoniously with the crunchy Biscoff crumb base, creating a symphony of textures and flavors. It was a dessert that impressed without requiring hours of labor in the kitchen, proving that simplicity and elegance can coexist. This No-Bake Biscoff Cheesecake Cups recipe is an ideal choice for beginner cooks because it requires no baking, minimal ingredients, and very little effort. It’s a fantastic way to create a delicious and impressive dessert without any prior baking experience. Plus, it’s a delightful treat that caters to everyone’s sweet tooth, making it perfect for any occasion, from casual gatherings to special celebrations.
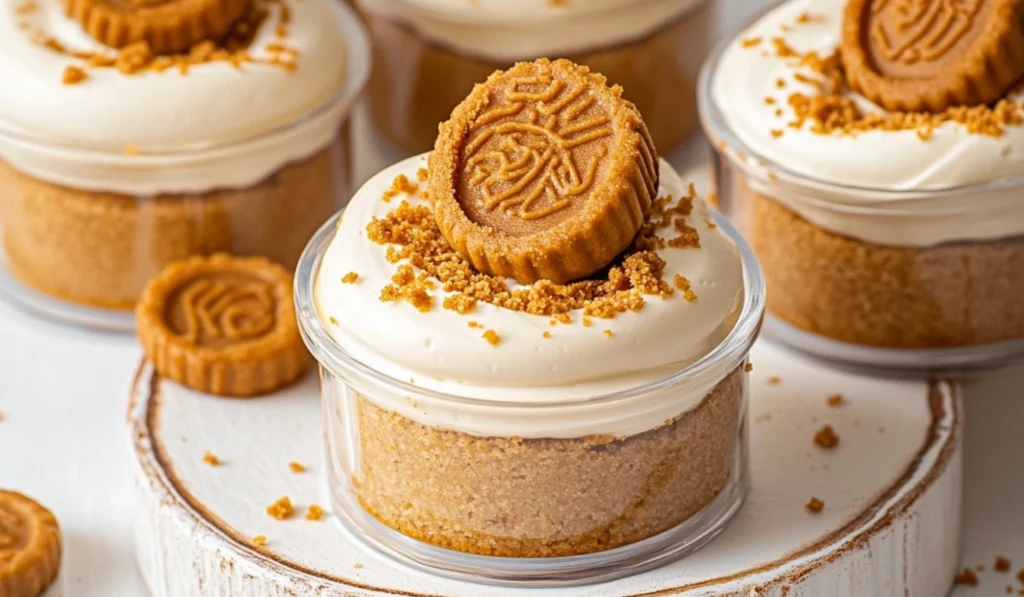
No-Bake Biscoff Cheesecake Cups: A Creamy Dream for Dessert Lovers
Indulge in the rich Biscoff flavor of these Cheesecake Cups. Biscoff cookies and spread blend for a creamy dessert.
- Prep Time: 20 minutes
- Cook Time: 0 minutes
- Total Time: 4 hours 20 minutes (including chilling time)
- Yield: 8 servings
- Category: Dessert
- Method: Mixing, Whipping, Chilling
- Cuisine: European Inspired, American
Ingredients
- Biscoff cookies (30)
- Melted butter (2 tbsp)
- Heavy cream (16 oz)
- Cream cheese (8 oz)
- Powdered sugar (1/2 cup)
- Biscoff spread (1/2 cup)
- Vanilla extract (1 tsp)
- Melted Biscoff spread (1/2 cup)
- Biscoff cookies (8)
Instructions
Make the Base (The Crumb Creation):
-
- Crush the Biscuits (The Crushing Commencement): Start by crushing the Lotus Biscoff biscuits into fine crumbs. You can use a food processor for a quick and even crush, or a rolling pin for a more hands-on approach. If using a rolling pin, place the biscuits in a zip-top bag and crush them until they are finely crumbled.
-
- Combine with Butter (The Binding Basics): In a medium bowl, combine the Biscoff crumbs with 2 tablespoons of melted unsalted butter. Mix until the crumbs are evenly coated with the butter and the mixture holds together when pressed.
-
- Reserve Crumbs (The Crumb Conservation): Reserve a few tablespoons of the crumb mixture for decoration. This will add a decorative touch and enhance the visual appeal of the finished cups.
-
- Divide into Cups (The Cup Distribution): Divide the remaining crumb mixture evenly into your serving cups. Add about 2-3 tablespoons of the mixture to each cup, depending on the size of your cups.
-
- Press Down (The Base Compaction): Press down on the crumb mixture in each cup to create an even, firm base. You can use the back of a spoon, a small glass, or your fingers to press it down firmly.
-
- Set Aside (The Base Backup): Set the cups aside while you prepare the cheesecake filling.
Make the Cheesecake Filling (The Filling Formation):
-
- Whip Heavy Cream (The Whipping Wonder): In a large bowl, whisk the heavy cream using an electric mixer or a stand mixer fitted with the whisk attachment until stiff peaks form. This creates a light and airy texture for the filling. Ensure the heavy cream is well chilled for optimal whipping.
-
- Cream Cheese Mixture (The Creaming Creation): In another bowl, whisk the cream cheese, powdered sugar, Biscoff spread, and vanilla extract until smooth and creamy. Ensure the cream cheese is at room temperature to avoid lumps. Use an electric mixer or a hand mixer for best results.
-
- Fold in Whipped Cream (The Folding Fusion): Gradually add the whipped heavy cream into the cream cheese mixture and fold gently until fully incorporated. Use a spatula to fold the cream, avoiding overmixing, which can deflate the cream and make the filling less airy.
Assemble (The Cup Construction):
-
- Prepare Piping Bag (The Piping Preparation): Add the cheesecake mixture to a large piping bag fitted with a large round tip or a star tip. This makes it easier to fill the cups evenly and neatly. If you don’t have a piping bag, you can use a zip-top bag with a corner snipped off.
-
- Pipe into Cups (The Piping Process): Pipe the cheesecake mixture into each dessert cup, filling them to the top. Ensure the filling is evenly distributed and reaches the top of each cup.
-
- Melt Biscoff Spread (The Melting Moment): Melt ½ cup of Biscoff spread in the microwave for 20 seconds or until liquidy. Be careful not to overheat it, as it can burn quickly.
-
- Top with Spread (The Topping Touch): Top each cup with a thin, even layer of melted Biscoff spread. Use a spoon or a small spatula to spread the melted spread smoothly.
-
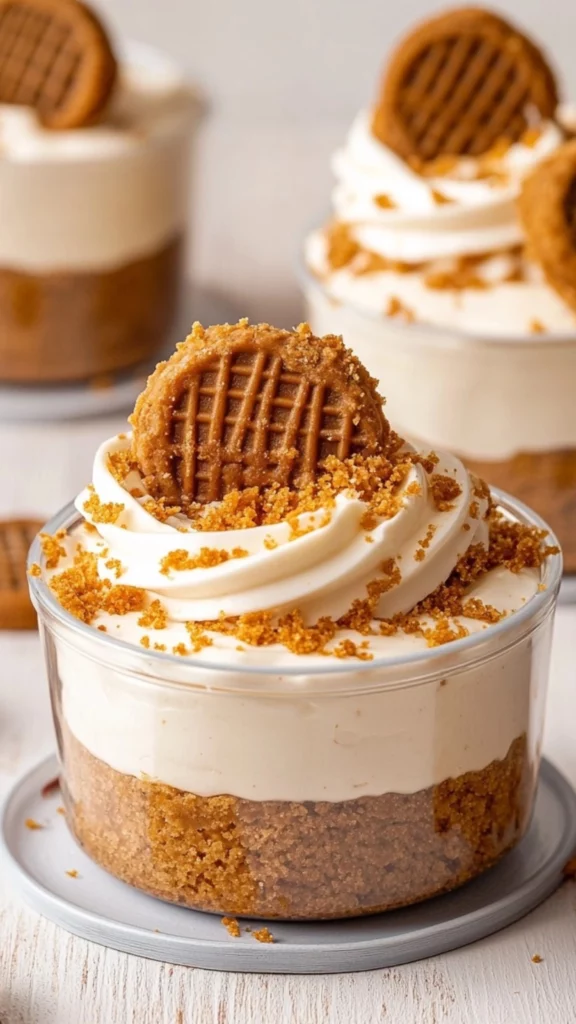
- Add Cookie Halves (The Cookie Completion): Add Biscoff cookie halves to decorate the top of each cup. Arrange them neatly on the surface of the melted Biscoff spread.
-
- Sprinkle Crumbs (The Crumb Climax): Sprinkle with a little reserved Biscoff crumb mixture for added texture and visual appeal. This enhances the Biscoff flavor and adds a decorative touch.
-
- Refrigerate (The Chilling Charm): Refrigerate the cups for at least 4 hours, or preferably overnight, until the cheesecake filling firms up and sets completely. This ensures the cups are firm and easy to serve.
Serve (The Serving Spectacle):
-
- Serve Chilled (The Chilling Choice): Serve the No-Bake Biscoff Cheesecake Cups chilled for the best taste and texture. The cold temperature enhances the creaminess of the filling and the crunchiness of the base.
Notes
- Use room temperature cream cheese.
- Whip cream to stiff peaks.
- Chill for 4 hours.
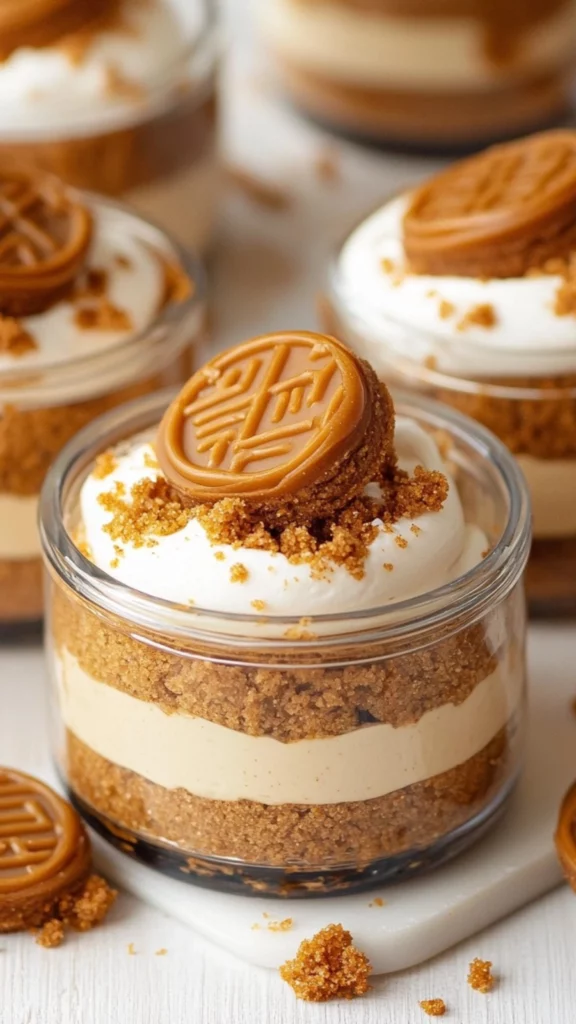
This No-Bake Biscoff Cheesecake Cups recipe is meticulously designed to be beginner-friendly, breaking down the entire process into simple, easily manageable steps. We’ll begin by creating a crunchy Biscoff crumb base, a foundation that provides a delightful textural contrast to the creamy filling. Then, we’ll move on to crafting a creamy, Biscoff-infused cheesecake filling, a simple mixture that’s packed with flavor and requires minimal culinary skills. Finally, we’ll assemble the cups, layering the crumb base and cheesecake filling, and garnish them with melted Biscoff spread and Biscoff cookie halves, creating a visually appealing and utterly delicious dessert. This recipe is a fantastic way to learn some basic dessert-making techniques, such as crushing cookies, whipping cream, and folding ingredients, while creating a decadent treat that’s perfect for any celebration or casual gathering.
Ingredients and Preparation (A Detailed Guide to Biscoff Bliss)
This recipe yields 8 regular-sized cups or 16 shot-sized cups, making it perfect for a small gathering, a dessert buffet, or a sweet treat for the family. You can easily adjust the ingredient amounts to make more or fewer servings, depending on your needs. This recipe is easily doubled or tripled for larger gatherings or to have extra cups for later enjoyment.
Ingredients (The Stars of the Show):
Crumb Base (The Crunchy Foundation):
- 30 Lotus Biscoff biscuits Lotus Biscoff biscuits form the base of the crumb layer, providing a unique, spiced, and caramel-like flavor. You can use other similar spiced cookies, graham crackers, or digestive biscuits for the crumb base. For a gluten-free version, use certified gluten-free spiced cookies.
- 2 tablespoons unsalted butter, melted Melted unsalted butter binds the crumbs together and creates a firm base. You can use salted butter, but omit a pinch of salt from the recipe.
Cheesecake Filling (The Creamy Core):
- 16 oz heavy cream (2 cups) Heavy cream forms the base of the cheesecake filling, providing a rich and creamy texture. Ensure the heavy cream is well chilled for optimal whipping.
- 8 oz cream cheese, at room temperature Cream cheese adds tanginess and creaminess to the filling. Ensure the cream cheese is at room temperature to avoid lumps in the filling.
- 1/2 cup powdered sugar Powdered sugar sweetens the filling and helps stabilize the whipped cream. You can adjust the amount of powdered sugar to your sweetness preference.
- 1/2 cup Biscoff spread Biscoff spread adds a unique, spiced, and caramel-like flavor to the filling. You can use other cookie butter spreads or Nutella for a different flavor profile.
- 1 teaspoon vanilla extract Vanilla extract adds a warm and aromatic flavor to the filling. You can use vanilla bean paste or another extract like almond extract.
Garnish (The Finishing Flourish):
- 1/2 cup Biscoff spread Melted Biscoff spread adds a glossy, flavorful topping to the cheesecake cups.
- 8 Biscoff cookies, cut in half Biscoff cookie halves add a decorative touch and enhance the Biscoff flavor.
Alternatives and Flexibility (Making it Your Own Culinary Creation):
- Biscuit Variations (The Biscuit Bonanza): You can use other similar spiced cookies, graham crackers, digestive biscuits, or shortbread cookies for the crumb base. For a gluten-free version, use certified gluten-free spiced cookies.
- Butter Substitutes (The Butter Switch): You can use salted butter, but omit a pinch of salt from the recipe. You can also use coconut oil or other melted fats.
- Heavy Cream Options (The Cream Choices): Ensure the heavy cream is well chilled for optimal whipping. You can use whipping cream or double cream as well.
- Cream Cheese Options (The Cream Cheese Choices): Ensure the cream cheese is at room temperature to avoid lumps in the filling. You can also use a combination of cream cheese and mascarpone cheese for a richer flavor.
- Sugar Substitutes (The Sugar Switch): You can adjust the amount of powdered sugar to your sweetness preference. You can also use other sweeteners like granulated sugar, brown sugar, or sugar substitutes like stevia or erythritol.
- Biscoff Spread Alternatives (The Spread Spectrum): You can use other cookie butter spreads, Nutella, peanut butter, almond butter, or other spreads for a different flavor profile.
- Extract Variations (The Extract Exploration): You can use vanilla bean paste, almond extract, lemon extract, or other extracts to add different flavors to the filling.
- Garnish Variations (The Garnish Glory): Feel free to get creative with your garnish. Other options include whipped cream, chocolate shavings, fresh berries, caramel sauce, sprinkles, chopped nuts, or edible flowers.
Step-by-Step Instructions (Easy Steps to Biscoff Cups)
Make the Base (The Crumb Creation):
- Crush the Biscuits (The Crushing Commencement): Start by crushing the Lotus Biscoff biscuits into fine crumbs. You can use a food processor for a quick and even crush, or a rolling pin for a more hands-on approach. If using a rolling pin, place the biscuits in a zip-top bag and crush them until they are finely crumbled.
- Combine with Butter (The Binding Basics): In a medium bowl, combine the Biscoff crumbs with 2 tablespoons of melted unsalted butter. Mix until the crumbs are evenly coated with the butter and the mixture holds together when pressed.
- Reserve Crumbs (The Crumb Conservation): Reserve a few tablespoons of the crumb mixture for decoration. This will add a decorative touch and enhance the visual appeal of the finished cups.
- Divide into Cups (The Cup Distribution): Divide the remaining crumb mixture evenly into your serving cups. Add about 2-3 tablespoons of the mixture to each cup, depending on the size of your cups.
- Press Down (The Base Compaction): Press down on the crumb mixture in each cup to create an even, firm base. You can use the back of a spoon, a small glass, or your fingers to press it down firmly.
- Set Aside (The Base Backup): Set the cups aside while you prepare the cheesecake filling.
Make the Cheesecake Filling (The Filling Formation):
- Whip Heavy Cream (The Whipping Wonder): In a large bowl, whisk the heavy cream using an electric mixer or a stand mixer fitted with the whisk attachment until stiff peaks form. This creates a light and airy texture for the filling. Ensure the heavy cream is well chilled for optimal whipping.
- Cream Cheese Mixture (The Creaming Creation): In another bowl, whisk the cream cheese, powdered sugar, Biscoff spread, and vanilla extract until smooth and creamy. Ensure the cream cheese is at room temperature to avoid lumps. Use an electric mixer or a hand mixer for best results.
- Fold in Whipped Cream (The Folding Fusion): Gradually add the whipped heavy cream into the cream cheese mixture and fold gently until fully incorporated. Use a spatula to fold the cream, avoiding overmixing, which can deflate the cream and make the filling less airy.
Assemble (The Cup Construction):
- Prepare Piping Bag (The Piping Preparation): Add the cheesecake mixture to a large piping bag fitted with a large round tip or a star tip. This makes it easier to fill the cups evenly and neatly. If you don’t have a piping bag, you can use a zip-top bag with a corner snipped off.
- Pipe into Cups (The Piping Process): Pipe the cheesecake mixture into each dessert cup, filling them to the top. Ensure the filling is evenly distributed and reaches the top of each cup.
- Melt Biscoff Spread (The Melting Moment): Melt ½ cup of Biscoff spread in the microwave for 20 seconds or until liquidy. Be careful not to overheat it, as it can burn quickly.
- Top with Spread (The Topping Touch): Top each cup with a thin, even layer of melted Biscoff spread. Use a spoon or a small spatula to spread the melted spread smoothly.
- Add Cookie Halves (The Cookie Completion): Add Biscoff cookie halves to decorate the top of each cup. Arrange them neatly on the surface of the melted Biscoff spread.
- Sprinkle Crumbs (The Crumb Climax): Sprinkle with a little reserved Biscoff crumb mixture for added texture and visual appeal. This enhances the Biscoff flavor and adds a decorative touch.
- Refrigerate (The Chilling Charm): Refrigerate the cups for at least 4 hours, or preferably overnight, until the cheesecake filling firms up and sets completely. This ensures the cups are firm and easy to serve.
Serve (The Serving Spectacle):
- Serve Chilled (The Chilling Choice): Serve the No-Bake Biscoff Cheesecake Cups chilled for the best taste and texture. The cold temperature enhances the creaminess of the filling and the crunchiness of the base.
Beginner Tips and Notes (Troubleshooting and Helpful Hints)
- Crushing Consistency (The Crushing Clarity): If you don’t have a food processor, you can crush the biscuits by placing them in a zip-top bag and using a rolling pin. Ensure the biscuits are crushed into fine crumbs for a smooth and even base.
- Softening Strategy (The Softening Solution): Ensure the cream cheese is at room temperature to avoid lumps in the filling. Leave it out for about 30 minutes before using. You can also microwave it in short intervals, but be careful not to overheat it.
- Whipping Wisdom (The Whipping Way): Ensure the heavy cream is well chilled for optimal whipping. Use an electric mixer or a stand mixer for best results. Chill the bowl and whisk attachment for even better results.
- Folding Finesse (The Folding Focus): When folding the whipped cream into the cream cheese mixture, use a gentle hand and avoid overmixing. Overmixing can deflate the cream and make the filling less airy and light.
Serving Suggestions (Enhancing Your Dessert Experience)
These No-Bake Biscoff Cheesecake Cups are delicious on their own, offering a creamy, spiced, and satisfying dessert experience. However, they can be further enhanced with some complementary sides and toppings to create a more elaborate and visually appealing dessert.
Complementary Sides (The Delicious Additions):
- Fresh Berry Medley (The Berry Bliss): Serve with a side of fresh berries like strawberries, raspberries, blueberries, or blackberries for a refreshing and slightly tart contrast to the creamy, sweet cheesecake.
- Whipped Cream Dollop (The Creamy Cloud): Add a dollop of homemade whipped cream for extra creaminess and a light, airy texture. You can also use flavored whipped cream, such as vanilla or cinnamon.
- Chocolate Sauce Drizzle (The Chocolate Charm): Drizzle with chocolate sauce, either dark chocolate or milk chocolate, for a decadent and rich touch.
- Caramel Sauce Swirl (The Caramel Craving): Drizzle with caramel sauce for a sweet and sticky finish that complements the Biscoff flavor.
- Fruit Compote (The Fruity Fusion): Serve with a warm or cold fruit compote, such as berry compote, apple compote, or pear compote, for a comforting and flavorful side.
Garnishes (The Garnish Glory):
- Biscoff Crumbles (The Crumb Crunch): Sprinkle with extra Biscoff crumbles for added texture and a more intense Biscoff flavor.
- Chocolate Shavings (The Chocolate Shimmer): Garnish with chocolate shavings, either dark chocolate or white chocolate, for a visually appealing and elegant touch.
- Chopped Nuts (The Nutty Nuances): Sprinkle with chopped nuts, such as walnuts, pecans, or almonds, for added texture and a nutty flavor.
- Edible Flowers (The Floral Flourish): Garnish with edible flowers for a beautiful and sophisticated presentation.
- Sprinkles (The Sprinkle Sparkle): Add a sprinkle of colorful sprinkles for a fun and festive touch.
Storage Tips (Keeping Your Cups Fresh and Flavorful):
- Store leftover cheesecake cups in an airtight container in the refrigerator for up to 3-4 days.
- Garnish with fresh toppings, such as berries or whipped cream, just before serving to maintain their freshness and prevent them from becoming soggy.
- If using nuts or fruit garnishes, add them just before serving to prevent them from becoming soggy or losing their texture.
Conclusion (Inviting You to Create and Share)
These No-Bake Biscoff Cheesecake Cups are a perfect example of how combining simple ingredients and techniques can create a truly delicious and impressive dessert that’s perfect for any occasion, from casual gatherings to special celebrations. They’re a fantastic option for parties, potlucks, family gatherings, or any time you want to share a sweet treat with loved ones. Don’t be afraid to experiment with the recipe and add your own personal touch. Try different cookie bases, fillings, or toppings to create your own unique version. And most importantly, have fun in the kitchen! Dessert making should be an enjoyable and creative experience, not a chore.
Now, I encourage you to try this recipe – you won’t be disappointed! Share your culinary creations and any variations you come up with in the comments below – I’d love to hear about your No-Bake Biscoff Cheesecake Cups adventures! Did you try a different cookie base? Did you add any special ingredients to the filling? What did your family or friends think? Let me know! Happy dessert making, and may your kitchen be filled with the warm, spiced aroma of Biscoff and the anticipation of a truly satisfying treat! And remember, the best part about dessert making is sharing your creations with loved ones. So, invite some friends or family over for a dessert gathering and enjoy these delightful No-Bake Biscoff Cheesecake Cups together. It’s a wonderful way to connect, create lasting memories, and savor the fruits (or rather, the cheesecake cups!) of your labor. These No-Bake Biscoff Cheesecake Cups are more than just a dessert; they’re a celebration of good food, good company, and the joy of sharing a truly delicious and memorable treat. Enjoy every flavorful bite! And who knows? Maybe this will become your new go-to recipe for a quick and easy dessert! You might even find yourself making a double or triple batch because they’re just that good. So, go ahead, embrace the simplicity of this recipe, unleash your culinary creativity, and prepare to be amazed by just how delicious and impressive these No-Bake Biscoff Cheesecake Cups are. They’re a guaranteed crowd-pleaser that will have everyone coming back for more. Bon appétit!


