Imagine the creamy, sweet indulgence of classic banana pudding, perfectly portioned into individual cups, each bite a symphony of soft bananas, crunchy Nilla Wafers, and luscious pudding. That’s the simple joy of these Nilla Wafer Banana Pudding Cups. I remember the first time I made these for a family gathering. My grandmother, a true Southern belle, had always made a large dish of banana pudding for every occasion. I wanted to recreate that comforting flavor but in a way that was easy to serve and looked beautiful. The individual cups were a hit! Everyone loved the nostalgic taste and the pretty presentation. This recipe is perfect for beginner cooks. It’s a no-bake dessert that requires minimal effort and time, making it ideal for those who want to impress without spending hours in the kitchen. The combination of instant pudding, whipped cream, and store-bought cookies makes it incredibly easy to assemble, while the fresh bananas add a touch of wholesome sweetness. Plus, the individual servings make it easy to control portions and create a visually appealing dessert that’s perfect for any occasion.

Nilla Wafer Banana Pudding Cups: A Sweet Slice of Southern Comfort

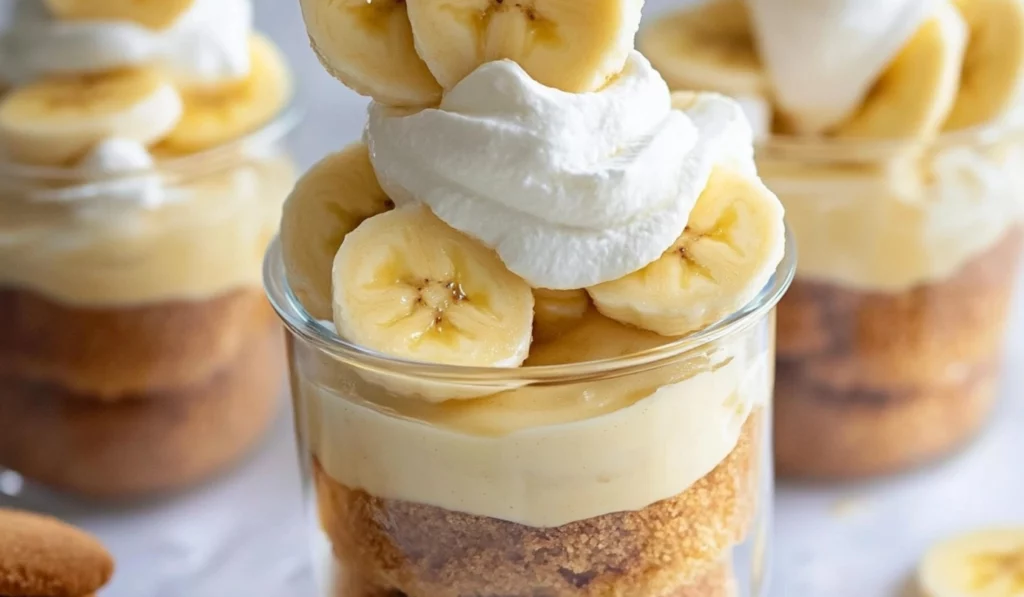
Enjoy creamy banana pudding layered with fresh bananas and Nilla Wafers, served in individual cups. A simple, no-bake dessert.
- Prep Time: 20 minutes
- Cook Time: 0 minutes
- Total Time: 20 minutes
- Yield: 6 servings 1x
- Category: Dessert
- Method: No-Bake
- Cuisine: American
Ingredients
- 2 cups cold milk
- 1 3.4 ounces package instant vanilla pudding
- 2 cups heavy whipping cream
- ¼ cup powdered sugar
- 1 teaspoon vanilla extract
- 2–3 large bananas, peeled and sliced
- 36 Nilla Wafer cookies
Instructions
- Prepare the Pudding: In a medium mixing bowl, whisk together the cold milk and instant vanilla pudding mix until thickened, about 2 minutes. Whisk vigorously to ensure the pudding is smooth and lump-free. Cover the bowl with plastic wrap and refrigerate for at least 5 minutes, or until needed. This allows the pudding to set properly and thicken.
- Make the Whipped Cream: In a separate medium mixing bowl, beat together the heavy whipping cream, powdered sugar, and vanilla extract with an electric mixer on medium speed until stiff peaks form. Be careful not to over-beat, as this can turn the cream into butter. Stop mixing when the cream forms stiff peaks that hold their shape.
- Prepare the Cups: Set 6 plastic 9-ounce punch cups on the counter or a cookie sheet for easy assembly. This will help you keep the cups stable while you layer the ingredients.
- Layer the Bananas: Place banana slices along the bottom of each cup around the sides so they are visible from the outside. This creates a visually appealing presentation and adds a layer of fresh fruit to the pudding cups.
- Add the First Pudding Layer: Scoop ¼ cup of the vanilla pudding into the bottom of each cup and spread it out so the banana slices are fully covered. This layer will hold the bananas in place and create a base for the other layers.
- Add the Nilla Wafers: Place 4-5 Nilla Wafers in each cup on top of the pudding layer, positioning the cookies facing out so each round cookie is visible through the sides of the cups. This adds a decorative touch and ensures the cookies are evenly distributed.
- Add the Whipped Cream Layer: Scoop ¼ cup of the whipped cream into each cup and smooth it out so the Nilla Wafers are fully covered. This layer adds a light and airy texture to the pudding cups.
- Add the Remaining Pudding: Divide the remaining vanilla pudding evenly into each cup, creating a final layer of creamy pudding.
- Garnish: Top each cup with a dollop of the remaining whipped cream and a Nilla Wafer for garnish. If serving immediately, add a slice of banana for an extra touch.
Notes
- Use cold milk and cream.
- Don’t overmix pudding or whipped cream.
- Slice bananas just before assembling.
- Layer ingredients evenly.
- Chill before serving.
Ingredients and Preparation: The Heart of the Pudding
This recipe relies on a few simple, readily available ingredients that, when layered together, create a classic and comforting dessert. Here’s a detailed breakdown with added tips and tricks to ensure success:
Pudding:
- Cold Milk: 2 cups. Cold milk is crucial for activating the instant pudding mix. The colder the milk, the faster the pudding will set. Whole milk is recommended for the richest flavor and creamiest texture, but 2% or even non-dairy alternatives like almond or oat milk can be used.
- Instant Vanilla Pudding Mix (3.4 oz package): 1 package. Instant pudding mix is the key to this quick and easy dessert. Ensure you are using instant pudding, not cook-and-serve, as the latter requires cooking and will not set properly in this recipe.
Whipped Cream:
- Heavy Whipping Cream: 2 cups. Heavy whipping cream is essential for creating light, airy whipped cream. Ensure it is very cold before whipping. Cold cream whips faster and holds its shape better.
- Powdered Sugar: ¼ cup. Powdered sugar adds sweetness to the whipped cream and dissolves easily, creating a smooth, lump-free texture. Sift the powdered sugar if it appears lumpy.
- Vanilla Extract: 1 teaspoon. Vanilla extract enhances the flavors of the whipped cream and adds a warm, sweet note. Use pure vanilla extract for the best flavor.
Assembly:
- Large Bananas, Peeled and Sliced: 2-3. Ripe but firm bananas are ideal for this recipe. Overripe bananas will become mushy, while underripe bananas will lack sweetness. Slice the bananas just before assembling the pudding cups to prevent browning.
- Nilla Wafer Cookies: 36. Nilla Wafers provide a sweet, crunchy contrast to the creamy pudding and soft bananas. They are a classic addition to banana pudding, but other vanilla wafers or cookies can be used.
Alternative Ingredient Suggestions:
Pudding:
- Banana Cream Pudding Mix: For an even more intense banana flavor, use instant banana cream pudding mix instead of vanilla.
- Non-Dairy Milk: Almond milk, soy milk, oat milk, or coconut milk can be used for a dairy-free version. Choose unsweetened varieties to control the sweetness of the pudding.
- Banana Extract: Add a splash of banana extract to the pudding for an extra boost of banana flavor.
- Spices: Add a pinch of cinnamon or nutmeg to the pudding mix for added warmth and spice.
- Other Instant Pudding Flavors: Try using other instant pudding flavors like butterscotch or white chocolate for a different twist.
Whipped Cream:
- Store-Bought Whipped Topping: For a quicker option, use store-bought whipped topping instead of making your own.
- Coconut Cream: For a dairy-free whipped cream alternative, chill a can of full-fat coconut milk overnight. Scoop out the solid cream and whip it with powdered sugar and vanilla extract.
- Liqueur: Add a tablespoon of liqueur, such as rum or amaretto, to the whipped cream for added flavor.
- Stabilized Whipped Cream: Add a teaspoon of cornstarch or gelatin to the whipped cream to stabilize it and prevent it from weeping.
Assembly:
- Other Cookies: Try using other types of vanilla wafers, shortbread cookies, or graham crackers instead of Nilla Wafers.
- Fresh Berries: Add layers of fresh berries, such as strawberries, blueberries, or raspberries, for added flavor and color.
- Toasted Nuts: Add a layer of toasted pecans or walnuts for a nutty crunch.
- Sauces: Drizzle caramel or chocolate sauce over the pudding cups for added sweetness and flavor.
- Plantains: Use plantains instead of bananas for a slight variation in flavor and texture. Plantains are less sweet and have a firmer texture than bananas.
Step-by-Step Instructions: Creating Your Nilla Wafer Banana Pudding Cups Masterpiece
- Prepare the Pudding: In a medium mixing bowl, whisk together the cold milk and instant vanilla pudding mix until thickened, about 2 minutes. Whisk vigorously to ensure the pudding is smooth and lump-free. Cover the bowl with plastic wrap and refrigerate for at least 5 minutes, or until needed. This allows the pudding to set properly and thicken.
- Make the Whipped Cream: In a separate medium mixing bowl, beat together the heavy whipping cream, powdered sugar, and vanilla extract with an electric mixer on medium speed until stiff peaks form. Be careful not to over-beat, as this can turn the cream into butter. Stop mixing when the cream forms stiff peaks that hold their shape.
- Prepare the Cups: Set 6 plastic 9-ounce punch cups on the counter or a cookie sheet for easy assembly. This will help you keep the cups stable while you layer the ingredients.
- Layer the Bananas: Place banana slices along the bottom of each cup around the sides so they are visible from the outside. This creates a visually appealing presentation and adds a layer of fresh fruit to the pudding cups.
- Add the First Pudding Layer: Scoop ¼ cup of the vanilla pudding into the bottom of each cup and spread it out so the banana slices are fully covered. This layer will hold the bananas in place and create a base for the other layers.
- Add the Nilla Wafers: Place 4-5 Nilla Wafers in each cup on top of the pudding layer, positioning the cookies facing out so each round cookie is visible through the sides of the cups. This adds a decorative touch and ensures the cookies are evenly distributed.
- Add the Whipped Cream Layer: Scoop ¼ cup of the whipped cream into each cup and smooth it out so the Nilla Wafers are fully covered. This layer adds a light and airy texture to the pudding cups.
- Add the Remaining Pudding: Divide the remaining vanilla pudding evenly into each cup, creating a final layer of creamy pudding.
- Garnish: Top each cup with a dollop of the remaining whipped cream and a Nilla Wafer for garnish. If serving immediately, add a slice of banana for an extra touch.
Beginner Tips and Notes: Mastering the Art of Nilla Wafer Banana Pudding Cups
- Cold Ingredients: Ensure the milk and heavy whipping cream are very cold for optimal results. Cold ingredients whip up faster and create a smoother texture.
- Don’t Overmix: Be careful not to overmix the pudding or the whipped cream. Overmixing the pudding can make it too thick, and overmixing the whipped cream can turn it into butter.
- Banana Preparation: Slice the bananas just before assembling the pudding cups to prevent them from browning. If you need to slice them ahead of time, toss them with a little lemon juice to slow down the browning process.
- Layering Technique: Layer the ingredients evenly to ensure each cup has a consistent flavor and texture.
Serving Suggestions: Completing Your Nilla Wafer Banana Pudding Cups Experience
- Caramel Drizzle: Drizzle caramel sauce over the top of the pudding cups for added sweetness and a rich, gooey flavor.
- Chocolate Shavings: Garnish with dark or milk chocolate shavings for a decadent touch and a hint of bitterness to balance the sweetness.
- Toasted Nuts: Sprinkle toasted pecans, walnuts, or almonds over the top for added crunch and a nutty flavor.
- Fruit Compote: Serve with a side of warm fruit compote, such as a berry or apple compote, for a warm and fruity contrast.
Storage Tips for Leftovers:
- Refrigeration: Store leftover pudding cups in an airtight container in the refrigerator for up to 2 days. The Nilla Wafers will soften over time, but the pudding will remain creamy.
- Preventing Browning: To prevent the bananas from browning, add a layer of whipped cream or pudding on top of the banana slices before storing.
- Separate Storage: If you have leftover pudding, whipped cream, or bananas, store them separately in airtight containers. This will help maintain their texture and freshness.
- Cookie Storage: Store leftover Nilla Wafers in an airtight container at room temperature to keep them crisp.

Conclusion: Share Your Culinary Creations!
These Nilla Wafer Banana Pudding Cups are a delightful and easy dessert that’s perfect for any occasion. I encourage you to try this recipe and share your baking (or rather, assembling) experiences in the comments below! I’d love to hear about your variations, tips, and tricks. Did you add any extra toppings, use different cookies, or get creative with the presentation? Your feedback is valuable and inspires other home cooks. Let us know how your pudding cups turned out and what serving suggestions you enjoyed most. Share your photos and tag me on social media so I can see your Nilla Wafer Banana Pudding Cups masterpieces! Use #BananaPuddingCups and #EasyDesserts so I can find your creations. I also enjoy seeing your culinary adventures on Instagram stories, so feel free to tag me and show off your creations. Happy assembling, and I can’t wait to see what you create!


