
There’s something about bite-sized desserts that makes them extra special. They’re adorable, perfectly portioned, and packed with flavor. One of my all-time favorite mini treats is the Mini Cannoli Bites. These little gems taste just like traditional cannoli but are so much easier to make. When I first tried making these, I was amazed at how simple they were to prepare, yet they captured all the magic of the classic Italian dessert. Whether you’re hosting a party, looking for an easy treat to bring to a potluck, or simply craving a sweet indulgence, these mini cannoli bites are the perfect choice. What’s even better is that they are so beginner-friendly and come together in no time.
Mini Cannoli Bites: The Perfect Bite-Sized Dessert for Any Occasion

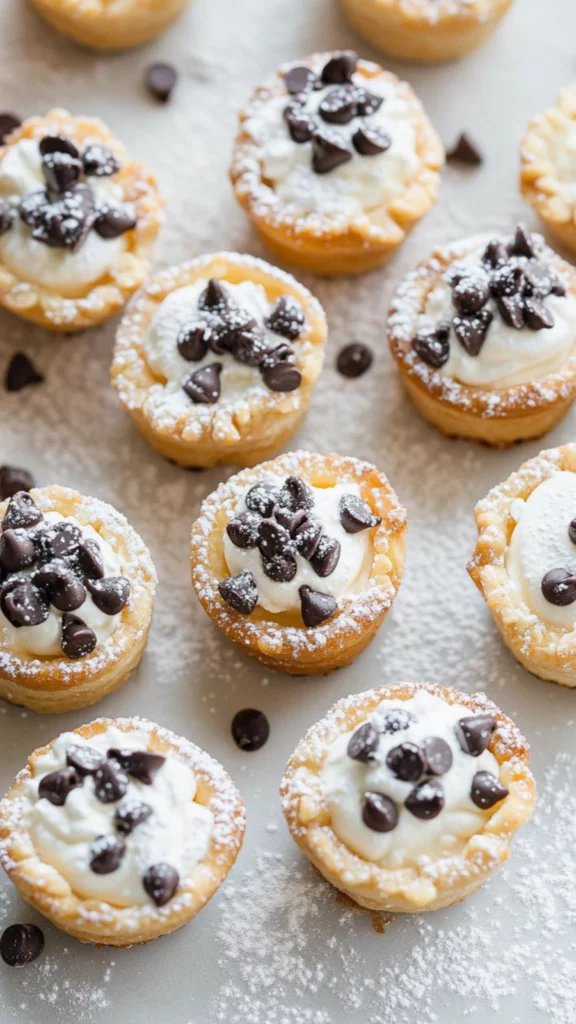
Craving cannoli but want something quicker and easier? These Mini Cannoli Bites give you all the creamy, crispy goodness of traditional cannoli in a bite-sized form. With a simple mix of ricotta, mascarpone, and a flaky crust, they’re perfect for beginners and ideal for any occasion. Let’s get baking!
- Prep Time: 10 minutes
- Cook Time: 15 minutes
- Total Time: 30 minutes
- Yield: 12 mini bites 1x
- Category: Dessert
- Method: Baking
- Cuisine: American, Italian
- Diet: Vegetarian
Ingredients
- 1 Premade Pie Crust: Using a premade pie crust makes this recipe incredibly simple. You can find these at most grocery stores, and they save you the hassle of making dough from scratch. Just unroll and cut it into rounds for the base of your mini cannoli bites.
Substitution: If you want to experiment, you could also try puff pastry or phyllo dough, which will create a flakier texture, though the classic cannoli flavor is best with pie crust. - 1/2 Cup Whole Milk Ricotta Cheese (strained): Ricotta cheese is the base of the creamy filling in these mini cannoli bites. It has a mild, slightly grainy texture that’s perfect when paired with mascarpone.
Tip: Strain the ricotta cheese to remove excess moisture, which will prevent the filling from being too runny. You can do this by placing the ricotta in a fine-mesh sieve or cheesecloth for about 30 minutes before using it. - 1/4 Cup Mascarpone Cheese: Mascarpone is a rich, creamy cheese that adds a luxurious texture to the filling. It’s a bit like cream cheese but lighter and milder in flavor.
Substitution: If you don’t have mascarpone, you can substitute it with cream cheese, though the flavor will be slightly different. You could also use a mixture of cream cheese and heavy cream to mimic the smooth, rich consistency of mascarpone. - 1/2 Tsp. Vanilla Extract: Vanilla extract enhances the flavor of the filling, adding a warm, aromatic note.
Substitution: If you don’t have vanilla extract, you can use almond extract for a slightly nutty flavor, or even a touch of cinnamon for a warm spice. - 1/3 Cup Powdered Sugar: Powdered sugar is the key to sweetening the filling without making it grainy. It dissolves easily into the ricotta and mascarpone for a smooth, silky texture.
Tip: If you don’t have powdered sugar, you can make your own by blending regular granulated sugar in a food processor until it’s fine. - 1/3 Cup Mini Chocolate Chips: Chocolate chips add a bit of crunch and rich chocolate flavor to the cannoli filling.
Variation: You can replace the chocolate chips with other mix-ins like crushed pistachios, chopped candied ginger, or even toffee bits for a fun twist.
Instructions
1. Prepare the Pie Crust
Preheat your oven to 400°F (200°C). Unroll the premade pie crust onto a lightly floured surface and use a 2 ½-inch round biscuit cutter, a cookie cutter, or even a glass to cut out 12 rounds of dough. You should have enough dough to create 12 mini cups. Place each round into the cups of a mini muffin tin, gently pressing the dough into the pan to form little cups. Be sure to press the dough around the edges to form a neat, uniform shape.
2. Bake the Pie Crusts
Bake the pie crust cups for 10-12 minutes, or until they are a light golden brown. Check them periodically to make sure they don’t overbake. The crusts should be crisp and golden but not too dark. Once they’re done, remove them from the oven and let them cool for about 15 minutes.
3. Prepare the Filling
While the pie cups are cooling, prepare the filling by mixing together the ricotta cheese, mascarpone, powdered sugar, vanilla extract, and mini chocolate chips in a medium-sized bowl. Stir the mixture until it’s smooth and well combined. If you want a super-smooth filling, you can use a hand mixer or a whisk. Taste the filling and adjust the sweetness if necessary by adding more powdered sugar.
4. Fill the Pie Cups
Once the pie cups have cooled, spoon the ricotta filling into each cup. If you want a more polished look, use a large zip-top bag and snip off the corner to pipe the filling into the cups. You can also use a pastry bag or piping bag with a star tip to make the filling look even more elegant. Once the filling is added, sprinkle the mini chocolate chips on top and dust the bites with powdered sugar for a finishing touch.
5. Serve and Enjoy
These Mini Cannoli Bites are best enjoyed right away, but you can store them in the fridge for later. They make a wonderful addition to any dessert spread or just as a sweet treat to share with family and friends.
Notes
1. Straining Ricotta
Always strain your ricotta cheese before using it in this recipe. Ricotta can hold quite a bit of moisture, and straining it ensures your filling won’t become too runny.
2. Preventing Overbaking
Be vigilant while baking the pie crusts. The crusts bake quickly, and if they’re left in the oven too long, they can become dry or too hard. Remove them from the oven as soon as they’re golden brown.
3. Make-Ahead Option
You can prepare the pie cups and the filling a day in advance. Simply store the baked pie cups at room temperature and the filling in the fridge. When you’re ready to serve, just fill the cups with the ricotta mixture and add the toppings.
4. Piping the Filling
If you want to make these mini cannoli bites look more professional, piping the filling with a pastry bag or zip-top bag will give them a bakery-quality appearance. If you don’t have a piping bag, no worries! Simply spoon the filling into the cups.
5. Customizing the Flavor
You can easily customize the flavor of these mini cannoli bites. Try adding orange zest for a citrusy twist, or mix in some ground cinnamon or nutmeg for warmth. If you prefer a nutty flavor, crushed pistachios or chopped almonds are great additions to the filling.
If you’ve ever been intimidated by making traditional cannoli, this recipe is a great place to start. Instead of frying the pastry, you use a premade pie crust, which means less mess and effort. The filling, made with ricotta and mascarpone cheeses, is rich, creamy, and utterly delicious. It’s everything you love about cannoli, but in a bite-sized version that’s fun to eat and share. Ready to create this magical treat in your own kitchen? Let’s get started!
Why Mini Cannoli Bites Are Perfect for Beginners
These Mini Cannoli Bites are a great choice for beginner cooks for several reasons. First and foremost, the recipe is straightforward, with minimal ingredients and simple techniques. You don’t need any fancy equipment, and the instructions are clear and easy to follow. No frying or complicated pastry-making skills are required—just bake, fill, and serve. This recipe is also quick, taking just 30 minutes from start to finish, so you don’t have to spend hours in the kitchen. Whether you’re a first-time baker or a seasoned cook, you’ll appreciate how easy and rewarding these little treats are to make.
Additionally, the recipe allows for flexibility and customization. While the traditional filling is made with ricotta and mascarpone cheese, you can easily tweak the ingredients to suit your taste or dietary preferences. Add some citrus zest for a fresh twist, or substitute the chocolate chips with crushed pistachios for a more sophisticated flavor profile. The sky’s the limit when it comes to personalizing these mini desserts. Most importantly, these bites are absolutely delicious, making them a guaranteed hit with friends, family, or even just yourself when you need a quick dessert fix.
Ingredients and Preparation
Before we dive into the step-by-step instructions, let’s take a look at the ingredients you’ll need to make these Mini Cannoli Bites. These ingredients are easy to find at most grocery stores, and many of them are pantry staples. In addition, I’ve included some helpful substitutions in case you don’t have everything on hand.
Ingredients:
- 1 Premade Pie Crust: Using a premade pie crust makes this recipe incredibly simple. You can find these at most grocery stores, and they save you the hassle of making dough from scratch. Just unroll and cut it into rounds for the base of your mini cannoli bites.
Substitution: If you want to experiment, you could also try puff pastry or phyllo dough, which will create a flakier texture, though the classic cannoli flavor is best with pie crust. - 1/2 Cup Whole Milk Ricotta Cheese (strained): Ricotta cheese is the base of the creamy filling in these mini cannoli bites. It has a mild, slightly grainy texture that’s perfect when paired with mascarpone.
Tip: Strain the ricotta cheese to remove excess moisture, which will prevent the filling from being too runny. You can do this by placing the ricotta in a fine-mesh sieve or cheesecloth for about 30 minutes before using it. - 1/4 Cup Mascarpone Cheese: Mascarpone is a rich, creamy cheese that adds a luxurious texture to the filling. It’s a bit like cream cheese but lighter and milder in flavor.
Substitution: If you don’t have mascarpone, you can substitute it with cream cheese, though the flavor will be slightly different. You could also use a mixture of cream cheese and heavy cream to mimic the smooth, rich consistency of mascarpone. - 1/2 Tsp. Vanilla Extract: Vanilla extract enhances the flavor of the filling, adding a warm, aromatic note.
Substitution: If you don’t have vanilla extract, you can use almond extract for a slightly nutty flavor, or even a touch of cinnamon for a warm spice. - 1/3 Cup Powdered Sugar: Powdered sugar is the key to sweetening the filling without making it grainy. It dissolves easily into the ricotta and mascarpone for a smooth, silky texture.
Tip: If you don’t have powdered sugar, you can make your own by blending regular granulated sugar in a food processor until it’s fine. - 1/3 Cup Mini Chocolate Chips: Chocolate chips add a bit of crunch and rich chocolate flavor to the cannoli filling.
Variation: You can replace the chocolate chips with other mix-ins like crushed pistachios, chopped candied ginger, or even toffee bits for a fun twist.
Preparation:
Once you’ve gathered all your ingredients, it’s time to prep for baking. Make sure to have everything ready before you begin, as this recipe comes together quickly and efficiently. You’ll need a mini muffin tin to form the crusts into little cups, as well as a few simple tools like a rolling pin, a cutter, and a mixing bowl.
Step-by-Step Instructions
1. Prepare the Pie Crust
Preheat your oven to 400°F (200°C). Unroll the premade pie crust onto a lightly floured surface and use a 2 ½-inch round biscuit cutter, a cookie cutter, or even a glass to cut out 12 rounds of dough. You should have enough dough to create 12 mini cups. Place each round into the cups of a mini muffin tin, gently pressing the dough into the pan to form little cups. Be sure to press the dough around the edges to form a neat, uniform shape.
2. Bake the Pie Crusts
Bake the pie crust cups for 10-12 minutes, or until they are a light golden brown. Check them periodically to make sure they don’t overbake. The crusts should be crisp and golden but not too dark. Once they’re done, remove them from the oven and let them cool for about 15 minutes.
3. Prepare the Filling
While the pie cups are cooling, prepare the filling by mixing together the ricotta cheese, mascarpone, powdered sugar, vanilla extract, and mini chocolate chips in a medium-sized bowl. Stir the mixture until it’s smooth and well combined. If you want a super-smooth filling, you can use a hand mixer or a whisk. Taste the filling and adjust the sweetness if necessary by adding more powdered sugar.
4. Fill the Pie Cups
Once the pie cups have cooled, spoon the ricotta filling into each cup. If you want a more polished look, use a large zip-top bag and snip off the corner to pipe the filling into the cups. You can also use a pastry bag or piping bag with a star tip to make the filling look even more elegant. Once the filling is added, sprinkle the mini chocolate chips on top and dust the bites with powdered sugar for a finishing touch.
5. Serve and Enjoy
These Mini Cannoli Bites are best enjoyed right away, but you can store them in the fridge for later. They make a wonderful addition to any dessert spread or just as a sweet treat to share with family and friends.
Beginner Tips and Notes
1. Straining Ricotta
Always strain your ricotta cheese before using it in this recipe. Ricotta can hold quite a bit of moisture, and straining it ensures your filling won’t become too runny.
2. Preventing Overbaking
Be vigilant while baking the pie crusts. The crusts bake quickly, and if they’re left in the oven too long, they can become dry or too hard. Remove them from the oven as soon as they’re golden brown.
3. Make-Ahead Option
You can prepare the pie cups and the filling a day in advance. Simply store the baked pie cups at room temperature and the filling in the fridge. When you’re ready to serve, just fill the cups with the ricotta mixture and add the toppings.
4. Piping the Filling
If you want to make these mini cannoli bites look more professional, piping the filling with a pastry bag or zip-top bag will give them a bakery-quality appearance. If you don’t have a piping bag, no worries! Simply spoon the filling into the cups.
5. Customizing the Flavor
You can easily customize the flavor of these mini cannoli bites. Try adding orange zest for a citrusy twist, or mix in some ground cinnamon or nutmeg for warmth. If you prefer a nutty flavor, crushed pistachios or chopped almonds are great additions to the filling.
Serving Suggestions
These Mini Cannoli Bites are versatile and can be served in a variety of ways. If you’re hosting a gathering, they make a perfect addition to a dessert spread. Serve them alongside other bite-sized treats like mini cheesecakes, cupcakes, or brownies for a fun and varied dessert table. For a more elegant presentation, arrange them on a tiered dessert stand with fresh berries and a few sprigs of mint. They also pair wonderfully with a cup of coffee or espresso for an after-dinner treat. If you’re looking for a more festive version, top them with candied orange peel, or drizzle them with a little melted chocolate for extra indulgence.
Storage and Leftovers
If you have leftovers, store them in an airtight container in the fridge for up to two days. The pie crust may soften slightly over time, so they’re best eaten fresh, but they’re still delicious the next day. If you want to make the pie cups ahead of time, you can freeze the unfilled cups for up to a month. Thaw them before filling with the ricotta mixture and enjoy!
Why You’ll Love This Recipe
There are so many reasons to love these Mini Cannoli Bites. First, they’re quick and easy to make, taking only 30 minutes to prepare. Second, they’re incredibly customizable, so you can adjust the flavor and toppings to suit your personal preferences. And third, they’re absolutely delicious—rich, creamy, and perfectly sweet, with just the right amount of crunch. These mini cannoli bites are perfect for any occasion, whether you’re hosting a party, attending a potluck, or simply enjoying a sweet treat at home.

Conclusion
Now that you’ve got the recipe for these incredible Mini Cannoli Bites, it’s time to start baking! With minimal effort and just a few ingredients, you can create a dessert that looks and tastes amazing. Whether you’re a beginner or an experienced cook, this recipe is sure to impress. Enjoy the process, and don’t forget to share these bite-sized delights with friends and family. After all, good food is meant to be shared. Happy baking!


