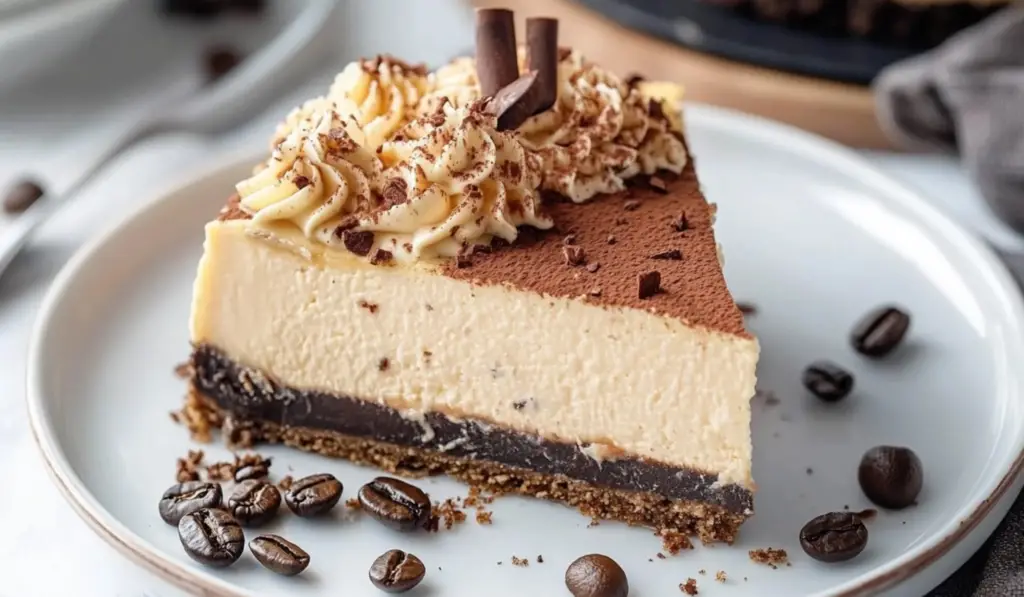
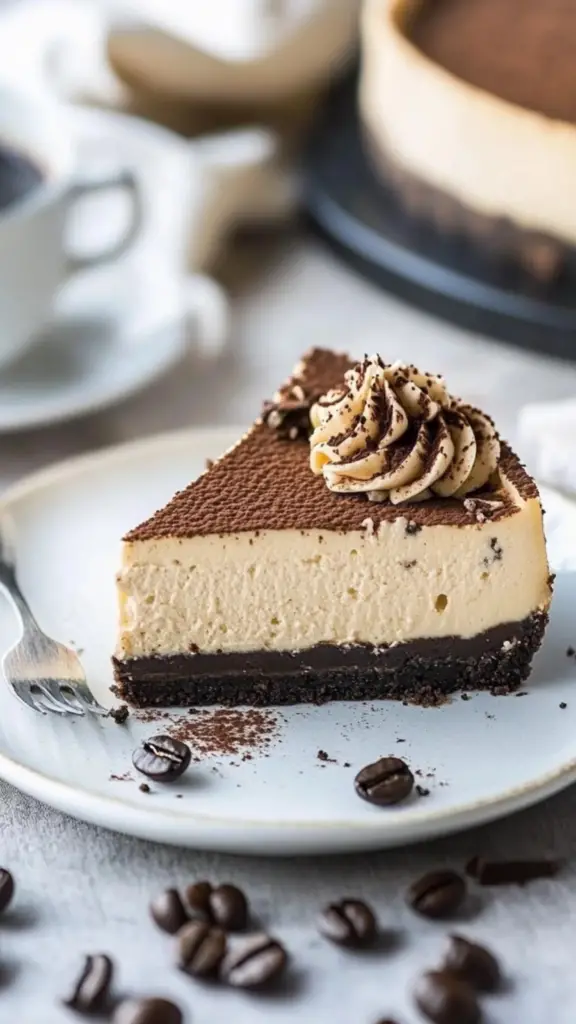
For those who delight in the rich, creamy indulgence of cheesecake and the bold, aromatic punch of coffee, this Coffee Cheesecake is a dream come true. A luxurious dessert with an Oreo cookie crust, an espresso-infused cheesecake filling, and a decadent coffee-flavored chocolate ganache topping, this treat is perfect for coffee aficionados looking to elevate their sweet-tooth cravings. The soft, velvety texture of the cheesecake contrasts beautifully with the crunch of the Oreo crust, while the coffee-enhanced chocolate ganache brings the whole creation to a divine finish. Whether you’re hosting a gathering or simply treating yourself to something special, this dessert promises to impress.
PrintCoffee Cheesecake: A Decadent Treat for Coffee Lovers
For those who delight in the rich, creamy indulgence of cheesecake and the bold, aromatic punch of coffee, this Coffee Cheesecake is a dream come true. A luxurious dessert with an Oreo cookie crust, an espresso-infused cheesecake filling, and a decadent coffee-flavored chocolate ganache topping, this treat is perfect for coffee aficionados looking to elevate their sweet-tooth cravings. The soft, velvety texture of the cheesecake contrasts beautifully with the crunch of the Oreo crust, while the coffee-enhanced chocolate ganache brings the whole creation to a divine finish. Whether you’re hosting a gathering or simply treating yourself to something special, this dessert promises to impress.
- Prep Time: 45 minutes
- Cook Time: 50 minutes
- Total Time: 7 hours 35 minutes (includes chilling)
- Yield: 12 servings 1x
- Category: Dessert, Cheesecake, Coffee Desserts
- Method: Baking, No-Bake, Chilled
- Cuisine: American
- Diet: Vegetarian
Ingredients
Oreo Crust:
- 25 Oreo cookies (use both the filling and wafers)
- 1/3 cup unsalted butter, melted
Cheesecake Filling:
- 2–3 teaspoons instant coffee powder*
- 1 tablespoon hot water
- 24 oz cream cheese (full-fat, brick style)
- 1 1/4 cups white sugar
- 1 teaspoon vanilla extract
- 2/3 cup sour cream*
- 3 large eggs*
- Hot water (for the water bath)
Chocolate Ganache:
- 6 oz dark chocolate (50-70% cacao)
- 2/3 cup heavy cream*
- 1 teaspoon instant coffee powder (optional)
Coffee Whipped Cream (Optional):
- 1/2 cup heavy cream
- 1 teaspoon instant coffee powder
Note: Choose a high-quality instant coffee powder for the best flavor.
Equipment You’ll Need:
- 9-inch springform pan
- Large roasting pan (big enough to fit the springform pan inside)
- Aluminum foil
Instructions
Step 1: Making the Oreo Crust
Begin by preheating your oven to 350°F (175°C). Next, wrap the outside of the springform pan with aluminum foil, ensuring the seams are sealed. This step will prevent water from seeping into the cheesecake during the baking process.
For the crust, place the Oreo cookies (with the filling) into a food processor or a high-powered blender and pulse until they form fine crumbs. Alternatively, if you don’t have a processor, place the cookies in a ziplock bag and crush them using a rolling pin. Once crushed, mix the Oreo crumbs with the melted butter until well combined. Press this mixture into the bottom of the springform pan, creating a slight lip around the edges. Bake the crust in the preheated oven for 10 minutes, then remove it and turn the temperature down to 325°F (163°C).
This crust provides a delightful contrast to the smooth, creamy cheesecake filling. The chocolatey, slightly crunchy base complements the rich flavor profile of the cheesecake and adds an extra layer of texture that elevates the entire dessert experience.
Step 2: Preparing the Cheesecake Filling
In a small cup, dissolve the instant coffee powder in 1 tablespoon of hot water. You don’t need to completely dissolve the coffee—just let it mix enough to enhance the flavor. Instant coffee powder is the secret to delivering that unmistakable, rich coffee flavor throughout the cheesecake without overwhelming the texture.
In a large mixing bowl, beat the cream cheese, sugar, and coffee mixture until smooth and lump-free. Scrape down the sides of the bowl to ensure everything is evenly combined. Add in the vanilla extract and sour cream, then mix again until fully incorporated. The sour cream adds a tangy note to the filling, balancing the richness of the cream cheese and creating a silky texture.
Next, beat in the eggs one at a time, ensuring each egg is fully blended before adding the next. Keep the mixer on low speed to avoid overworking the batter, which can lead to cracks during baking. Mixing the eggs slowly ensures the cheesecake remains smooth and dense, yet light and airy in texture.
Once the batter is ready, pour it over the pre-baked Oreo crust, smoothing the top for an even surface. Place the springform pan inside the large roasting pan and carefully pour hot water into the roasting pan. Aim for about 1/2 to 1 inch of water around the cheesecake. The water bath ensures even cooking and helps prevent cracks.
Step 3: Baking the Cheesecake
Place the roasting pan with the cheesecake into the oven and bake for 50-60 minutes, or until the top of the cheesecake is set but still slightly wobbly in the center. Think of it like a gentle jiggle—similar to the consistency of pudding or jello when nudged. This subtle wobble is a sign that the cheesecake is perfectly done.
Once baked, remove the cheesecake from the oven and let it cool in the water bath until it reaches room temperature. Afterward, cover it with aluminum foil and refrigerate for at least 6 hours, preferably overnight. This chilling step is crucial for allowing the flavors to meld and the texture to firm up. Chilling also helps to set the cheesecake, making it easier to slice and serve without cracks forming.
The cheesecake may develop a slight golden color on the top, which is normal. It’s a sign that it’s properly baked, and this golden hue adds to the cheesecake’s appeal. The long chill time allows the flavors to settle and intensify, ensuring that every bite is rich and flavorful.
Step 4: Making the Chocolate Ganache
While the cheesecake chills, prepare the rich coffee chocolate ganache. Chop the dark chocolate into very small pieces and place it in a heatproof bowl. In a separate saucepan, combine the heavy cream and instant coffee powder, heating gently until the cream is almost boiling. Pour the hot cream over the chopped chocolate and let it sit for 3 minutes. Then, whisk until the ganache is smooth and glossy.
The ganache adds a luscious, silky layer to the cheesecake, and the hint of coffee in the cream enhances the overall coffee flavor of the dessert. The smooth ganache coats the cheesecake perfectly and gives it a glossy finish that’s both tempting and elegant.
Once the cheesecake has fully chilled, remove it from the fridge and gently unclip the springform pan. Pour the chocolate ganache over the top of the cheesecake, allowing it to drip over the edges. This luscious layer of ganache adds depth and richness to the coffee flavor, making each bite even more satisfying. Return the cheesecake to the fridge to let the ganache set.
Step 5: Optional Coffee Whipped Cream
For an extra touch, prepare the coffee whipped cream. Combine the instant coffee powder and heavy cream in a bowl and let it sit for a few minutes to allow the coffee to dissolve into the cream. Then, use an electric mixer to beat the cream until stiff peaks form.
When ready to serve, top the cheesecake with a dollop of the coffee whipped cream and garnish with chocolate curls for a polished, professional finish. The whipped cream lightens the dessert’s richness and provides a refreshing contrast to the dense, coffee-flavored cheesecake.
Notes
- Ingredient Substitutions: If you prefer a less intense coffee flavor, you can reduce the amount of instant coffee powder used. Semi-sweet chocolate can be substituted for dark chocolate in the ganache for a sweeter finish. For a lighter version, you could try using low-fat cream cheese or sour cream, though the texture may be slightly different.
- Serving Suggestions: This cheesecake pairs wonderfully with a cup of freshly brewed coffee or espresso. It also makes for a luxurious dessert at dinner parties or special occasions. For a fun twist, serve it with a scoop of vanilla ice cream or fresh berries for added color and flavor. You can even drizzle extra chocolate ganache on top for an indulgent touch.
- Make-Ahead Tip: This cheesecake can be made ahead of time and stored in the fridge for up to 3 days, making it an ideal dessert for entertaining. The flavors only improve with time, and it can easily be prepared a day or two in advance. This also allows the cheesecake to fully set and firm up, ensuring perfect slices every time.
This recipe is designed to appeal to coffee lovers and cheesecake fans alike, combining two beloved ingredients to create a truly irresistible dessert. Let’s dive in and break down the steps and ingredients to guide you through making this rich, indulgent coffee cheesecake.
Ingredients for the Coffee Cheesecake:
Oreo Crust:
- 25 Oreo cookies (use both the filling and wafers)
- 1/3 cup unsalted butter, melted
Cheesecake Filling:
- 2-3 teaspoons instant coffee powder*
- 1 tablespoon hot water
- 24 oz cream cheese (full-fat, brick style)
- 1 1/4 cups white sugar
- 1 teaspoon vanilla extract
- 2/3 cup sour cream*
- 3 large eggs*
- Hot water (for the water bath)
Chocolate Ganache:
- 6 oz dark chocolate (50-70% cacao)
- 2/3 cup heavy cream*
- 1 teaspoon instant coffee powder (optional)
Coffee Whipped Cream (Optional):
- 1/2 cup heavy cream
- 1 teaspoon instant coffee powder
Note: Choose a high-quality instant coffee powder for the best flavor.
Equipment You’ll Need:
- 9-inch springform pan
- Large roasting pan (big enough to fit the springform pan inside)
- Aluminum foil
Preparation Instructions:
Step 1: Making the Oreo Crust
Begin by preheating your oven to 350°F (175°C). Next, wrap the outside of the springform pan with aluminum foil, ensuring the seams are sealed. This step will prevent water from seeping into the cheesecake during the baking process.
For the crust, place the Oreo cookies (with the filling) into a food processor or a high-powered blender and pulse until they form fine crumbs. Alternatively, if you don’t have a processor, place the cookies in a ziplock bag and crush them using a rolling pin. Once crushed, mix the Oreo crumbs with the melted butter until well combined. Press this mixture into the bottom of the springform pan, creating a slight lip around the edges. Bake the crust in the preheated oven for 10 minutes, then remove it and turn the temperature down to 325°F (163°C).
This crust provides a delightful contrast to the smooth, creamy cheesecake filling. The chocolatey, slightly crunchy base complements the rich flavor profile of the cheesecake and adds an extra layer of texture that elevates the entire dessert experience.
Step 2: Preparing the Cheesecake Filling
In a small cup, dissolve the instant coffee powder in 1 tablespoon of hot water. You don’t need to completely dissolve the coffee—just let it mix enough to enhance the flavor. Instant coffee powder is the secret to delivering that unmistakable, rich coffee flavor throughout the cheesecake without overwhelming the texture.
In a large mixing bowl, beat the cream cheese, sugar, and coffee mixture until smooth and lump-free. Scrape down the sides of the bowl to ensure everything is evenly combined. Add in the vanilla extract and sour cream, then mix again until fully incorporated. The sour cream adds a tangy note to the filling, balancing the richness of the cream cheese and creating a silky texture.
Next, beat in the eggs one at a time, ensuring each egg is fully blended before adding the next. Keep the mixer on low speed to avoid overworking the batter, which can lead to cracks during baking. Mixing the eggs slowly ensures the cheesecake remains smooth and dense, yet light and airy in texture.
Once the batter is ready, pour it over the pre-baked Oreo crust, smoothing the top for an even surface. Place the springform pan inside the large roasting pan and carefully pour hot water into the roasting pan. Aim for about 1/2 to 1 inch of water around the cheesecake. The water bath ensures even cooking and helps prevent cracks.
Step 3: Baking the Cheesecake
Place the roasting pan with the cheesecake into the oven and bake for 50-60 minutes, or until the top of the cheesecake is set but still slightly wobbly in the center. Think of it like a gentle jiggle—similar to the consistency of pudding or jello when nudged. This subtle wobble is a sign that the cheesecake is perfectly done.
Once baked, remove the cheesecake from the oven and let it cool in the water bath until it reaches room temperature. Afterward, cover it with aluminum foil and refrigerate for at least 6 hours, preferably overnight. This chilling step is crucial for allowing the flavors to meld and the texture to firm up. Chilling also helps to set the cheesecake, making it easier to slice and serve without cracks forming.
The cheesecake may develop a slight golden color on the top, which is normal. It’s a sign that it’s properly baked, and this golden hue adds to the cheesecake’s appeal. The long chill time allows the flavors to settle and intensify, ensuring that every bite is rich and flavorful.
Step 4: Making the Chocolate Ganache
While the cheesecake chills, prepare the rich coffee chocolate ganache. Chop the dark chocolate into very small pieces and place it in a heatproof bowl. In a separate saucepan, combine the heavy cream and instant coffee powder, heating gently until the cream is almost boiling. Pour the hot cream over the chopped chocolate and let it sit for 3 minutes. Then, whisk until the ganache is smooth and glossy.
The ganache adds a luscious, silky layer to the cheesecake, and the hint of coffee in the cream enhances the overall coffee flavor of the dessert. The smooth ganache coats the cheesecake perfectly and gives it a glossy finish that’s both tempting and elegant.
Once the cheesecake has fully chilled, remove it from the fridge and gently unclip the springform pan. Pour the chocolate ganache over the top of the cheesecake, allowing it to drip over the edges. This luscious layer of ganache adds depth and richness to the coffee flavor, making each bite even more satisfying. Return the cheesecake to the fridge to let the ganache set.
Step 5: Optional Coffee Whipped Cream
For an extra touch, prepare the coffee whipped cream. Combine the instant coffee powder and heavy cream in a bowl and let it sit for a few minutes to allow the coffee to dissolve into the cream. Then, use an electric mixer to beat the cream until stiff peaks form.
When ready to serve, top the cheesecake with a dollop of the coffee whipped cream and garnish with chocolate curls for a polished, professional finish. The whipped cream lightens the dessert’s richness and provides a refreshing contrast to the dense, coffee-flavored cheesecake.
Flavor, Texture, and Aroma: The Ultimate Coffee Experience
The flavor of this coffee cheesecake is an absolute dream for coffee enthusiasts. The instant coffee in the filling gives the cheesecake a rich espresso flavor that pairs perfectly with the creamy, tangy notes of the cream cheese and sour cream. The sweetness from the sugar balances the bitterness of the coffee, creating a harmonious, well-rounded flavor profile. Each bite is an indulgence of rich, creamy coffee bliss that lingers on the palate.
The Oreo crust adds a delightful contrast with its crunchy texture, complementing the smooth, silky consistency of the cheesecake filling. The crust adds a light, chocolatey bitterness that blends seamlessly with the rich sweetness of the coffee cheesecake. The chocolate ganache is the star of the show, infusing the entire dessert with deep, intense cocoa flavor, while the optional coffee whipped cream provides a light and fluffy contrast to the dense cheesecake. This combination of textures and flavors makes every bite a delightful experience.
Aromatically, the whole dish is an experience of its own. The warm, rich coffee and chocolate scents waft through the air, tempting you from the moment the ganache is poured. Every bite brings together the enticing scent of freshly brewed coffee with the indulgent aroma of dark chocolate. The aroma of the ganache alone is enough to leave anyone salivating.
Tips for Success and Variations
- Ingredient Substitutions: If you prefer a less intense coffee flavor, you can reduce the amount of instant coffee powder used. Semi-sweet chocolate can be substituted for dark chocolate in the ganache for a sweeter finish. For a lighter version, you could try using low-fat cream cheese or sour cream, though the texture may be slightly different.
- Serving Suggestions: This cheesecake pairs wonderfully with a cup of freshly brewed coffee or espresso. It also makes for a luxurious dessert at dinner parties or special occasions. For a fun twist, serve it with a scoop of vanilla ice cream or fresh berries for added color and flavor. You can even drizzle extra chocolate ganache on top for an indulgent touch.
- Make-Ahead Tip: This cheesecake can be made ahead of time and stored in the fridge for up to 3 days, making it an ideal dessert for entertaining. The flavors only improve with time, and it can easily be prepared a day or two in advance. This also allows the cheesecake to fully set and firm up, ensuring perfect slices every time.
Conclusion
This Coffee Cheesecake is a must-try for anyone who loves the combination of creamy desserts and bold coffee flavors. With its rich, velvety filling, buttery Oreo crust, and indulgent coffee ganache, it’s a dessert that will leave everyone craving more. Whether for a casual family gathering or an elegant dinner party, this coffee-infused cheesecake will undoubtedly steal the show and earn rave reviews from guests and family alike. Enjoy the journey of creating this masterpiece, and of course, savor every last bite.
