I remember my first attempt at making garlic knots. I was intimidated by the thought of working with dough, but I wanted to create a warm, comforting appetizer for a casual get-together. That’s when I discovered this recipe for Cheese-Filled Garlic Knots. It was surprisingly easy, and the result was a crowd-pleaser – soft, buttery knots filled with gooey cheese and coated in a savory garlic butter. This recipe is perfect for beginner cooks. It’s approachable, uses store-bought or homemade pizza dough, and is a fun way to practice shaping dough. Plus, it’s a guaranteed hit at parties or as a cozy side dish. If you’re looking for a simple, delicious, and crowd-pleasing appetizer, these Cheese-Filled Garlic Knots are your perfect solution. They offer a delightful balance of soft, buttery, cheesy, and garlicky flavors, making them a perfect addition to any meal or gathering.
Cheese-Filled Garlic Knots: A Warm and Cheesy Delight
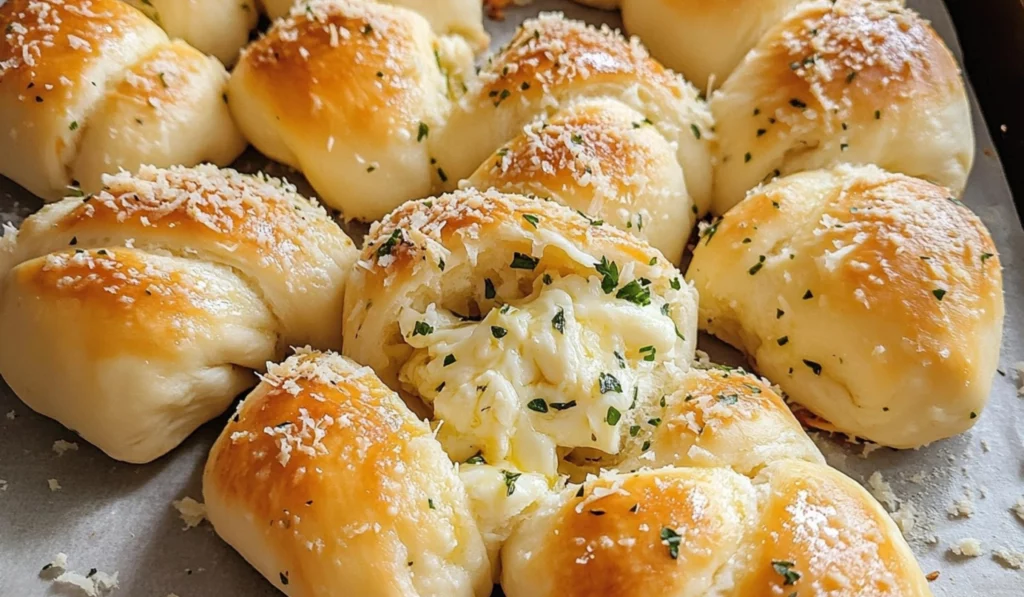
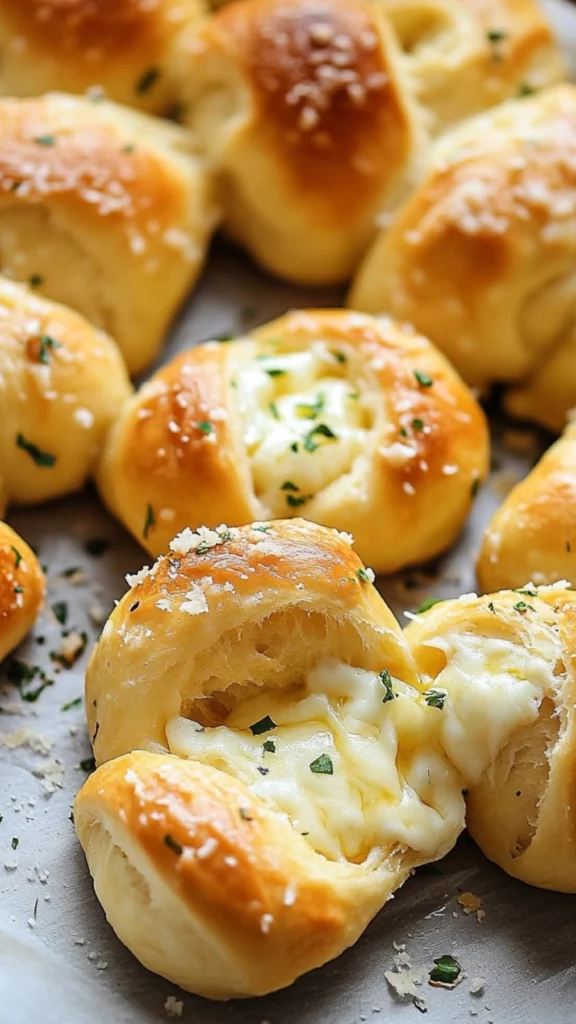
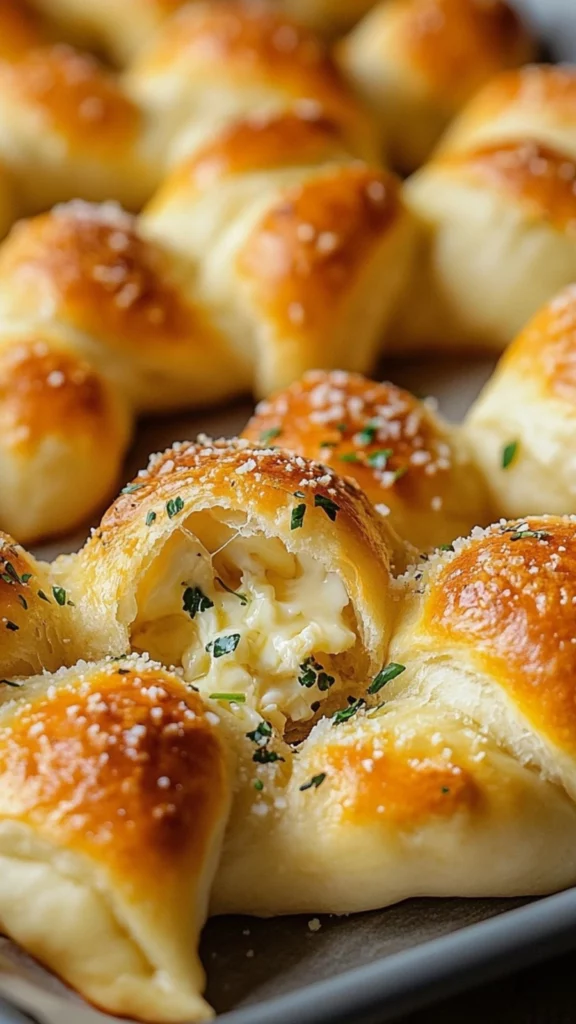
Cheese-Filled Garlic Knots are a warm, buttery, and cheesy appetizer perfect for any gathering. Soft knots filled with melted mozzarella and coated in a savory garlic butter make them irresistible. This easy recipe is ideal for beginner cooks, requiring simple steps and delivering maximum flavor.
- Prep Time: 20 minutes
- Cook Time: 15 minutes
- Total Time: 35 minutes
- Yield: 12 knots 1x
- Category: Dinner, Appetizer, Snack
- Method: Baking, Shaping, Mixing
- Cuisine: American, Italian-American
- Diet: Vegetarian
Ingredients
- 1 lb pizza dough (store-bought or homemade)
- 1 cup shredded mozzarella cheese
- 1/2 cup unsalted butter, melted
- 4 cloves garlic, minced
- 2 tbsp fresh parsley, chopped
- 1 tsp salt
Instructions
-
Preheat and Prepare: Preheat your oven to 400°F (200°C). Line a baking sheet with parchment paper. This prevents the knots from sticking and makes cleanup easier. Parchment paper ensures easy removal of the baked knots.
-
Divide the Dough: Divide the pizza dough into 12 equal pieces. Dividing the dough ensures even baking and consistent knot sizes, resulting in evenly cooked knots.
-
Shape the Knots: Flatten each piece into a small rectangle. Place a small amount of shredded mozzarella cheese in the center of each piece. Fold the dough over the cheese and pinch the edges to seal tightly, forming a knot. Flattening the dough makes it easier to fill and shape, and pinching the edges tightly prevents the cheese from leaking during baking.
-
Arrange the Knots: Place the knots on the prepared baking sheet. Leave some space between the knots to allow for even baking. Leaving space between the knots prevents them from sticking together.
-
Prepare the Garlic Butter: In a small bowl, mix the melted butter, minced garlic, chopped parsley, and salt. Mixing the garlic butter ensures even distribution of flavors, creating a well-balanced garlic butter.
-
Brush the Knots: Brush the garlic butter mixture generously over each knot. Generous brushing ensures a flavorful and buttery coating, coating each knot thoroughly.
-
Bake: Bake in the preheated oven for 12-15 minutes, or until the knots are golden brown and the cheese is melted. Baking until golden brown ensures the knots are cooked through and the cheese is melted and gooey.
-
Serve: Remove from the oven and brush with additional garlic butter if desired. Serve warm with marinara sauce for dipping. Brushing with additional garlic butter enhances the flavor and adds a glossy finish, and serving with marinara sauce adds a tangy dipping option.
Notes
- Lightly flour hands to prevent dough from sticking.
- Pinch edges tightly to seal in cheese.
- Brush generously with garlic butter for maximum flavor.
- Serve warm for best taste and texture.
Ingredients and Preparation: Your Cheese-Filled Garlic Knot Arsenal – The Building Blocks of Deliciousness
These Cheese-Filled Garlic Knots are wonderfully adaptable. Feel free to adjust the cheese and herbs to your preference. Remember, the key to stress-free cooking is having all your ingredients prepped and ready to go before you start cooking. This mise en place approach makes the process smooth and enjoyable. It also prevents you from forgetting a crucial ingredient mid-recipe.
The Dough: The Soft and Fluffy Base – The Foundation of the Knots:
- 1 lb pizza dough (store-bought or homemade) – Provides a soft and chewy base. Alternatives: You can use bread dough or even puff pastry for a different texture. Pizza dough provides a classic garlic knot texture.
The Filling: The Cheesy Center – The Gooey Goodness:
- 1 cup shredded mozzarella cheese – Provides a melty and gooey filling. Alternatives: You can use other cheeses like cheddar, provolone, or Monterey Jack. Mozzarella cheese melts beautifully and provides a classic cheese pull.
The Garlic Butter: The Savory Coating – The Flavor Infusion:
- 1/2 cup unsalted butter, melted – Adds richness and flavor. Melted butter creates a smooth and flavorful coating.
- 4 cloves garlic, minced – Provides a pungent and aromatic flavor. Freshly minced garlic provides a robust garlic flavor.
- 2 tbsp fresh parsley, chopped – Adds freshness and a touch of herbiness. Alternatives: You can use other herbs like oregano, basil, or chives. Fresh parsley adds a vibrant color and fresh flavor.
- 1 tsp salt – Enhances the overall flavor. Salt balances the flavors and enhances the garlic butter.
Step-by-Step Instructions: Your Path to Cheesy Knots – A Beginner-Friendly and Detailed Guide
- Preheat and Prepare: Preheat your oven to 400°F (200°C). Line a baking sheet with parchment paper. This prevents the knots from sticking and makes cleanup easier. Parchment paper ensures easy removal of the baked knots.
- Divide the Dough: Divide the pizza dough into 12 equal pieces. Dividing the dough ensures even baking and consistent knot sizes, resulting in evenly cooked knots.
- Shape the Knots: Flatten each piece into a small rectangle. Place a small amount of shredded mozzarella cheese in the center of each piece. Fold the dough over the cheese and pinch the edges to seal tightly, forming a knot. Flattening the dough makes it easier to fill and shape, and pinching the edges tightly prevents the cheese from leaking during baking.
- Arrange the Knots: Place the knots on the prepared baking sheet. Leave some space between the knots to allow for even baking. Leaving space between the knots prevents them from sticking together.
- Prepare the Garlic Butter: In a small bowl, mix the melted butter, minced garlic, chopped parsley, and salt. Mixing the garlic butter ensures even distribution of flavors, creating a well-balanced garlic butter.
- Brush the Knots: Brush the garlic butter mixture generously over each knot. Generous brushing ensures a flavorful and buttery coating, coating each knot thoroughly.
- Bake: Bake in the preheated oven for 12-15 minutes, or until the knots are golden brown and the cheese is melted. Baking until golden brown ensures the knots are cooked through and the cheese is melted and gooey.
- Serve: Remove from the oven and brush with additional garlic butter if desired. Serve warm with marinara sauce for dipping. Brushing with additional garlic butter enhances the flavor and adds a glossy finish, and serving with marinara sauce adds a tangy dipping option.
Beginner Tips and Notes: Your Kitchen Companion – Helpful Hints and Hacks for Culinary Success
- Troubleshooting: Kitchen Calamities Conquered:
- If the dough is too sticky, lightly flour your hands and the work surface. Lightly floured hands prevent the dough from sticking.
- If the cheese is leaking out, ensure the edges are pinched tightly and don’t overfill the knots. Pinching tightly and avoiding overfilling prevents cheese leakage.
- If the knots are browning too quickly, reduce the oven temperature slightly. Lowering the oven temperature prevents over-browning.
- If the garlic butter is burning, use clarified butter or reduce the heat when melting. Clarified butter has a higher smoke point, preventing burning.
- Prep Efficiency: Time-Saving Strategies:
- Use store-bought pizza dough to save time. Store-bought dough is a convenient time-saver.
- Prepare the garlic butter ahead of time and store it in the refrigerator. Pre-made garlic butter simplifies the process.
- Shred the cheese in advance and store it in an airtight container. Pre-shredded cheese saves time during preparation.
- Shape the knots ahead of time and store them in the refrigerator until ready to bake. Pre-shaped knots are convenient for baking.
- Tool Substitutions: Improvise and Adapt:
- If you don’t have parchment paper, grease the baking sheet well. A greased baking sheet prevents sticking.
- If you don’t have a pastry brush, use a spoon or your fingers to brush the garlic butter. A spoon or fingers can be used to apply the garlic butter.
- If you don’t have fresh parsley, use dried parsley or other herbs. Dried herbs provide a substitute for fresh herbs.
- If you don’t have a small bowl, use a mug or a ramekin. A mug or ramekin can be used to mix the garlic butter.
- Flavor Boosters: Culinary Creativity Unleashed:
- Add a pinch of red pepper flakes to the garlic butter for a touch of heat. Red pepper flakes add a spicy kick.
- Use different cheeses like pepper jack or mozzarella. Different cheeses provide unique flavor profiles.
- Add sun-dried tomatoes or olives to the filling. Sun-dried tomatoes or olives add a savory and tangy flavor.
- Sprinkle with Parmesan cheese before baking. Parmesan cheese adds a salty and nutty flavor.
Serving Suggestions: Completing the Culinary Picture – From Simple Snack to Party Platter
These Cheese-Filled Garlic Knots are delicious on their own, but you can elevate them with complementary sides and sauces.
- Sides: A Perfect Pairing:
- Serve with a side of marinara sauce for dipping. Marinara sauce adds a classic dipping option.
- Pair with a simple green salad for a balanced meal. A green salad adds a refreshing side.
- Serve with a bowl of warm soup for a cozy appetizer. Warm soup complements the warm knots.
- Enjoy with a platter of antipasto for a party appetizer. Antipasto adds a variety of flavors and textures.
- Sauces: A Flavor Boost:
- Offer a side of pesto sauce for dipping. Pesto sauce adds a herbaceous dipping option.
- Serve with a creamy garlic dip. Creamy garlic dip enhances the garlic flavor.
- Drizzle with a balsamic glaze for a tangy contrast. Balsamic glaze adds a sweet and tangy finish.
- Drinks: A Refreshing Addition:
- Pair with a glass of red wine or beer. Red wine or beer complements the savory flavors.
- Serve with a sparkling water or soda. Sparkling water or soda adds a refreshing beverage.
- Enjoy with a refreshing cocktail or mocktail. A cocktail or mocktail adds a festive drink.
- Leftovers: Repurposing Deliciousness – Extending the Enjoyment:
- Store leftover knots in an airtight container in the refrigerator for up to 3 days. Properly stored leftovers maintain their freshness and flavor.
- Reheat in the oven or air fryer until warm and crispy. Reheating ensures the knots are warm and crispy.
- Use leftover knots to make garlic bread or croutons. Sliced knots can be used to make garlic bread, and cubed knots can be used to make croutons.
- Crumble leftover knots and use them as a topping for salads or soups. Crumbled knots add a crunchy topping.
A Culinary Adventure: From Simple Snack to Party Sensation
These Cheese-Filled Garlic Knots are a testament to how easy and delicious a homemade appetizer can be. They’re perfect for parties, gatherings, or any time you want a warm and cheesy treat. So, gather your ingredients, follow the instructions, and get ready to enjoy a culinary triumph! Don’t be afraid to experiment with different fillings and flavor combinations to create your own signature version. And most importantly, have fun! Cooking should be an enjoyable experience, a chance to express your creativity and share delicious food with the people you love. We’d love to see your Cheese-Filled Garlic Knot creations! Share your photos and any variations you try in the comments below. Happy cooking!
What other quick, easy, and flavorful recipes would you like to see us explore? Are you interested in learning more about different cooking techniques or perhaps mastering other culinary skills? Let us know in the comments! We’re here to support you on your culinary journey, one delicious bite at a time. We can’t wait to hear about your culinary triumphs! Share your photos and tag us in your creations – we’re excited to see what you make! We’re confident that this recipe will become a regular part of your appetizer repertoire. It’s a guaranteed way to bring some warm, cheesy, and garlicky goodness to your table. Enjoy!


