I remember the first time I truly appreciated the versatility of oats. It wasn’t just in a bowl of warm oatmeal, but in a chewy, fruity, and utterly satisfying bar. That’s when I discovered the magic of Blueberry Oatmeal Bars. They’re like sunshine in every bite – the comforting texture of oats, the juicy burst of blueberries, and a touch of sweetness that makes them irresistible. This recipe is absolutely perfect for beginner bakers. It’s incredibly simple, uses minimal ingredients and equipment, and is a fantastic way to introduce yourself to the joy of baking. Plus, these bars are a much healthier alternative to store-bought snacks, making them a guilt-free treat you can enjoy any time of day. If you’re looking for a quick, easy, and wholesome baking project that will impress your family and friends (or just yourself!), these Blueberry Oatmeal Bars are a must-try!
Blueberry Oatmeal Bars: A Beginner’s Guide to Baking Wholesome Goodness

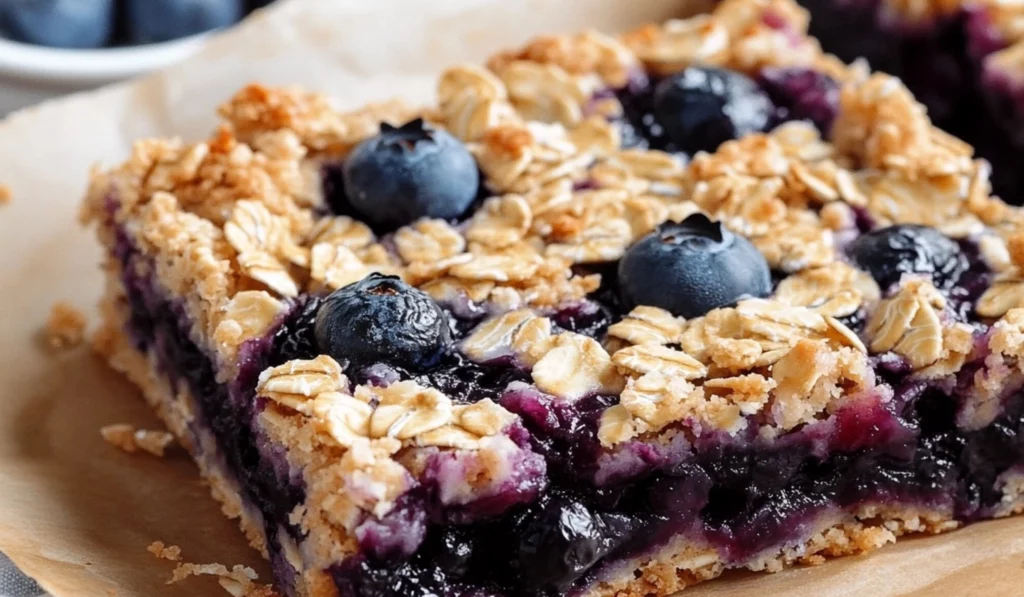
Looking for a healthy and satisfying snack or dessert? These Blueberry Oatmeal Bars are the perfect solution! Chewy oats and juicy blueberries combine for a flavorful and wholesome treat. Imagine a bar packed with goodness, bursting with fruity sweetness in every bite. It’s a treat for the taste buds, perfect for any time of day. This easy recipe is ideal for beginner cooks, requiring minimal ingredients and delivering maximum flavor.
- Prep Time: 15 minutes
- Cook Time: 35-40 minutes
- Total Time: 50-55 minutes
- Yield: 12 bars 1x
- Category: Snack, Dessert, Breakfast
- Method: Baking
- Cuisine: American
- Diet: Vegetarian
Ingredients
- 1 cup old-fashioned oats
- ¾ cup all-purpose flour (or gluten-free blend)
- ⅓ cup light brown sugar
- ¼ teaspoon baking soda
- ¼ teaspoon salt
- ½ teaspoon cinnamon (optional)
- 6 tablespoons unsalted butter (melted) or coconut oil
- 1 teaspoon vanilla extract
- 1 cup blueberries (fresh or frozen)
- ¼ cup granulated sugar
- 2 teaspoons cornstarch
Instructions
- Preheat the Oven: Preheat the oven to 375°F (190°C). Accurate oven temperature is crucial for baking. Use an oven thermometer to ensure your oven is properly calibrated.
- Prepare the Pan: Line an 8-inch square baking pan with parchment paper, leaving some overhang for easy removal. This is a must – it will save you so much hassle later. Make sure the parchment paper goes up all four sides of the pan, creating a “sling” that you can use to lift the bars out of the pan.
- Combine Dry Ingredients: In a large bowl, whisk together the oats, flour, brown sugar, baking soda, salt, and cinnamon (if using). Whisking helps to aerate the dry ingredients and ensures that the baking soda and salt are evenly distributed. This is important for even rising and consistent flavor.
- Add Wet Ingredients: Stir in the melted butter (or coconut oil) and vanilla extract until the mixture is crumbly. You can use a spoon or your hands to mix the ingredients together. The mixture should resemble coarse crumbs. Don’t overmix at this stage.
- Press the Base: Press half of the oat mixture firmly into the bottom of the prepared pan to form a base. Use the back of a spoon or your hands to create an even layer. Pressing it firmly is key – this will help create a solid base that won’t crumble when you add the filling.
- Prepare the Blueberry Filling: In a separate bowl, toss the blueberries with granulated sugar and cornstarch. Coating the blueberries with sugar and cornstarch helps to thicken the juices they release as they bake, preventing a soggy base. This step is especially important if you’re using frozen blueberries.
- Spread the Filling: Spread the blueberry mixture evenly over the oat base. Make sure the blueberries are distributed evenly so that each bar has a good amount of fruit.
- Crumble the Topping: Crumble the remaining oat mixture over the blueberries, gently pressing down. You don’t have to press it down as firmly as the base, just enough to adhere to the blueberry layer. You want the topping to be crumbly, not compacted.
- Bake: Bake for 35-40 minutes, or until the top is golden brown and the blueberries are bubbly. Keep an eye on the bars towards the end of the baking time to prevent them from burning. A toothpick inserted into the center should come out with just a few moist crumbs. The edges of the bars should also be pulling away slightly from the sides of the pan.
- Cool: Allow the bars to cool completely in the pan on a wire rack. This is absolutely essential for the bars to set properly and prevent them from crumbling when you cut them. Resist the temptation to cut into them while they’re still warm! The cooling process allows the bars to firm up and the flavors to meld together.
- Cut and Serve: Once cooled, use the parchment paper overhang to lift the bars out of the pan and cut into squares. A sharp knife will make clean cuts. You can also use a pizza cutter for even slices.
Notes
- Use old-fashioned oats for best texture.
- Don’t overmix the oat mixture.
- Cool completely for clean cuts.
- Get creative with other berries or add-ins.
Ingredients and Preparation: The Heart of the Matter
This recipe relies on simple, pantry-friendly ingredients that come together beautifully. Here’s a detailed list with some extra tips:
For the Bars:
- Old-Fashioned Oats: 1 cup. Old-fashioned oats are the key to the chewy texture we all love in oatmeal bars. They provide a hearty and satisfying bite. Do not substitute with quick oats or steel-cut oats. Quick oats will result in a mushy texture, and steel-cut oats won’t soften enough during baking.
- All-Purpose Flour: ¾ cup (or gluten-free flour blend). All-purpose flour provides structure and helps to bind the bars together. If using a gluten-free flour blend, make sure it’s a 1:1 substitute for all-purpose flour, meaning it already contains the necessary starches and gums. Different gluten-free blends can have varying results, so stick with one you’ve used before or one that’s specifically recommended for baking.
- Light Brown Sugar: ⅓ cup. Light brown sugar adds sweetness and a subtle molasses flavor that complements the oats and blueberries. You can use dark brown sugar for a richer, more intense flavor, but the bars will be darker and slightly chewier. You can also experiment with coconut sugar or maple sugar for a less refined sweetener option, but be aware that they may affect the texture and browning of the bars.
- Baking Soda: ¼ teaspoon. Baking soda is a leavening agent that helps the bars to rise slightly and become tender. It reacts with the acid in the brown sugar to create carbon dioxide, which makes the bars light and airy. Make sure your baking soda is fresh – it loses its potency over time.
- Salt: ¼ teaspoon. Salt enhances the flavors in the bars and balances the sweetness. Don’t skip the salt! It’s a crucial ingredient in baking.
- Cinnamon (optional): ½ teaspoon. Cinnamon adds a warm and comforting flavor that complements the blueberries beautifully. It’s a classic pairing that just works. You can also try adding a pinch of nutmeg or cardamom for a different flavor profile.
- Unsalted Butter: 6 tablespoons, melted (or coconut oil). Melted butter adds richness, moisture, and a lovely buttery flavor. Coconut oil is a great alternative for a vegan option. Make sure it’s melted but not hot – you don’t want to accidentally cook the other ingredients. If using coconut oil, the texture of the bars might be slightly different – a bit less chewy.
- Vanilla Extract: 1 teaspoon. Vanilla extract enhances the other flavors and adds a touch of warmth. Use pure vanilla extract for the best flavor. Imitation vanilla extract just isn’t the same.
- Blueberries: 1 cup (fresh or frozen). Blueberries are the star of the show! Fresh or frozen blueberries both work well. If using frozen blueberries, there’s no need to thaw them. In fact, frozen blueberries can sometimes be better for baking because they hold their shape better and are less likely to bleed into the batter.
For the Blueberry Filling:
- Granulated Sugar: ¼ cup. Granulated sugar adds sweetness to the blueberry filling and helps to create a slightly jammy texture.
- Cornstarch: 2 teaspoons. Cornstarch is a thickening agent that helps to thicken the blueberry filling and prevent it from becoming too runny. This is especially important if you’re using frozen blueberries, as they tend to release more moisture.
Alternative Ingredient Suggestions (Expanded):
- Flour: You can substitute all-purpose flour with whole wheat flour for a healthier option. The texture will be slightly denser and nuttier. You can also try using a combination of all-purpose flour and whole wheat flour (e.g., half and half). For a gluten-free option, make sure your gluten-free flour blend is specifically designed for baking and can be substituted 1:1 for all-purpose flour.
- Sugar: You can reduce the amount of sugar in the recipe or substitute it with other sweeteners, such as maple syrup, honey, or agave. However, these substitutions may affect the texture and browning of the bars. Maple syrup and honey will add a distinct flavor to the bars. If using a liquid sweetener, you might need to adjust the amount of liquid in the recipe slightly.
- Butter: As mentioned above, coconut oil is a great vegan alternative to butter. You can also use unsweetened applesauce or mashed banana for a lower-fat option, but the texture will be quite different – softer and less chewy. If using applesauce or mashed banana, you might need to reduce the amount of liquid in the recipe.
- Blueberries: You can substitute the blueberries with other berries, such as raspberries, strawberries, or blackberries. You can also use a mix of berries for a colorful and flavorful treat. Dried cranberries or chopped dried apricots would also be delicious additions.
Step-by-Step Instructions: Baking Blueberry Bliss (With Extra Detail)
- Preheat the Oven: Preheat the oven to 375°F (190°C). Accurate oven temperature is crucial for baking. Use an oven thermometer to ensure your oven is properly calibrated.
- Prepare the Pan: Line an 8-inch square baking pan with parchment paper, leaving some overhang for easy removal. This is a must – it will save you so much hassle later. Make sure the parchment paper goes up all four sides of the pan, creating a “sling” that you can use to lift the bars out of the pan.
- Combine Dry Ingredients: In a large bowl, whisk together the oats, flour, brown sugar, baking soda, salt, and cinnamon (if using). Whisking helps to aerate the dry ingredients and ensures that the baking soda and salt are evenly distributed. This is important for even rising and consistent flavor.
- Add Wet Ingredients: Stir in the melted butter (or coconut oil) and vanilla extract until the mixture is crumbly. You can use a spoon or your hands to mix the ingredients together. The mixture should resemble coarse crumbs. Don’t overmix at this stage.
- Press the Base: Press half of the oat mixture firmly into the bottom of the prepared pan to form a base. Use the back of a spoon or your hands to create an even layer. Pressing it firmly is key – this will help create a solid base that won’t crumble when you add the filling.
- Prepare the Blueberry Filling: In a separate bowl, toss the blueberries with granulated sugar and cornstarch. Coating the blueberries with sugar and cornstarch helps to thicken the juices they release as they bake, preventing a soggy base. This step is especially important if you’re using frozen blueberries.
- Spread the Filling: Spread the blueberry mixture evenly over the oat base. Make sure the blueberries are distributed evenly so that each bar has a good amount of fruit.
- Crumble the Topping: Crumble the remaining oat mixture over the blueberries, gently pressing down. You don’t have to press it down as firmly as the base, just enough to adhere to the blueberry layer. You want the topping to be crumbly, not compacted.
- Bake: Bake for 35-40 minutes, or until the top is golden brown and the blueberries are bubbly. Keep an eye on the bars towards the end of the baking time to prevent them from burning. A toothpick inserted into the center should come out with just a few moist crumbs. The edges of the bars should also be pulling away slightly from the sides of the pan.
- Cool: Allow the bars to cool completely in the pan on a wire rack. This is absolutely essential for the bars to set properly and prevent them from crumbling when you cut them. Resist the temptation to cut into them while they’re still warm! The cooling process allows the bars to firm up and the flavors to meld together.
- Cut and Serve: Once cooled, use the parchment paper overhang to lift the bars out of the pan and cut into squares. A sharp knife will make clean cuts. You can also use a pizza cutter for even slices.
Beginner Tips and Notes: Baking Blueberry Bars Like a Pro
- Troubleshooting: Soggy Bars: If your bars are soggy, it could be due to not pressing the base firmly enough, using too much blueberry filling, or not baking them long enough. Make sure to follow the instructions carefully and bake the bars until they are golden brown and the filling is bubbly. You can also try using a little less blueberry filling next time. Another tip is to let the bars cool completely before cutting them.
- Troubleshooting: Burnt Bars: If your bars are burning, it’s likely because your oven temperature is too high or you baked them for too long. Use an oven thermometer to ensure accurate temperature, and keep an eye on the bars towards the end of the baking time. You can also try lowering the oven temperature by 25 degrees and baking them for a slightly longer period.
- Efficient Prep: You can mix the dry ingredients and prepare the blueberry filling ahead of time and store them separately in airtight containers at room temperature. This will make the baking process much faster when you’re ready to make the bars. You can also line the baking pan with parchment paper ahead of time.
- Measuring Ingredients: Accurate measurements are essential for baking. Use measuring cups and spoons to ensure the correct proportions of ingredients. Don’t pack down the flour when measuring it – spoon it into the measuring cup and level it off with a knife.
- Checking for Doneness: A toothpick inserted into the center of the bars should come out with just a few moist crumbs clinging to it. If it comes out clean, the bars are likely overbaked and may be dry. The edges of the bars should also be pulling away slightly from the sides of the pan.
- Cooling Completely: It’s crucial to let the bars cool completely before cutting them. This allows them to set properly and prevents them from crumbling. Resist the temptation to cut into them while they’re still warm! The cooling process can take several hours, so be patient.
- Storing: Store leftover bars in an airtight container at room temperature for up to 3 days or in the refrigerator for up to a week. If storing them in the refrigerator, bring them to room temperature before serving for the best texture. You can also freeze the bars for longer storage. Wrap them individually in plastic wrap and place them in a freezer bag. They can be frozen for up to 3 months. To thaw, simply leave them at room temperature for a few hours.
Serving Suggestions: Enhancing Your Blueberry Bar Experience (Expanded!)
These Blueberry Oatmeal Bars are delicious on their own, but they can also be enjoyed in many ways to create a more special treat:
- With a Glass of Milk: A classic pairing that’s perfect for a snack or dessert. Try using almond milk, soy milk, or oat milk for a non-dairy option.
- With Yogurt: Top the bars with a dollop of yogurt for a creamy and tangy addition. Greek yogurt is a great choice for its thickness and protein content. You can also try flavored yogurts for added flavor.
- With Ice Cream: Serve the bars warm with a scoop of vanilla ice cream (or your favorite flavor!) for a decadent dessert. The warm bars and cold ice cream create a delightful contrast in textures and temperatures.
- As a Breakfast Treat: Enjoy a bar with your morning coffee or tea for a quick and satisfying breakfast. They’re a great alternative to sugary pastries or muffins.
- With Fruit: Serve the bars with a side of fresh fruit, such as berries, bananas, or apples. This adds extra nutrition and flavor to your snack or dessert.
- Drizzled with Chocolate: For an extra touch of indulgence, drizzle the bars with melted chocolate (dark, milk, or white). This adds a rich and decadent flavor.
- Topped with Whipped Cream: A dollop of whipped cream makes these bars feel like a truly special treat. You can also try using a non-dairy whipped cream for a vegan option.
Storage Tips for Leftovers (Even More Detailed):
Store leftover bars in an airtight container at room temperature for up to 3 days or in the refrigerator for up to a week. If storing them in the refrigerator, bring them to room temperature before serving for the best texture. Cold bars can be a bit hard. You can also microwave them for a few seconds to warm them up. Freezing the bars is a great way to preserve their freshness for longer periods. Wrap them individually in plastic wrap and place them in a freezer bag or airtight container. They can be frozen for up to 3 months. To thaw, simply leave them at room temperature for a few hours, or microwave them for a few seconds.
Conclusion: Share Your Blueberry Bar Baking Success! (Ultimate Encouragement!)
These Blueberry Oatmeal Bars are a fantastic introduction to baking, offering a perfect blend of simplicity and deliciousness. I highly encourage you to try this recipe out and let me know how they turn out in the comments below! I genuinely love hearing about your baking adventures and any variations you create. Did you add any nuts or other fruits? Did you try a different type of flour or sweetener? Share your tips, tricks, and photos with other readers! Your feedback is invaluable and helps others who are trying the recipe for the first time.
Don’t be afraid to experiment with different ingredients and add-ins to create your own signature version of these bars. Perhaps you’ll discover a new favorite combination! Get creative and have fun with it! Baking should be enjoyable! Share your photos and tag me on social media so I can see your Blueberry Oatmeal Bar masterpieces! Use #BlueberryOatmealBars and #EasyBakingRecipes so I can find your creations. I also love seeing your variations on Instagram stories – tag me so I can see what you’re cooking up in your kitchen! Happy baking, and I can’t wait to hear from you!


